Next.js continues to evolve, constantly introducing features that boost our development efficiency, enhance performance, and scale our applications. A prime example of this evolution is the introduction of Server Actions in Next.js 14.
Server Actions revolutionize traditional client-based interactions, especially in how we handle form submissions and data updates, by providing a seamless method for executing server-side code in response to user interactions.
Server Actions are asynchronous functions that allow server-side code to run directly in response to actions taken by users, like submitting forms. These functions, executable on the server, are compatible with both server and client components of Next.js.
The core advantage of Server Actions lies in their server-side execution. This approach allows us, as developers, to offload data-related tasks, including fetching and updating data, to the server. This not only enhances performance by reducing the client's load but also significantly improves security by minimizing exposure to client-side vulnerabilities.
So, let's get started on this journey to unlock the full potential of Server Actions in Next.js projects.
First we will discuss the syntax of Server Actions and after that let's do a basic project setup. I know – next two section might not sound like the most thrilling adventure. But it's the groundwork we need to dive into the cooler, more dynamic parts of using Server Actions in Next.js.
First we will discuss the syntax to define and use Server Actions:
Defining Server Actions in Server Components
In server components, we define Server Actions using the use server directive. Simply place this directive at the top of the async function body to mark it as a Server Action. The server actine defined in the server component is also called Inline Server Action.
Here's an example:
// app/page.tsx (Server Component)

export default function Page() {
  async function createComment() {
    'use server'
    // ...
  }

  return (
    // ... JSX for our component
  )
}
Defining Server Actions in Separate Files
For better organization, we can define Server Actions in separate files using the module-level use server directive. All functions in the file will be treated as Server Actions.
Here's how:
// app/actions.ts
'use server';

export async function createComment() {
  // Logic to handle comment creation
}
Using Server Actions in Client Components
Client Components can only import actions that use the module-level use server directive.
Client Components can easily import and use Server Actions defined in separate files. For example, you can use the createComment action in a client component like this:
// app/client-component.jsx
'use client';
import { createComment } from '@/app/actions';

export default function ClientComponent() {
  // Use the handleComment Server Action here
  return <form action={createComment}>{/* ... form elements */}</form>;
}
Server Action to a Client Component as a prop
We can also pass Server Actions to Client Components as props. Here's an example of how to do it:
<ClientComponent handleComment={createComment} />How to invoke Server Actions:
We can use the action prop to invoke a Server Action from an HTML element, such as a <button> or <form>.
For example, the following code will invoke the createComment Server Action when the user clicks the button:
<button type="button" action="{createComment}">Submit</button>📌 Server Actions are not limited to html elements and can be invoked from event handlers, useEffect and third-party libraries.
Deep Dive:
Let's dive in by building a simple blog post app where users can comment on posts. We'll see how Server Actions with forms make this easier and better than old-school methods.
Step-by-Step Project Setup:
Let's begin by laying the groundwork for our project, ensuring we have a good foundation to integrate Server Actions effectively.
1. Initiate the Project with Next.js:
Let's start by creating a new Next.js application. Run the command below to generate the project skeleton:
npx create-next-app@latest.
2. Selecting Defaults:
When prompted, stick with the default settings. This choice simplifies the initial setup, allowing us to focus on the core functionalities.
3. Choosing SQLite for Our Database:
SQLite stands out for its simplicity and file-based nature, making it an ideal choice for our project's scope. It eliminates the complexities of server-based databases.
4. Integrating Prisma as the Database Connector:
Prisma will serve as the bridge between our SQLite database and the application.
5. Install Prisma: Include Prisma in our project by running:
npm install prisma --save-dev
6. Initializing Prisma with SQLite:
npx prisma init --datasource-provider sqlite
This will generate a schema.prisma file and an environment file to store our database URL.
7. Modeling Data:
Define a Comment model in the schema.prisma file. This model includes essential fields such as the user's name, message, and a timestamp, establishing the database structure for our application.
// prisma\schema.prisma

generator client {
  provider = "prisma-client-js"
}

datasource db {
  provider = "sqlite"
  url      = env("DATABASE_URL") // DATABASE_URL="file:./dev.db"
}

model Comment {
  id       String   @id @default(uuid())
  user     String
  message  String
  postedAt DateTime @default(now())
}
8. Creating the Database Table:
Use Prisma to create the database table based on our schema with:
npx prisma db push
While suitable for development, remember that Prisma's migration commands are preferable for production environments.
9. Setting Up a Database Interface:
We establish a data access layer by defining functions for fetching and inserting posts, abstracting away the direct Prisma commands.
// lib\db.js

import { PrismaClient } from '@prisma/client';

export const db = new PrismaClient({});

export async function getComments() {
  return await db.comment.findMany({
    orderBy: { postedAt: 'desc' },
  });
}

export async function createComment({ user, message }) {
  return await db.comment.create({
    data: { user, message },
  });
}
10. Building the Frontend
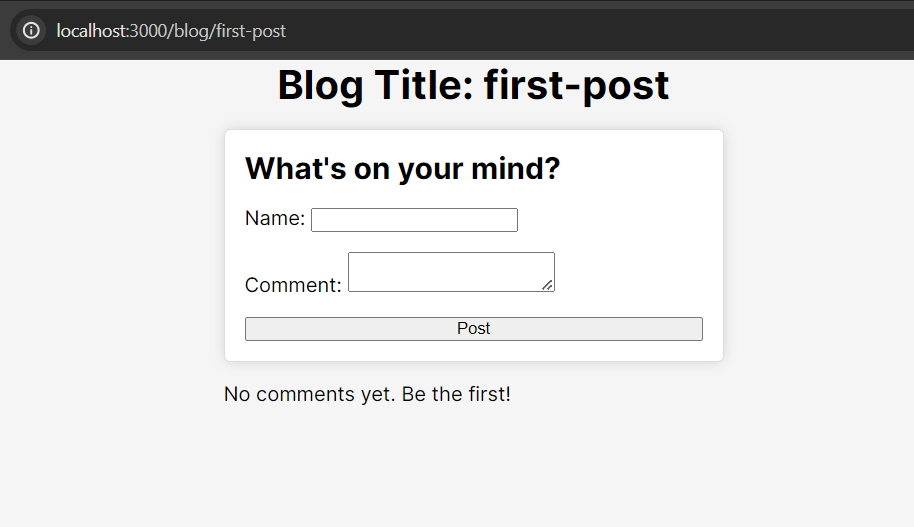
10.1. Blog Post page:
Our BlogPostPage fetches the comments using getComments and renders them.
// app\blog\[slug]\page.jsx

import { getComments } from '@/lib/db';
import CommentForm from '@/components/CommentForm';

export async function generateStaticParams() {
  return [{ slug: 'first-post' }, { slug: 'second-post' }];
}

export default async function BlogPostPage({ params: { slug } }) {
  const comments = await getComments();

  return (
    <main>
      <h1>Blog Title: {slug}</h1>
      <CommentForm slug={slug} />
      <div className="commentContainer">
        {comments.length > 0 ? (
          comments.map((comment) => (
            <article key={comment.id}>
              <h2>{comment.user}</h2>
              <p>{comment.message}</p>
            </article>
          ))
        ) : (
          <p>No comments yet. Be the first!</p>
        )}
      </div>
    </main>
  );
}
10.2. CommentForm Component:
This component provides us a user interface for submitting new comments.
// components\CommentForm.jsx

export default async function CommentForm() {
  return (
    <form action={action} className="commentForm">
      <h2>What's on your mind?</h2>
      <div>
        <label htmlFor="name">Name: {}</label>
        <input type="text" id="name" name="name" />
      </div>
      <div>
        <label htmlFor="message">Comment: {}</label>
        <textarea id="message" name="message" />
      </div>
      <button type="submit">Post</button>
    </form>
  );
}
After this setup, we've laid the groundwork for our application. It's a simple yet effective starting point, from here we are ready to explore the realm of Server Actions.
The Traditional Approach: Pre-Server Actions Era
Before we step into the world of Server Actions, let's take a moment to understand how forms were traditionally handled in Next.js. The traditional approach consisted of these steps:
-
Client-Side Submission: We nned an onSubmit handler in the client-side component to capture and submit data. This approach necessitated JavaScript execution in the browser, sidelining server components from directly processing form submissions.
-
API Route Dependency: To process form data server-side, we had to implement API routes. This extra layer handled the reception of form data and its subsequent database storage.
-
Client-Side Data Fetching: After submission, updating the UI with the latest data often meant initiating another client-side fetch request.
In essence, The traditional method is heavily dependent on client-side mechanisms for form handling and data management, led to an underutilization of server components, missing out on their potential for improving performance and security through server-side execution.
Server Actions with Form
Alright, now we're really getting to the good part – Server Actions. This time, I mean it; we're diving right in.
Ready? Let's do this!
We’ll start with the code snippet and then dissect its components and workings.
import { createComment } from '@/lib/db';

export default async function CommentForm() {
  async function action(formData) {
    'use server';

    await createComment({
      user: formData.get('name'),
      message: formData.get('message'),
    });
  }

  return (
    <form action={action} className="commentForm">
      <h2>What's on your mind?</h2>
      <div>
        <label htmlFor="name">Name: {}</label>
        <input type="text" id="name" name="name" />
      </div>
      <div>
        <label htmlFor="message">Comment: {}</label>
        <textarea id="message" name="message" />
      </div>
      <button type="submit">Post</button>
    </form>
  );
}
So, what we did?
-
Inline Server Action Creation: The action function within the component is an asynchronous function that utilizes the
use serverdirective to signify its execution on the server side in response to form submissions. -
Form Submission Handling: By assigning the
actionfunction to the form'sactionattribute, we establish a direct link between the form submission and the server-side function. This linkage is similar to setting up an event handler, but with the critical distinction that the associated function executes on the server, not in the client's browser. -
Form Data Processing: To ensure the server action receives the form data correctly, each input field must have a
nameattribute. This setup allows the action function to receive the submitted data as a FormData object, a standard browser interface for handling form data. -
Database Interaction: The action function extracts the user's name and message from the
FormDataobject and passes them to thecreateCommentfunction. This function, which interacts with our database (via Prisma in this case), inserts the new post into the database, effectively storing the user's submission.
That's all we need to do, now when user submit the form, comment will be created, we need a page Refresh after submitting the form to display the newly added comment. This step highlights an area for enhancement, where integrating dynamic updates without a full page reload could further improve the user experience. (We will be discussing this later in this blog post)

How it looks in terms of Network Request?
Here's a closer look at what happens, When the user submits the form:
1. Request URL and Method:
The form submission triggers a POST request to the current page URL.
Request URL: http://localhost:3000/blog/first-post
Request Method: POST
2. Request Payload Structure:
The payload of this POST request is particularly interesting. It is structured to include unique identifiers and values for each form field. This structuring is essential for Server Actions to correctly map and process the incoming data. The great part is, Next.js handles all of this for us automatically.
1_$ACTION_ID_32ec90c7358672c97325a6712ff46128e68e8867:
1_name: Ashwani
1_message: Exploring server actions
0: ["$K1"]
In this payload:
-
1_$ACTION_ID... represents a unique identifier for the Server Action being invoked. This ID ensures that the server can accurately identify and execute the corresponding action function.
-
1_name and 1_message are the form fields, where the numeric prefix and underscore signify their association with the action and the subsequent data represents the user input.
3. Response Payload:
Upon successful execution of the Server Action, the server responds with a payload structured to indicate the outcome of the action.
0:["$@1",["development",null]]
1:"$undefined"
This response includes:
-
A status indicator (0:["$@1",["development",null]]) signifying the successful execution of the action. The array and its contents provide context about the execution environment and result (if any).
-
An acknowledgment of the action's completion (1:"$undefined"), indicating that the action did not return any data to be directly rendered in the response.
Now, let's return to our app and address the challenge of needing to refresh the page to view newly added posts.
Implementing Dynamic Updates with Redirect and Revalidate
After submitting our form to add a new post, we aim to show the newly added content instantly without reloading the page. To accomplish this, we can use the redirect method from next/navigation.
Here's the updated code snippet for our CommentForm component:
import { createComment } from '@/lib/db';
import { redirect } from 'next/navigation';

export default async function CommentForm({ slug }) {
  async function action(formData) {
    'use server';

    await createComment({
      user: formData.get('name'),
      message: formData.get('message'),
    });

    redirect(`/blog/${slug}`);
  }

  return (
    <form action={action} className="commentForm">
      ...
    </form>
  );
}
With this implementation, once the form is submitted, the redirect method triggers a client-side navigation to /blog/${slug}, simulating a page refresh without the manual full page reload. This ensures that the user is immediately presented with the latest content.
Post-Submission Network Request Behavior:
Following the form submission, the server processes the request and, due to the redirect invocation, includes an X-Action-Redirect header in the response. This header signals to Next.js's client-side navigation system to redirect to the specified path (/blog/first-post), thereby updating the view for the user.
X-Action-Redirect: /blog/first-postNow, it's time to move forward with a production build.
npm run build
- In build log we can see that the our blog post pages are still statically generated at the build time.

Let's go ahead and launch the app in production mode.
npm run start
Now submit a comment in production mode
- Initially, when a new comment is added, everything functions as expected. The comment appears on the page right after submission, thanks to the implementation of redirect in our form's action function.
-
However, a refresh of the page reveals a puzzling issue. The page, once showing the new comment, no longer displays it. (This unexpected behavior is specific to the production environment, in development mode, pages are pre-rendered on each request.)
-
The form submission triggers a server-side action that dynamically renders the page with the new post. This dynamic rendering ensures the user immediately sees their contribution. However, this response is not cached by Next.js for future requests.
-
Next.js's caching mechanism is designed to enhance performance while considering user-specific data. It avoids caching dynamically rendered pages that result from actions like form submissions, primarily because such content might not be relevant or appropriate to cache for all users.
-
To ensure the new post remains visible to all users after submission, and not just momentarily to the submitting user, we need to prompt Next.js to
revalidatethe post page.
import { createComment } from '@/lib/db';
import { redirect } from 'next/navigation';

export default async function CommentForm({ slug }) {
  async function action(formData) {
    'use server';

    await createComment({
      user: formData.get('name'),
      message: formData.get('message'),
    });

    revalidatePath(`/blog/${slug}`);
    redirect(`/blog/${slug}`);
  }

  return (
    <form action={action} className="commentForm">
      ...
    </form>
  );
}
By calling revalidatePath(/blog/${slug}) right after the redirect, we instruct Next.js to regenerate the static page at /blog/${slug}, incorporating the new post into the cache. This ensures that subsequent visits or refreshes by any user will display the updated content, including the newly added posts.

In last, I'd like to highlight one more advantage of using Server Actions in Next.js: they inherently support Progressive Enhancement. This means that even if JavaScript hasn't loaded or is disabled in the user's browser, forms can still be submitted successfully thanks to Server Actions.
With JavaScript enabled, the experience is smoother and more interactive, as Next.js can dynamically update the DOM without requiring page reloads. This dual capability showcases the principle of progressive enhancement, where basic functionality is accessible to all users, and an enhanced experience is available to those with JavaScript enabled.
Now it's time to wrap our journey through Server Actions in Next.js 14, it's clear that these features are changing the game for web development. From making our apps run faster and safer to simplifying complex tasks.
But this is just the start. Web development is always moving forward, offering new things to learn and ways to improve. Looking ahead, we have plenty to explore, like handling loading and error state with Server Actions.
Thanks for coming along on this exploration, let's keep building amazing things together.