Introduction
The security and user experience of web applications are significantly influenced by user authentication. Authentication systems are essential for a variety of purposes, including facilitating a seamless login process, storing user data securely, and enabling access to personalized content. Of all the authentication techniques out there, Google Sign-In is the most widely used, dependable, and user-friendly.
By the time you finish reading this blog, you'll have a working authentication system that lets users log in with their Google accounts, improving your Next.js app's security and user experience. Using this comprehensive guide, I'll walk you through the process of setting up Google Sign-In in a Next.js application.
Starting with Google Cloud Console
Step 1: Create a Google Developer Project
For our Next.js app to support Google Sign-In, we must first create a Google Developer Project. The credentials, APIs, and configurations for our app are all managed centrally by this project.
-
Open the web browser and go to your Google Developer Console. Once you open the console, sign in with the Google account to proceed.
-
Click on the "Select a project" dropdown menu at the top of the screen after logging in. Next, click on "New Project".
-
In the "New Project" dialog, enter a name for the project. Select a name that accurately reflects the purpose of the application. If the project is being worked on within an organization, choose that organization so that access is limited to individuals who have organization emails. Choosing organization is optional.
-
Finally, click on "Create" button to create the new project.
-
Once the project is set up, we need to set up our OAuth consent screen in the API and services section. Click on the "Credentials" >> "Create Credentials" >> "OAuth client ID".
-
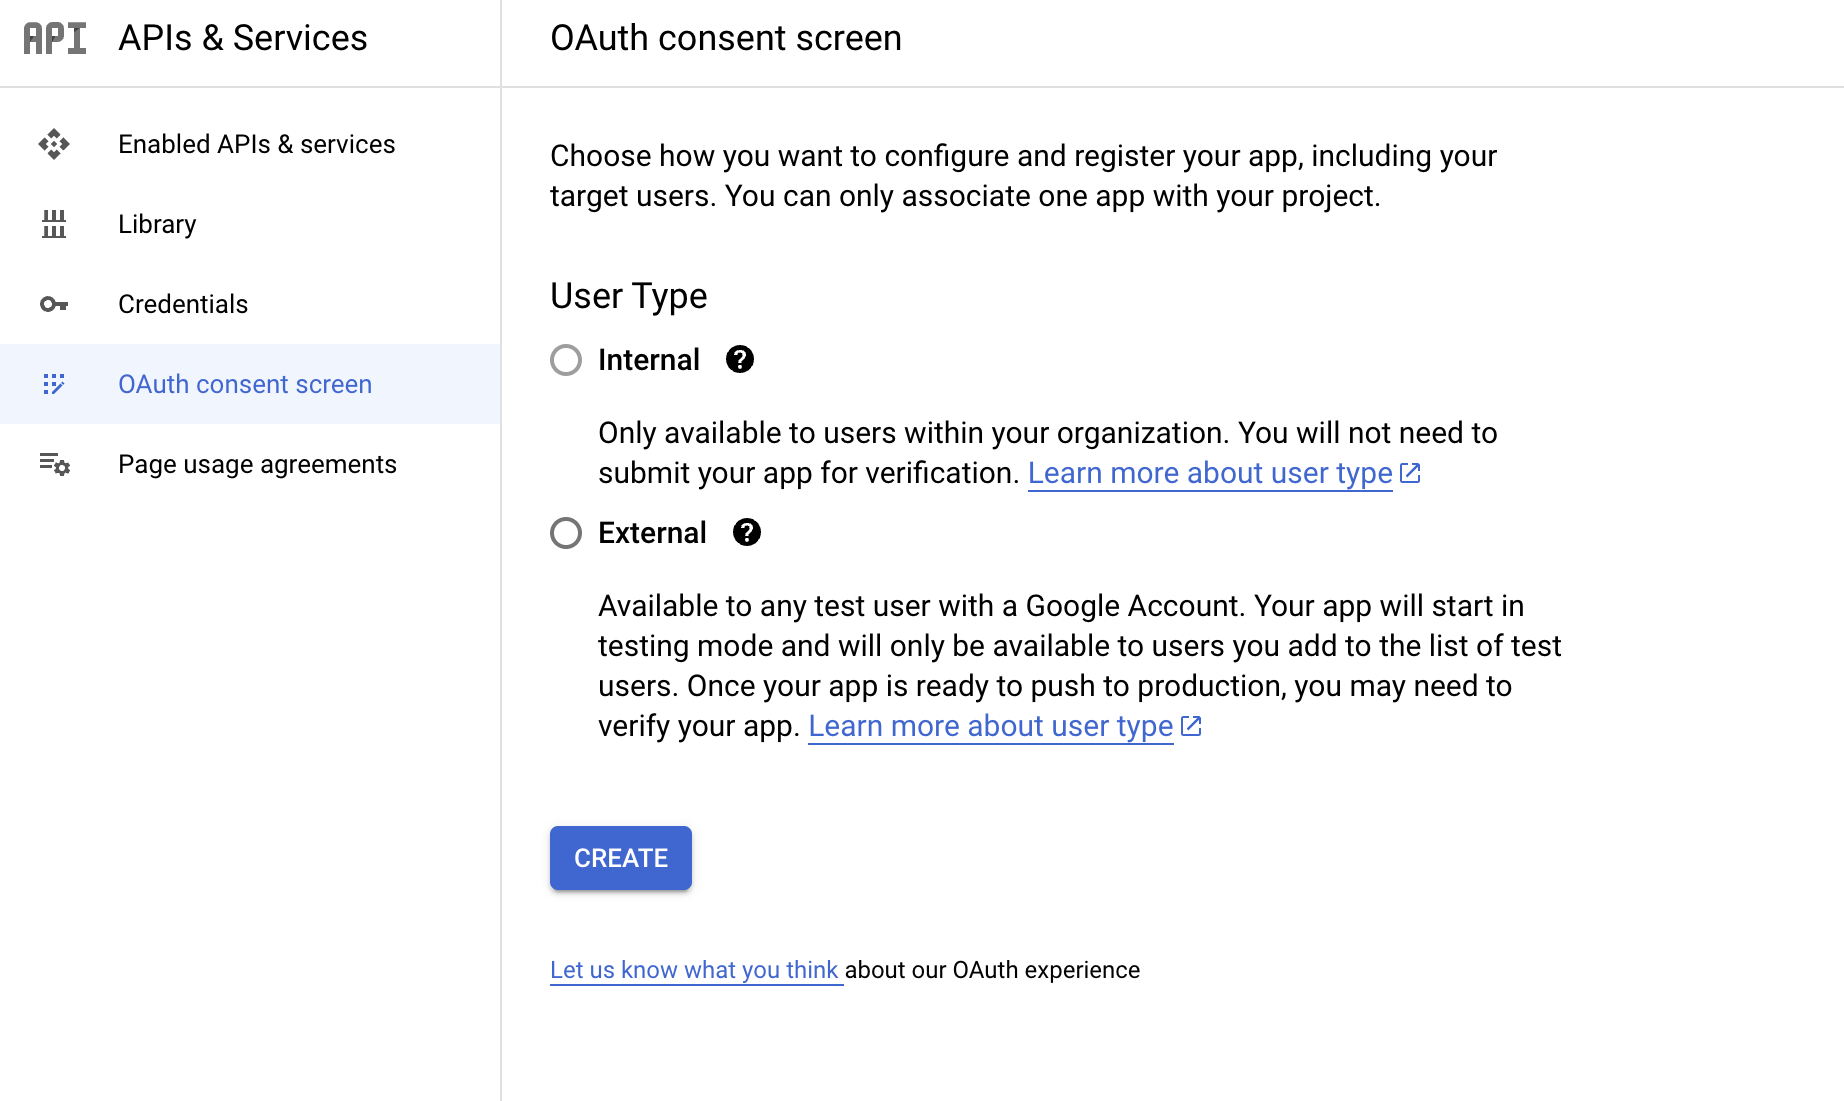
We will be required to configure the OAuth consent page in the following step before we can enable the API. We can simply follow the on-screen instructions to configure the OAuth consent screen with the required information.
We can use the "internal" or "external" setting to determine which emails can access the login on Google. "Internal" restricts access to users within our organization, while "external" allows any user with a Google Account to access.
-
In the authorized redirect URLs, set it to "https://localhost:300/api/auth/callback/google" for local development or our web app's hosted URL for the production environment.
-
Once this is done, click save, and then we will get the client ID and client secret for our app.
Really great so far. Now, let's move on to the next step and continue setting up Google Sign-In in our Next.js app. 🚀
Setup Google Auth using Next auth and Prisma Adapter.
Step 2: Install the required dependencies.
Install required dependencies for authentication and database connectivity
npm install next-auth @next-auth/prisma-adapter @prisma/client --save
npm install prisma --save-dev
Step 3: Set Up Prisma Database
Create a schema file in prisma/schema.prisma similar to this one:
generator client {
    provider      = "prisma-client-js"
    binaryTargets = ["native", "rhel-openssl-1.0.x"]
}

datasource db {
    provider  = "postgresql"
    url       = env("POSTGRES_PRISMA_URL")
    directUrl = env("POSTGRES_URL_NON_POOLING")
}

model Account {
    id                 String  @id @default(cuid())
    userId             String
    type               String
    provider           String
    providerAccountId  String
    refresh_token      String? @db.Text
    access_token       String? @db.Text
    expires_at         Int?
    token_type         String?
    scope              String?
    id_token           String? @db.Text
    session_state      String?
    oauth_token_secret String?
    oauth_token        String?

    user User @relation(fields: [userId], references: [id], onDelete: Cascade)

    @@unique([provider, providerAccountId])
}

model Session {
    id           String   @id @default(cuid())
    sessionToken String   @unique
    userId       String
    expires      DateTime
    user         User     @relation(fields: [userId], references: [id], onDelete: Cascade)
}

model User {
    id            String    @id @default(cuid())
    name          String?
    email         String?   @unique
    emailVerified DateTime?
    image         String?
    accounts      Account[]
    sessions      Session[]
}

model VerificationToken {
    identifier String
    token      String   @unique
    expires    DateTime

    @@unique([identifier, token])
}
Create a new file named db.js in prisma/db.js with the following content.
import { PrismaClient } from '@prisma/client';

const globalForPrisma = globalThis;

export const db =
  globalForPrisma.prisma ??
  new PrismaClient({
    log:
      process.env.NODE_ENV === 'development'
        ? ['query', 'error', 'warn']
        : ['error'],
  });

if (process.env.NODE_ENV !== 'production') globalForPrisma.prisma = db;
Explanation: This code initializes a Prisma client instance (db) and stores it globally to ensure there's only one instance throughout the application. It configures logging based on the environment, enabling query logging in development mode and error logging in other modes. In non-production environments, it stores the Prisma client instance globally for reuse.
Step 4: Run Database Migrations
After defining the schema in the prisma/schema.prisma file, we will run the following commands to generate Prisma Client and create a migration. This line executes all necessary steps to synchronize our database schema with the changes made in our Prisma schema file.
npx prisma generate && npx prisma migrate devStep 4: Configure auth.js to use the Prisma Adapter:
Create a file called auth.js in src/auth.js
import { PrismaAdapter } from '@next-auth/prisma-adapter';
import { getServerSession } from 'next-auth';
import GoogleProvider from 'next-auth/providers/google';
import { db } from '../prisma/db';

// Configuration options for authentication
export const authOptions = {
  // Callback to modify the session object
  callbacks: {
    session: ({ session, user }) => ({
      ...session,
      user: {
        ...session.user,
        id: user.id,
      },
    }),
  },
  // Prisma adapter to connect NextAuth.js with the database
  adapter: PrismaAdapter(db),
  // Authentication providers
  providers: [
    GoogleProvider({
      clientId: process.env.GOOGLE_CLIENT_ID,
      clientSecret: process.env.GOOGLE_CLIENT_SECRET,
      allowDangerousEmailAccountLinking: true,
    }),
  ],
};

// Utility function to retrieve the server session with authentication options
export const getServerAuthSession = () => getServerSession(authOptions);
Explanation: The provided code sets up authentication for a Next.js application using NextAuth.js. It configures a Prisma adapter to connect NextAuth.js with the database, initializes a Google authentication provider, and defines a session callback to enhance user session data.
Step 4: Create Authentication API Route
Navigate to the src/app/api/auth/[...nextauth]/ and create a new file named route.js similar to this one.
import { authOptions } from '@/auth';
import NextAuth from 'next-auth';

const handler = NextAuth(authOptions);
export { handler as GET, handler as POST };
Step 5: Secure Layout with Authentication Check
To ensure that only authenticated users can access the application layout, we'll implement a server-side authentication check in the layout.jsx file.
// Other code
import { getServerAuthSession } from '@/auth';
import { redirect } from 'next/navigation';

export default async function Layout({ children }) {
  const session = await getServerAuthSession();
  if (!session || !session.user) {
    redirect('/api/auth/signin');
  }
  return (
    <html
      lang="en"
      className={clsx('h-full antialiased', inter.variable, lexend.variable)}
      suppressHydrationWarning
    >
      <body className="flex min-h-full bg-white dark:bg-slate-900">
        <Providers>
          <Layout>{children}</Layout>
        </Providers>
      </body>
    </html>
  );
}
Step 6: Environment Configuration
Create a .env file and ensure you have environment variables set up for POSTGRES_PRISMA_URL, POSTGRES_URL_NON_POOLING, GOOGLE_CLIENT_ID, and GOOGLE_CLIENT_SECRET containing appropriate values for your database connection and Google OAuth credentials.
Step 7: Run the Next.js Application
Now that we've configured Google Sign-In in our Next.js application, let's run the application and see the authentication flow in action.
Run the following command to start the development server:
npm run dev
Once the server is running, open the web browser and navigate to http://localhost:3000. Since we've protected the entire layout with authentication, we'll be redirected to the sign-in page automatically.
Click on the "Sign in with Google" button to initiate the Google Sign-In process. We can choose our Google account to sign in.
After successful authentication, we'll be redirected back to the application, where we'll have access to the protected content.
Step 8: Implement Logout Functionality
To enable users to log out of the application, we can add an onClick event handler to the button, calling the signOut function provided by NextAuth.js.
// Navbar.js

import { signOut } from 'next-auth/react';
import Link from 'next/link';

export const Navbar = () => {
  return (
    <nav>
      {/* Navbar content */}
      <ul>
        <li>
          <Link href="/">
            <a>Home</a>
          </Link>
        </li>
        {/* Other navbar links */}
      </ul>

      {/* Logout button */}
      <button onClick={signOut}>Logout</button>
    </nav>
  );
};
Bonus Step: Implementing Google Sign-In on a Button for Landing Page Access
We can integrate Google Sign-In on a button right on the landing page if we want users to land on the page and prevent access to other pages until they sign in. This is the way we can go about it:
// LandingPage.js

import { signIn } from 'next-auth/react';

export const LandingPage = () => {
  const handleSignIn = async () => {
    await signIn('google');
  };

  return (
    <div>
      <h1>Welcome to Our Next.js App!</h1>
      <p>Please sign in to access the full content.</p>
      <button onClick={handleSignIn}>Sign in</button>
    </div>
  );
};
Conclusion
To sum up, integrating Google Sign-In into a Next.js application can greatly improve security and user experience.
NextAuth.js and Prisma adapter work together to simplify authentication management while maintaining data security and integrity. By putting these strategies into practice, we may improve user authentication and create a more reliable and intuitive web service. Cheers to your next coding adventure!