Introduction
Welcome to our guide on integrating NextJS with Contentful, focusing on the use of i18n for internationalization and leveraging Contentful's Content Delivery API for content management. This tutorial aims to provide a detailed pathway to seamlessly integrate Contentful into your NextJS projects, enhancing your web applications with dynamic, localized content. While we won't delve into the specifics of setting up i18n with NextJS, we'll offer a clear guide to integrating Contentful, a leading content management system, into your NextJS projects.
For those interested in exploring the integration of i18n with NextJS, especially in the context of an app directory setup that supports both server-side and client-side rendering, we recommend consulting this insightful article: NextJS app directory with i18n.
Note: This tutorial will not cover the live preview feature of Contentful, which allows you to directly view your content changes in the Contentful web app. This feature can be leveraged to streamline your content management workflow, enabling you to preview and publish content changes directly from Contentful. You can find some helpful resources down below this article to learn more about integrating the live preview feature.
Kickstarting The Journey
We'll begin with a pre-configured NextJS application that already incorporates i18n, as provided by the example from locize. This strategic choice allows us to focus exclusively on the integration of Contentful, simplifying the initial setup and highlighting the core focus of our tutorial.
This approach not only simplifies the initial setup but also highlights the core focus of our tutorial: seamlessly integrating Contentful into your NextJS projects. By starting with a pre-configured NextJS app that already incorporates i18n, we ensure that our readers can immediately dive into the specifics of Contentful integration, enhancing their learning experience by focusing on the new and exciting aspects of the integration process.
Getting Started
Get the example NextJS application from the locize repository by running the following commands:
git init
git remote add origin https://github.com/i18next/next-app-dir-i18next-example-ts.git
git pull origin main
npm install
npm run dev
This will set up the example NextJS application on your local machine, allowing you to explore the i18n setup and familiarize yourself with the project structure. Once you've successfully set up the example NextJS application, you're ready to proceed with integrating Contentful into your NextJS project.
Integrating Contentful with NextJS
To integrate Contentful with NextJS, we'll leverage Contentful's Content Delivery API, which allows us to fetch content from Contentful and render it within our NextJS application. The Contentful Content Delivery API provides a RESTful interface that enables us to retrieve content from Contentful, making it an ideal choice for integrating Contentful with NextJS.
To get started, you'll need to create a Contentful account and set up a new space to store your content. Once you've created a space in Contentful, you can start adding content to your space, for this article we'll simply copy and paste the content already used in the example repository.
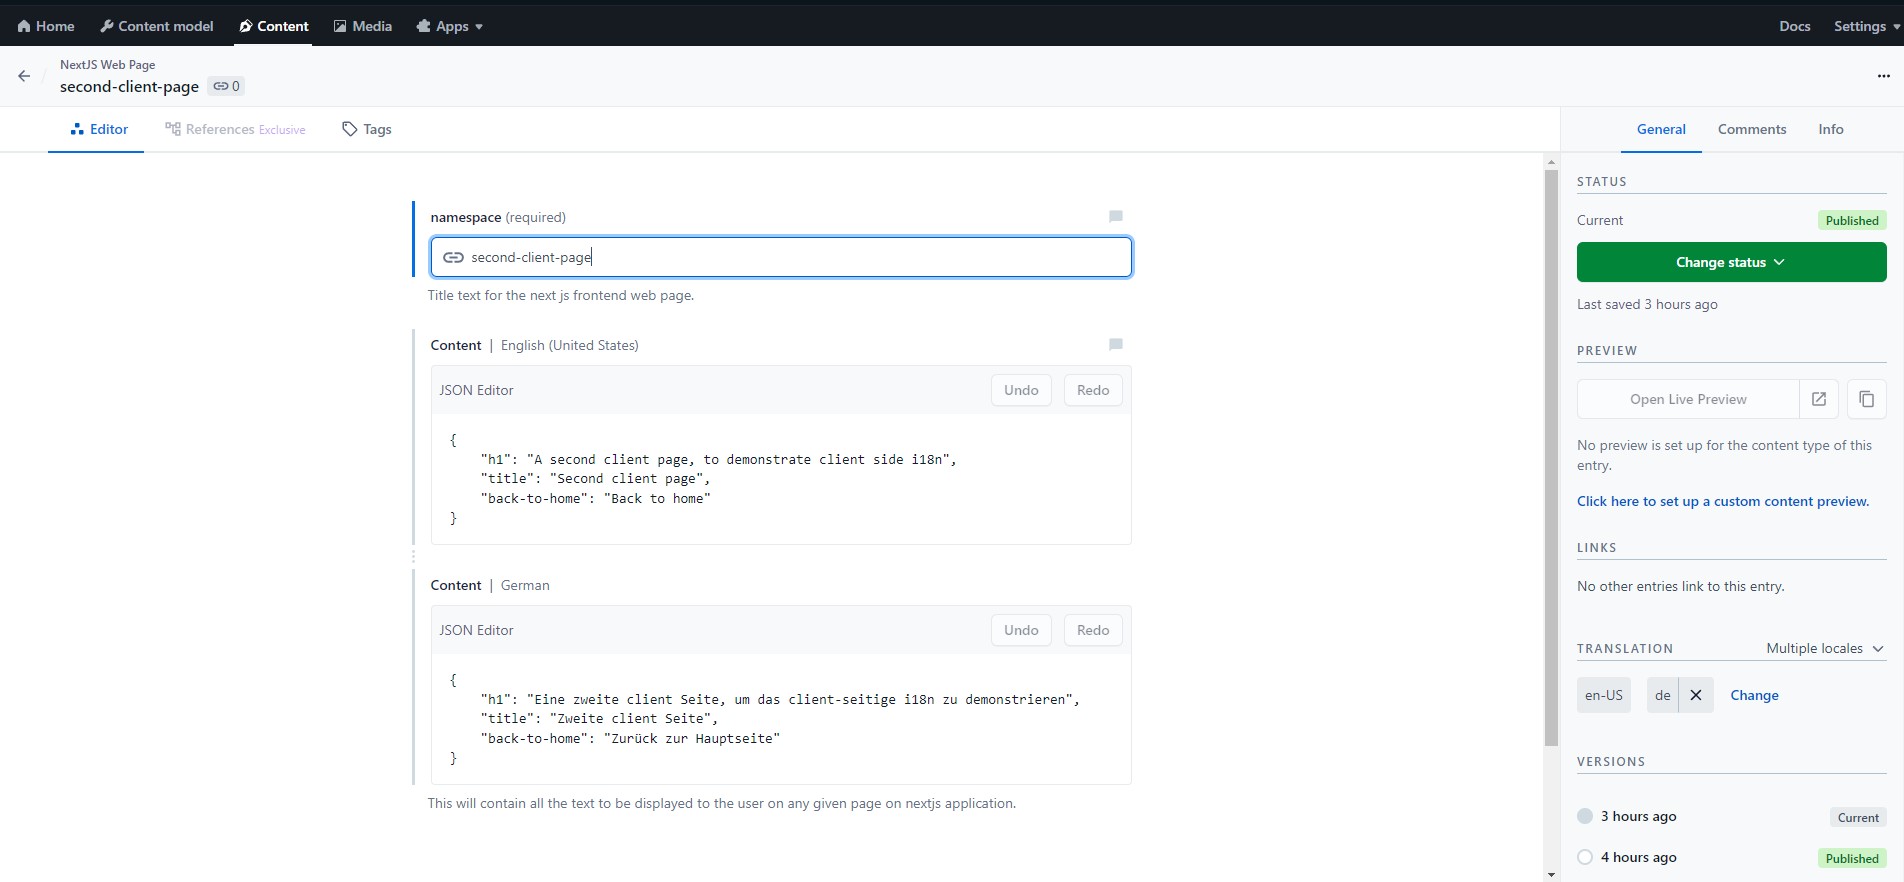
The Content model that we're going to use will have two fields:
- namespace - should be in the format of a URL and should be unique.
- content - would contain the JSON content that we will just copy and paste from the example repository.
Now we'll start creating entries for dedicated pages and components like the homepage and the footer. An entry would look something like this:
Installation
To fetch content from Contentful, we'll use the contentful package, which provides a JavaScript client for the Contentful Content Delivery API. You can install the contentful package by running the following command:
npm install contentfulAnd for updating our content data with the latest published contentful update we'll write a script that will be executed before the build and dev script. For that we'll install dotenv and ts-node packages by running the following command:
npm install --save-dev dotenv ts-nodeSynching Locales
To sync the locales from Contentful to our i18n setup we'll write a script that will fetch the locales from Contentful and update the locales in our i18n setup.
const fs = require('fs');
const path = require('path');
const dotenv = require('dotenv');
const contentful = require('contentful');

dotenv.config();

// Contentful model's name so we can fetch only the entries of this model
const CONTENTFUL_LOCALE_FILE_TYPE = 'nextJsWebPage';

const client = contentful.createClient({
  space: process.env.NEXT_PUBLIC_CONTENTFUL_SPACE_ID as string,
  accessToken: process.env.NEXT_PUBLIC_CONTENTFUL_ACCESS_TOKEN as string,
});

const locales = ['en-US', 'de'];
const namespaces = new Set<string>();

(async () => {
  for (const locale of locales) {
    const entries = await client.getEntries({
      locale,
      content_type: CONTENTFUL_LOCALE_FILE_TYPE,
    });

    for (const entry of entries.items) {
      namespaces.add(entry.fields.namespace);

      const dir = path.join(__dirname, `../app/i18n/locales/${locale}`);

      if (!fs.existsSync(dir)) {
        fs.mkdirSync(dir, { recursive: true });
      }

      const filePath = path.join(dir, `./${entry.fields.namespace}.json`);

      fs.writeFileSync(filePath, JSON.stringify(entry.fields.content, null, 2));

      console.log(`Wrote file to ${filePath}`);
    }
  }

  const namespaceFilePath = path.join(
    __dirname,
    '../app/i18n/locales/namespaces.json'
  );

  fs.writeFileSync(
    namespaceFilePath,
    JSON.stringify(Array.from(namespaces), null, 2)
  );

  console.log(`Wrote file to ${namespaceFilePath}`);
})();
Before Running the script we need to create a .env file in the root of the project with the following content:
NEXT_PUBLIC_CONTENTFUL_SPACE_ID=your-space-id
NEXT_PUBLIC_CONTENTFUL_ACCESS_TOKEN=your-access-token
You can find these values in the settings of your Contentful space, if there is none you can create a new one.
Configuration
To configure our dev and build script to keep the locales in sync with the contentful we'll update our package.json file with the following scripts:
{
  "scripts": {
    "dev": "next dev",
    "lint": "next lint",
    "start": "next start",
    "build": "next build",
    "syncLocales": "ts-node ./scripts/sync-locales.ts",
    "predev": "npm run syncLocales && npm run generate:LocaleTypes",
    "prebuild": "npm run syncLocales && npm run generate:LocaleTypes",
    "generate:LocaleTypes": "i18next-resources-for-ts interface -i ./app/i18n/locales/en-US -o ./@types/resources.d.ts"
  }
}
NOTE: i18next-resources-for-ts is a package that will generate typescript interfaces for our locales.
We're all set to get the content updates from Contentful and keep our locales in sync with the contentful entries. Now we can start fetching the content from Contentful and render it in our NextJS application. You can test it in your local environment by running the following command:
npm run devConclusion
In this tutorial, we've explored the seamless integration of Contentful with NextJS, leveraging the power of i18n for internationalization. By starting with a pre-configured NextJS application that already incorporates i18n, we've streamlined the integration process, allowing you to focus on the specifics of connecting Contentful with NextJS.
Keeping in mind the drawback's of this approach we can say that the contentful entries are not fetched at runtime and are fetched at build time. This can be a drawback if you have a lot of content and you want to keep it updated in real-time. In such cases, you can use the live preview feature of Contentful to directly view your content changes in the Contentful web app. I hope the resources provided below will be helpful in case you require an extensive integration with Contentful.