Test cases using Jest and React Testing Library
by Satya Swaroop Mohapatra, Senior System Analyst
When it comes to better user experience, handling bugs and fixing a specific component or some of it's functionality,
Testing prevents our ship from sinking post production 😃.
Testing frameworks like Jest, provides functions and methods through which we can make various assertions in our project.
So, let's dive into jest and react-testing-library by creating a simple Counter App using react.
As usual we will setup using cra template
npx create-react-app my-counter
cd my-counter
npm start
Let's create a simple counter,
import { useState } from 'react'
import './App.css'
function App() {
  const [count, setCount] = useState(1)
  const increment = () => {
    setCount(count + 1)
  }
  const decrement = () => {
    if (count === 0) {
      return
    }
    setCount(count - 1)
  }
  return (
    <div className="App">
      <h1>Counter App 😃</h1>
      <div className="flex">
        <button onClick={increment}>+</button>
        <button onClick={decrement}>-</button>
      </div>
      <div className="App">
        <h2 title="Display">{count}</h2>
      </div>
    </div>
  )
}
export default App
As of now we have created our counter, now let's focus on what is jest , react-testing-library and why do we use this together?
Jest
Jest is a javascript testing framework which provides a blended package of an assertion library along with a test runner and a built-in mocking library.
React Testing Library
It is a testing library that is used to render react components. It works directly with DOM nodes which assures the tests we write are very similar to how users interact with components.
Why do we use this together?
Jest provides us various test blocks like it() , test() and describe() which is used to name the test and to include the respective code. It also provides us a global assert function i.e expect() to make simple test assertions.
N.B. it() & test() are totally same, it is only the naming difference.
In order to make the test cases easy to read, easy to maintain jest comes with jest-dom which provides some custom matcher function such as toBeInTheDocument(), toHaveAttribute() toHaveStyle() etc. It becomes very easy to communicate with the DOM API in the same way we communicate in a browser.
While in other hand react-testing-libary provides us various methods like render() to render react components. The screen object which has all the query that of the document object model wrapped inside the <body> element.
As we are using cra template, the above package is automatically installed as a devDependencies in
package.json file. If we are not using cra template, we need to install it manually.
using npm
npm install --save-dev @testing-library/react @testing-library/jest-domor using yarn
yarn add --dev @testing-library/react @testing-library/jest-domNow, let's take a look at setupTest.js file, here we import the jest-dom package so that react can initialize it when setting up the test environment.
Test cases
Case-1: Will test if the title "Counter App 😃" is present in the document or not.
Case-2: Will test when the + clicked it should increment the counter by 1.
Case-3: Will test when the - clicked it should decrement the counter by 1.
N.B. Whenever we write test cases, our file naming convention should be some-name.test.js. If we have a
some-name.js file inside our component directory, we can create a __test__ directory and create
some-name.test.js file inside that, so that we can import some-name.js file just from one file level.
Let's delete everything from App.test.js file and start from beginning.
import { render, screen } from '@testing-library/react'
import App from './App'

test('renders Counter App 😃 title', () => {
  render(<App />)
  const titleElement = screen.getByText(/Counter App 😃/)
  expect(titleElement).toBeInTheDocument()
})
Here we are using render() method to render the whole <App/> component, and then we are querying for title by using getByText() query from the screen object. Then we have our global assert function expect() with a matcher function toBeInTheDocument() which simply tests if this element is rendered in DOM or not.
Run the test:
yarn testor
npm run testNow jest will automatically look for .test.js file and execute the test. If everything checks out, the test case will pass.
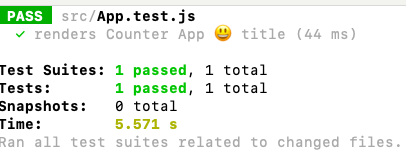
Congratulations 🎉 we have written our first test case.
Let's write the remaining test cases by using getByRole() query, here we will also use event-handlers the same way we perform events in a browser. We will use userEvent for that.
In order to use this, we first need to install it manually,
npm install --save-dev @testing-library/user-event @testing-library/domor
yarn add --dev @testing-library/user-event @testing-library/domimport userEvent from '@testing-library/user-event'
test('increment button is clicked and the value increments by 1', () => {
render(<App />)
const displayValue = screen.getByTitle('Display')
userEvent.click(screen.getByRole('button', { name: '+' }))
expect(displayValue.textContent).toBe('2')
})
test('decrement button is clicked and the value decrements by 1', () => {
render(<App />)
const displayValue = screen.getByTitle('Display')
userEvent.click(screen.getByRole('button', { name: '-' }))
expect(displayValue.textContent).toBe('0')
})Here we get the <h2> element from the <App/> component by using getByTitle() query. In order to refer to the exact element, we have added a title attribute to it.
After that, we have used userEvent and attached a click event to it, and then we are fetching both the buttons from <App/> by using getByRole query. When we run the test, the event will trigger the same way we perform the click event in a browser.
At the end we assert both the test cases, to match the expected value.
You can check the code here GitHub .
That's a wrap for this blog. We will focus on async testing in the next blog.
Happy Learning 😇!