Keycloak Single Sign-On Integration with Rails using omniauth-keycloak gem
by Sachin Kabadi, System Analyst
Quick Intro
Keycloak is an open-source identity and access management solution that provides features like:
-
Single Sign-On (SSO)
-
User Federation
-
Identity Brokering (e.g., Google, GitHub login)
-
Role-based Access Control (RBAC)
-
Integration with LDAP and Active Directory
This guide walks you through setting up Keycloak locally using Docker, creating a realm, user, client and integrating Keycloak with a Rails application using the omniauth-keycloak gem for single sign-on (SSO).
Prerequisites
-
Docker installed on your system.
-
A Rails application you want to integrate with Keycloak for SSO.
Step 1: Set Up Keycloak Server Locally
First, set up Keycloak on Docker by following the official Keycloak Docker guide
Start Keycloak Docker Container: open your terminal and run the following command to start the Keycloak server
docker run -d --name keycloak -e DB_VENDOR=postgres -e DB_ADDR=keycloak-postgres:5432 -e DB_DATABASE=keycloak -e DB_USER=keycloak -e DB_PASSWORD=postgres -p 8080:8080 -e KEYCLOAK_ADMIN=admin -e KEYCLOAK_ADMIN_PASSWORD=admin quay.io/keycloak/keycloak:25.0.2 start-devIf the command is successful, you will be able to see the docker container id like: “a540f5a77f7df4cb6a85c284941a8ba3c7be21bd51590db183d28973a18a17a2”

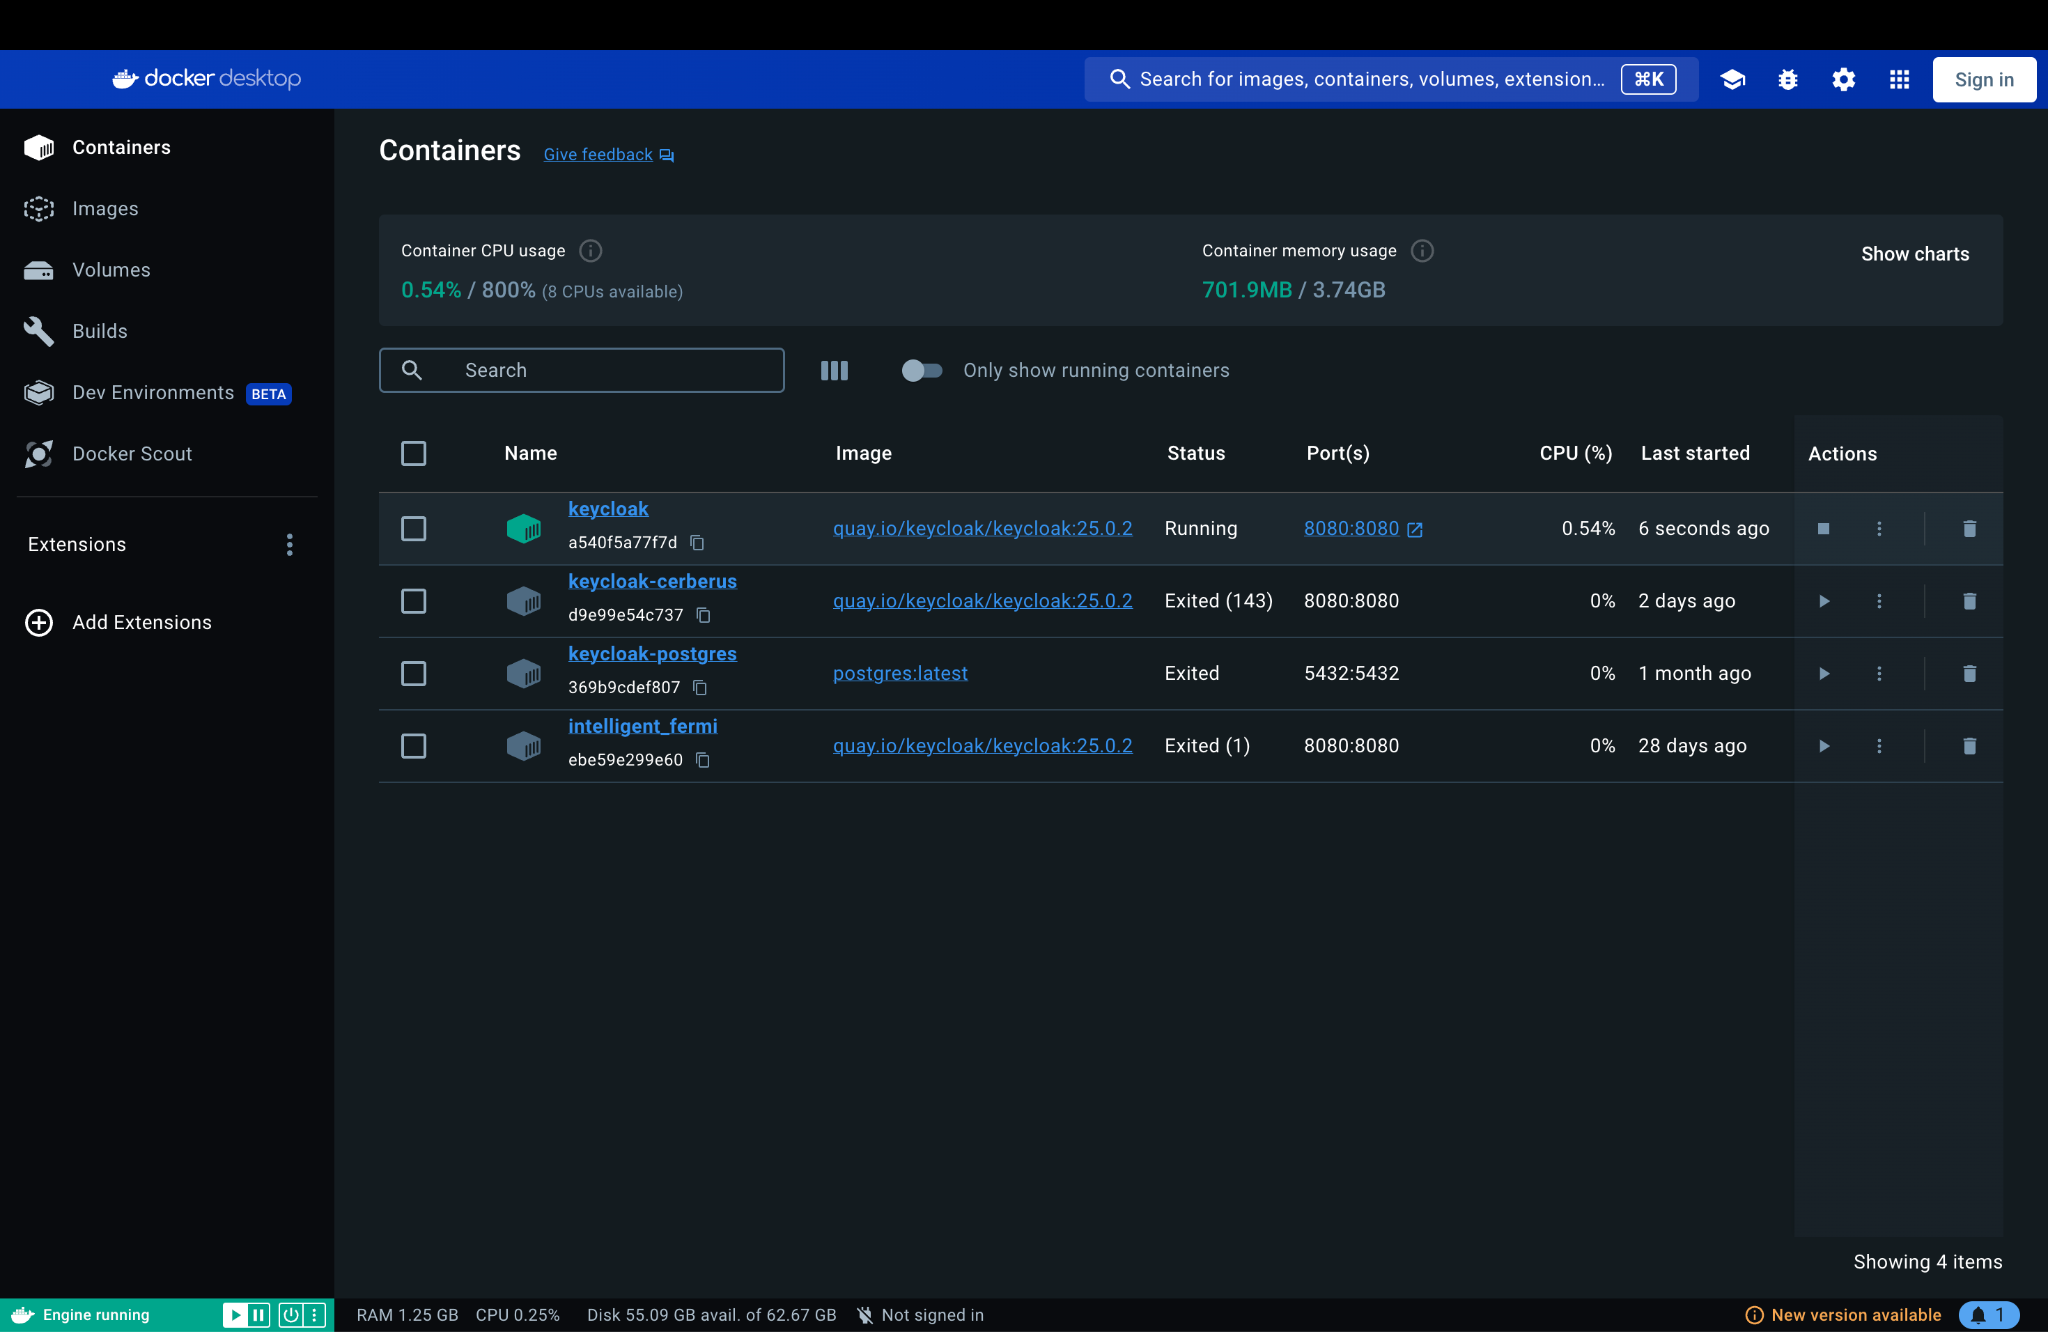
You can see the container in docker desktop app:
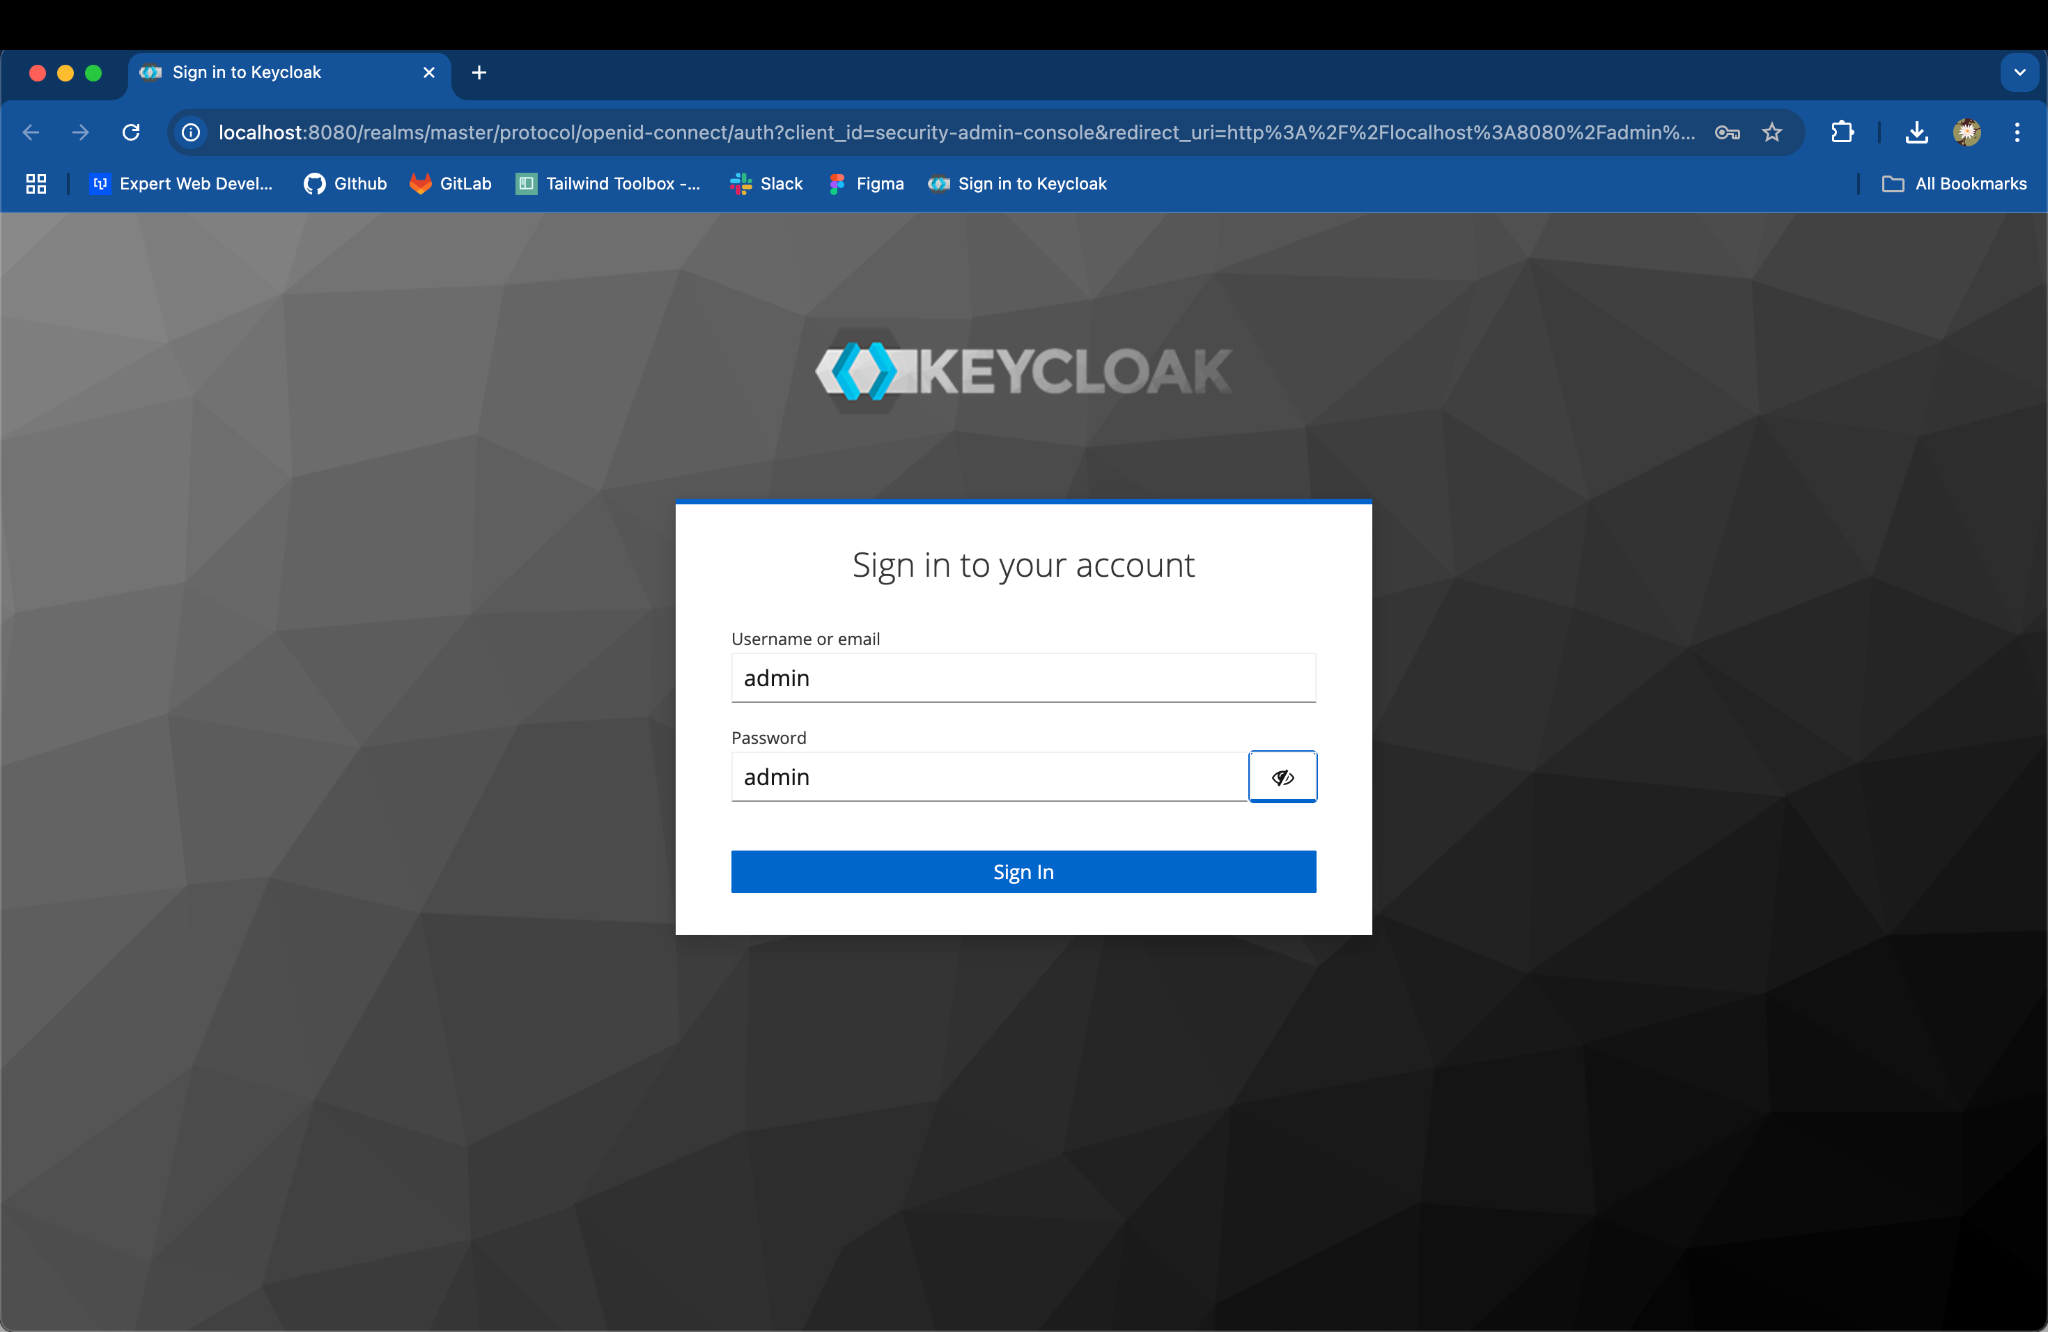
Keycloak server is up on http://localhost:8080, you can login with the default admin credentials:
Username: admin
Password: admin
Step 2: Create a Realm in Keycloak
Realm:
A realm is the top-level logical container in Keycloak. It acts as an isolated domain for managing users, credentials, roles, and clients.
-
Master Realm: The default realm used by Keycloak administrators.
-
Custom Realms: You can create realms for your applications to separate users and configurations.
Key Features:
-
Realms are isolated from each other (e.g., users in Realm A can't authenticate in Realm B unless explicitly configured).
-
Each realm can manage its configurations independently.
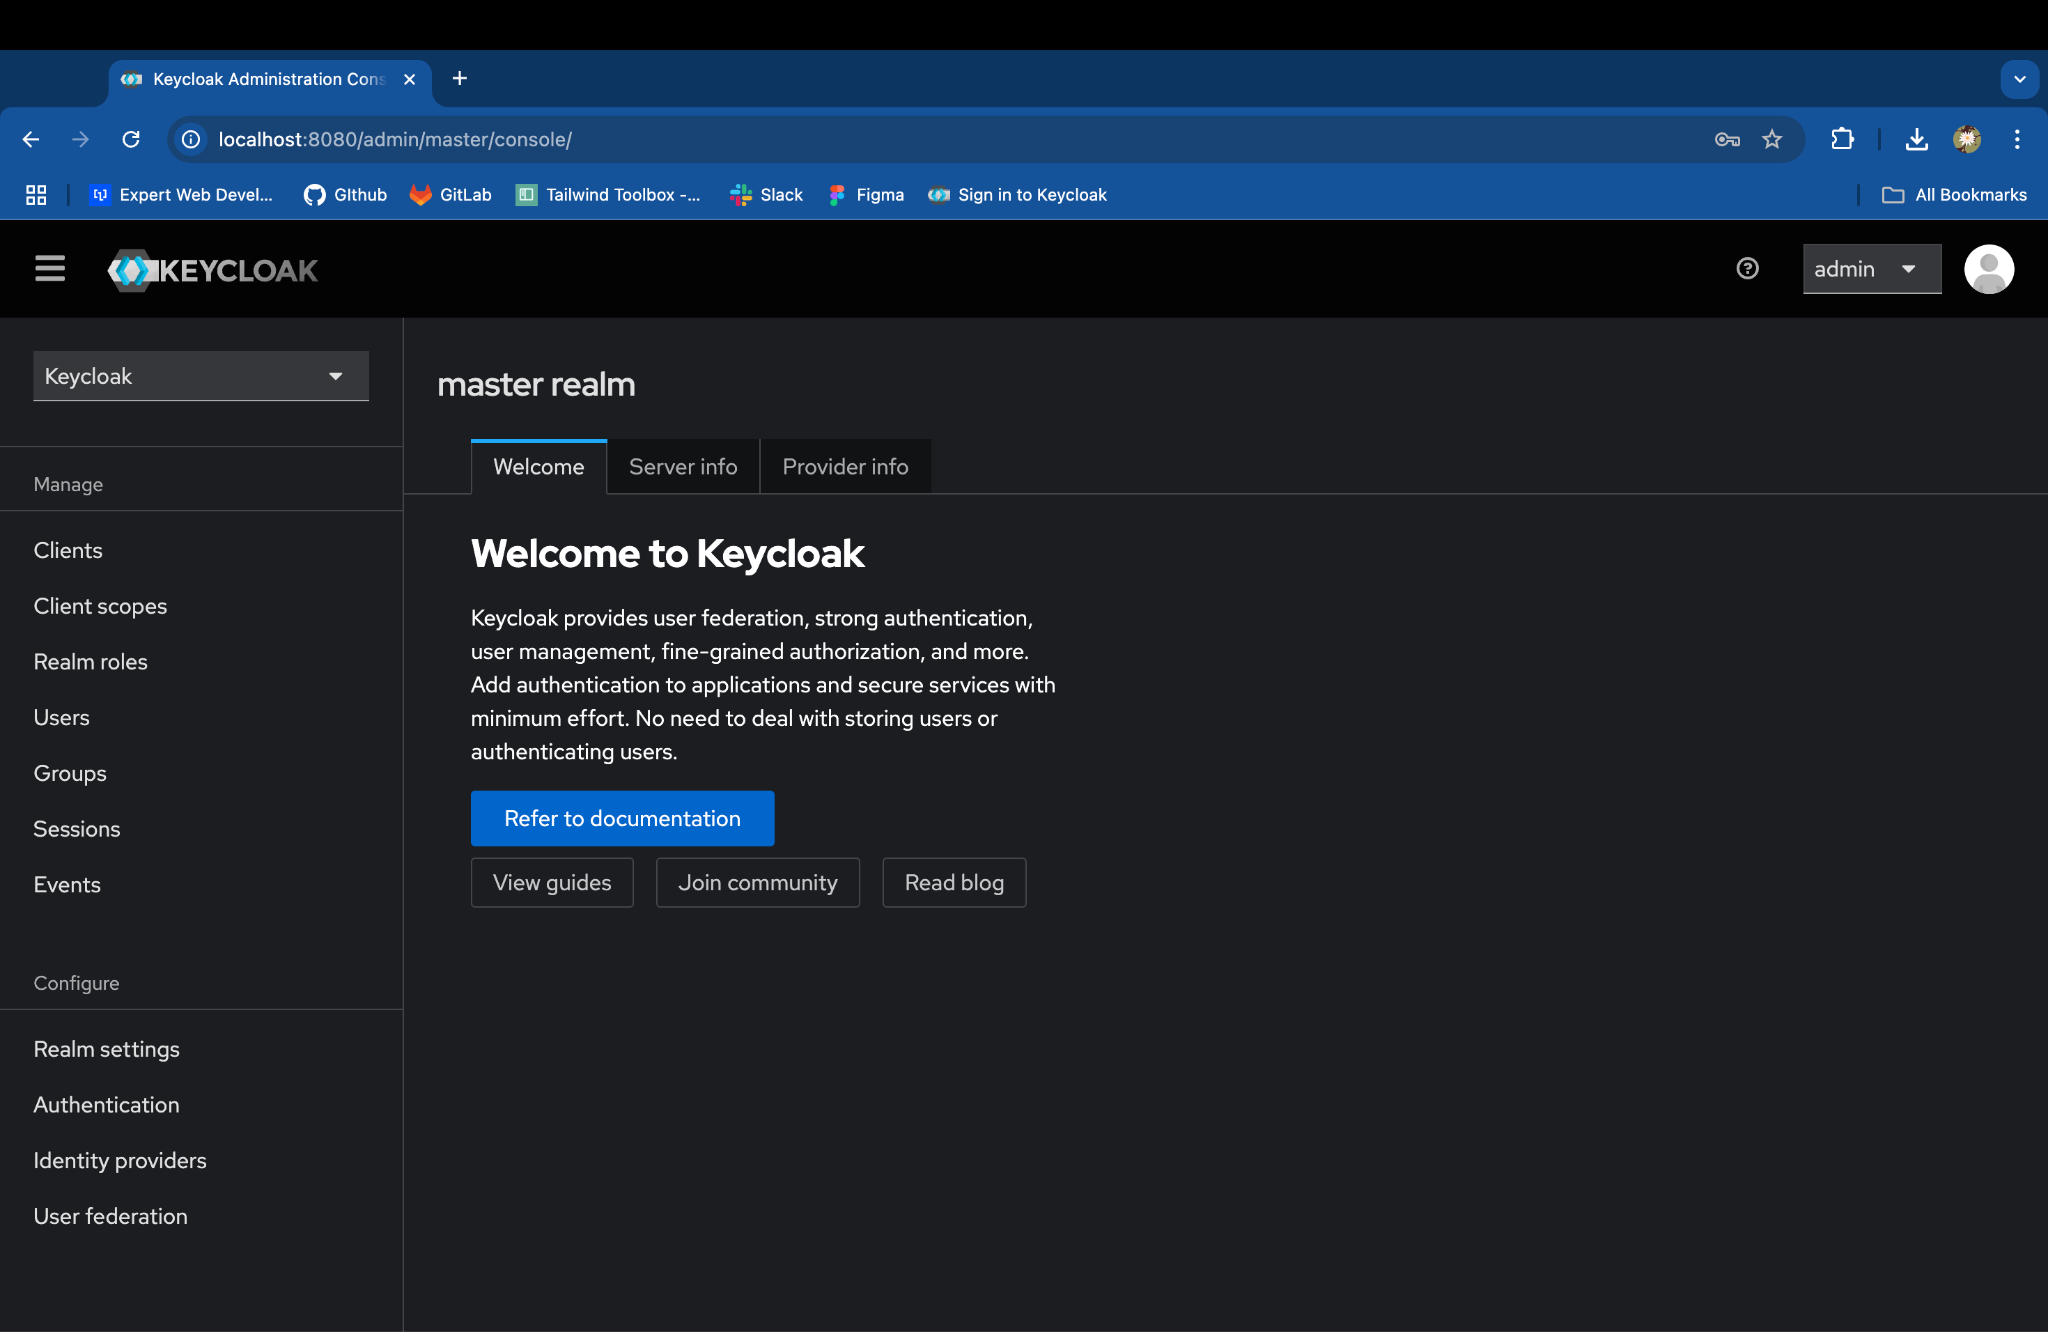
Access the Keycloak Admin Console: open http://localhost:8080 in your browser with admin credentials
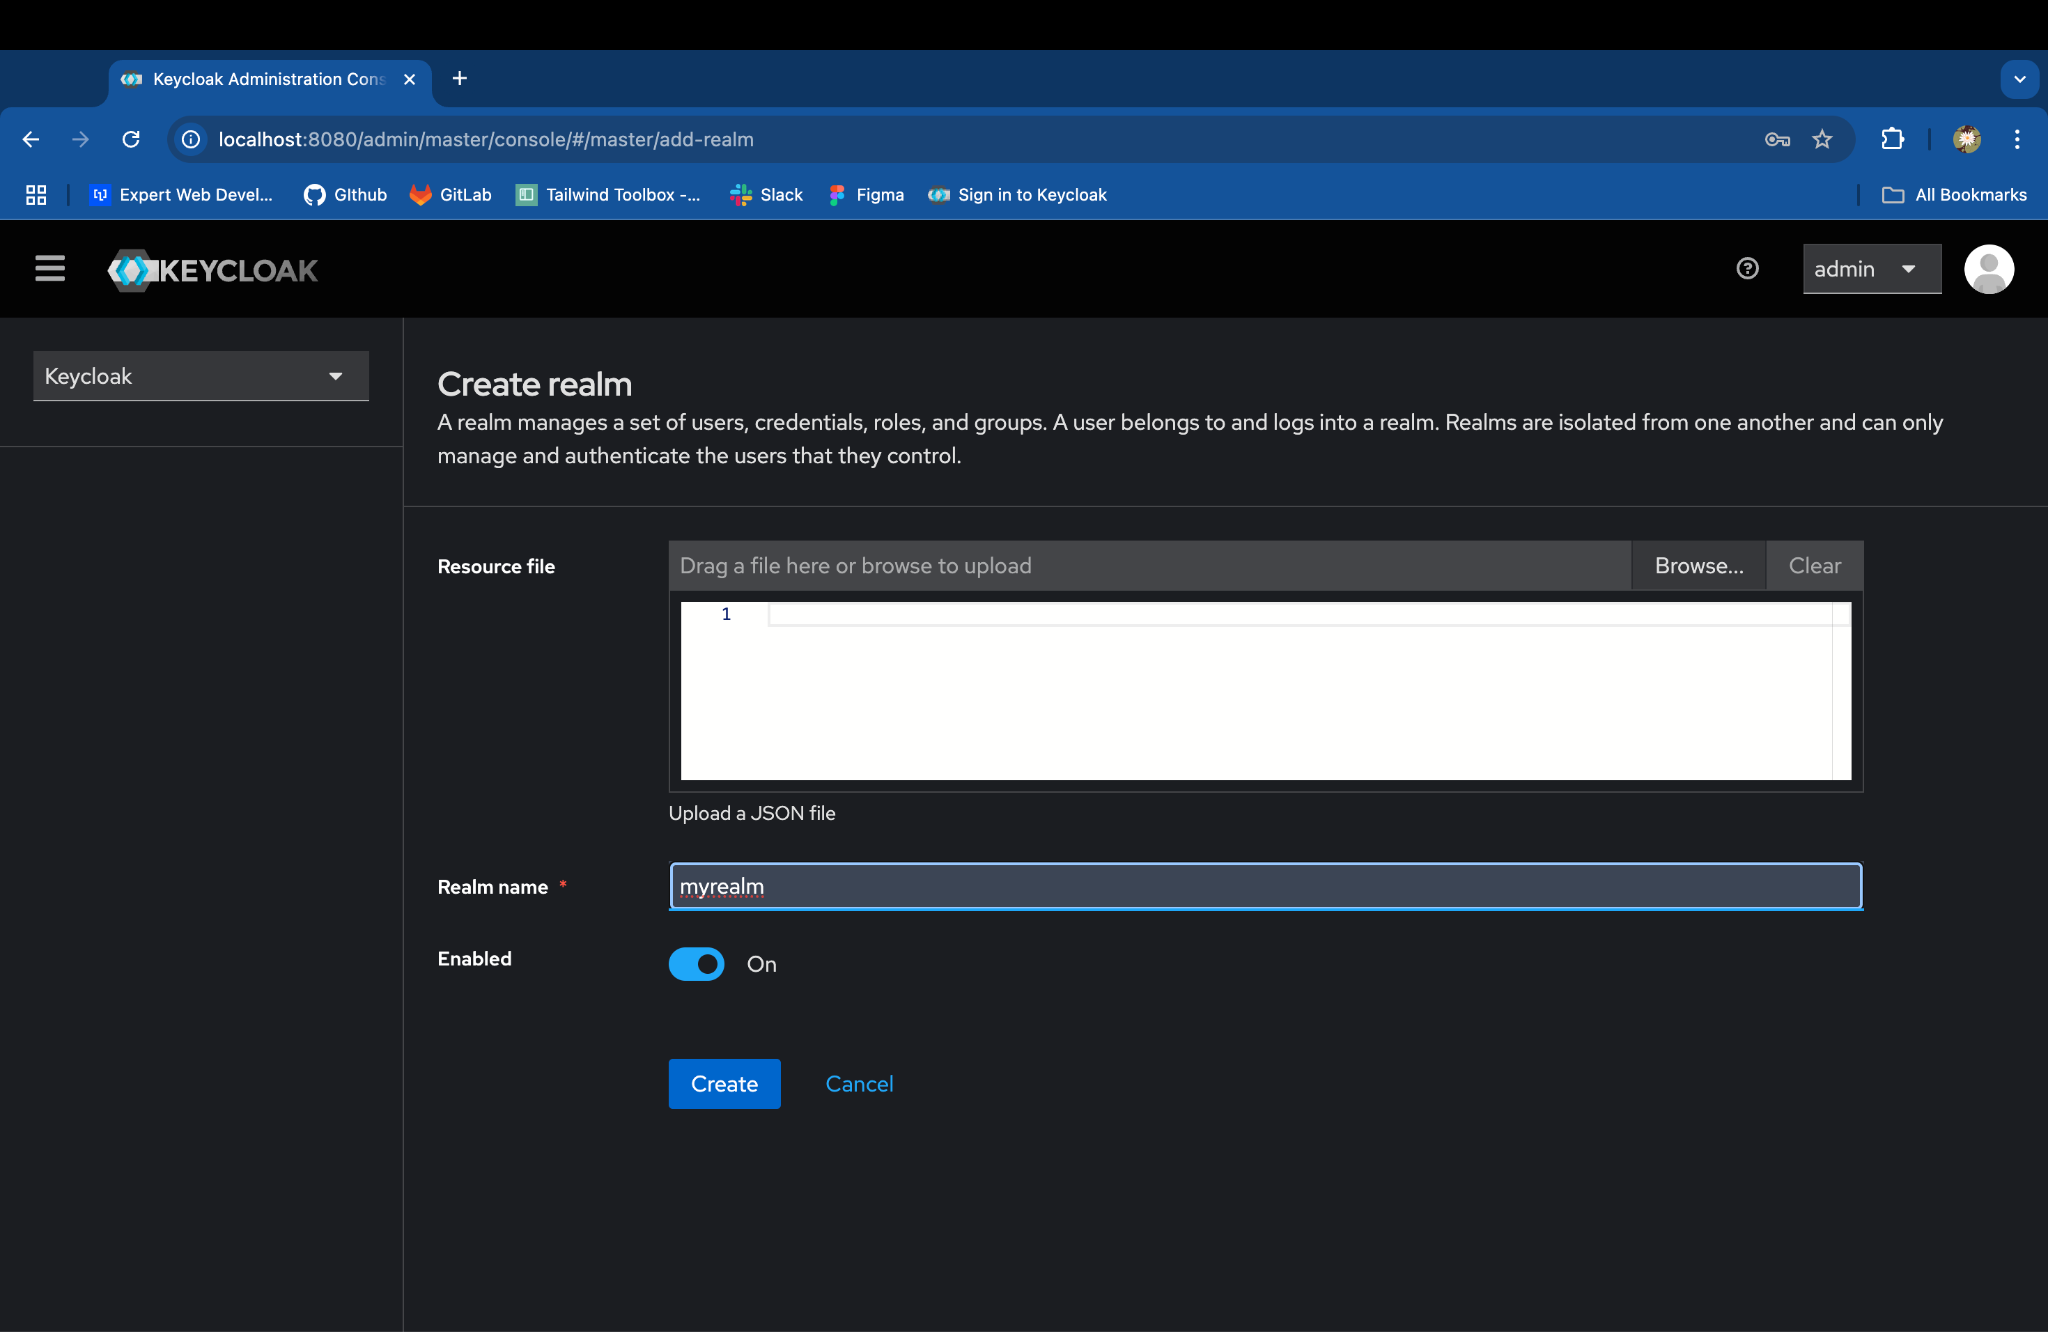
Create a New Realm:
In the admin console, click on Keycloak next to the master realm in the top-left corner.
- Click on Create Realm
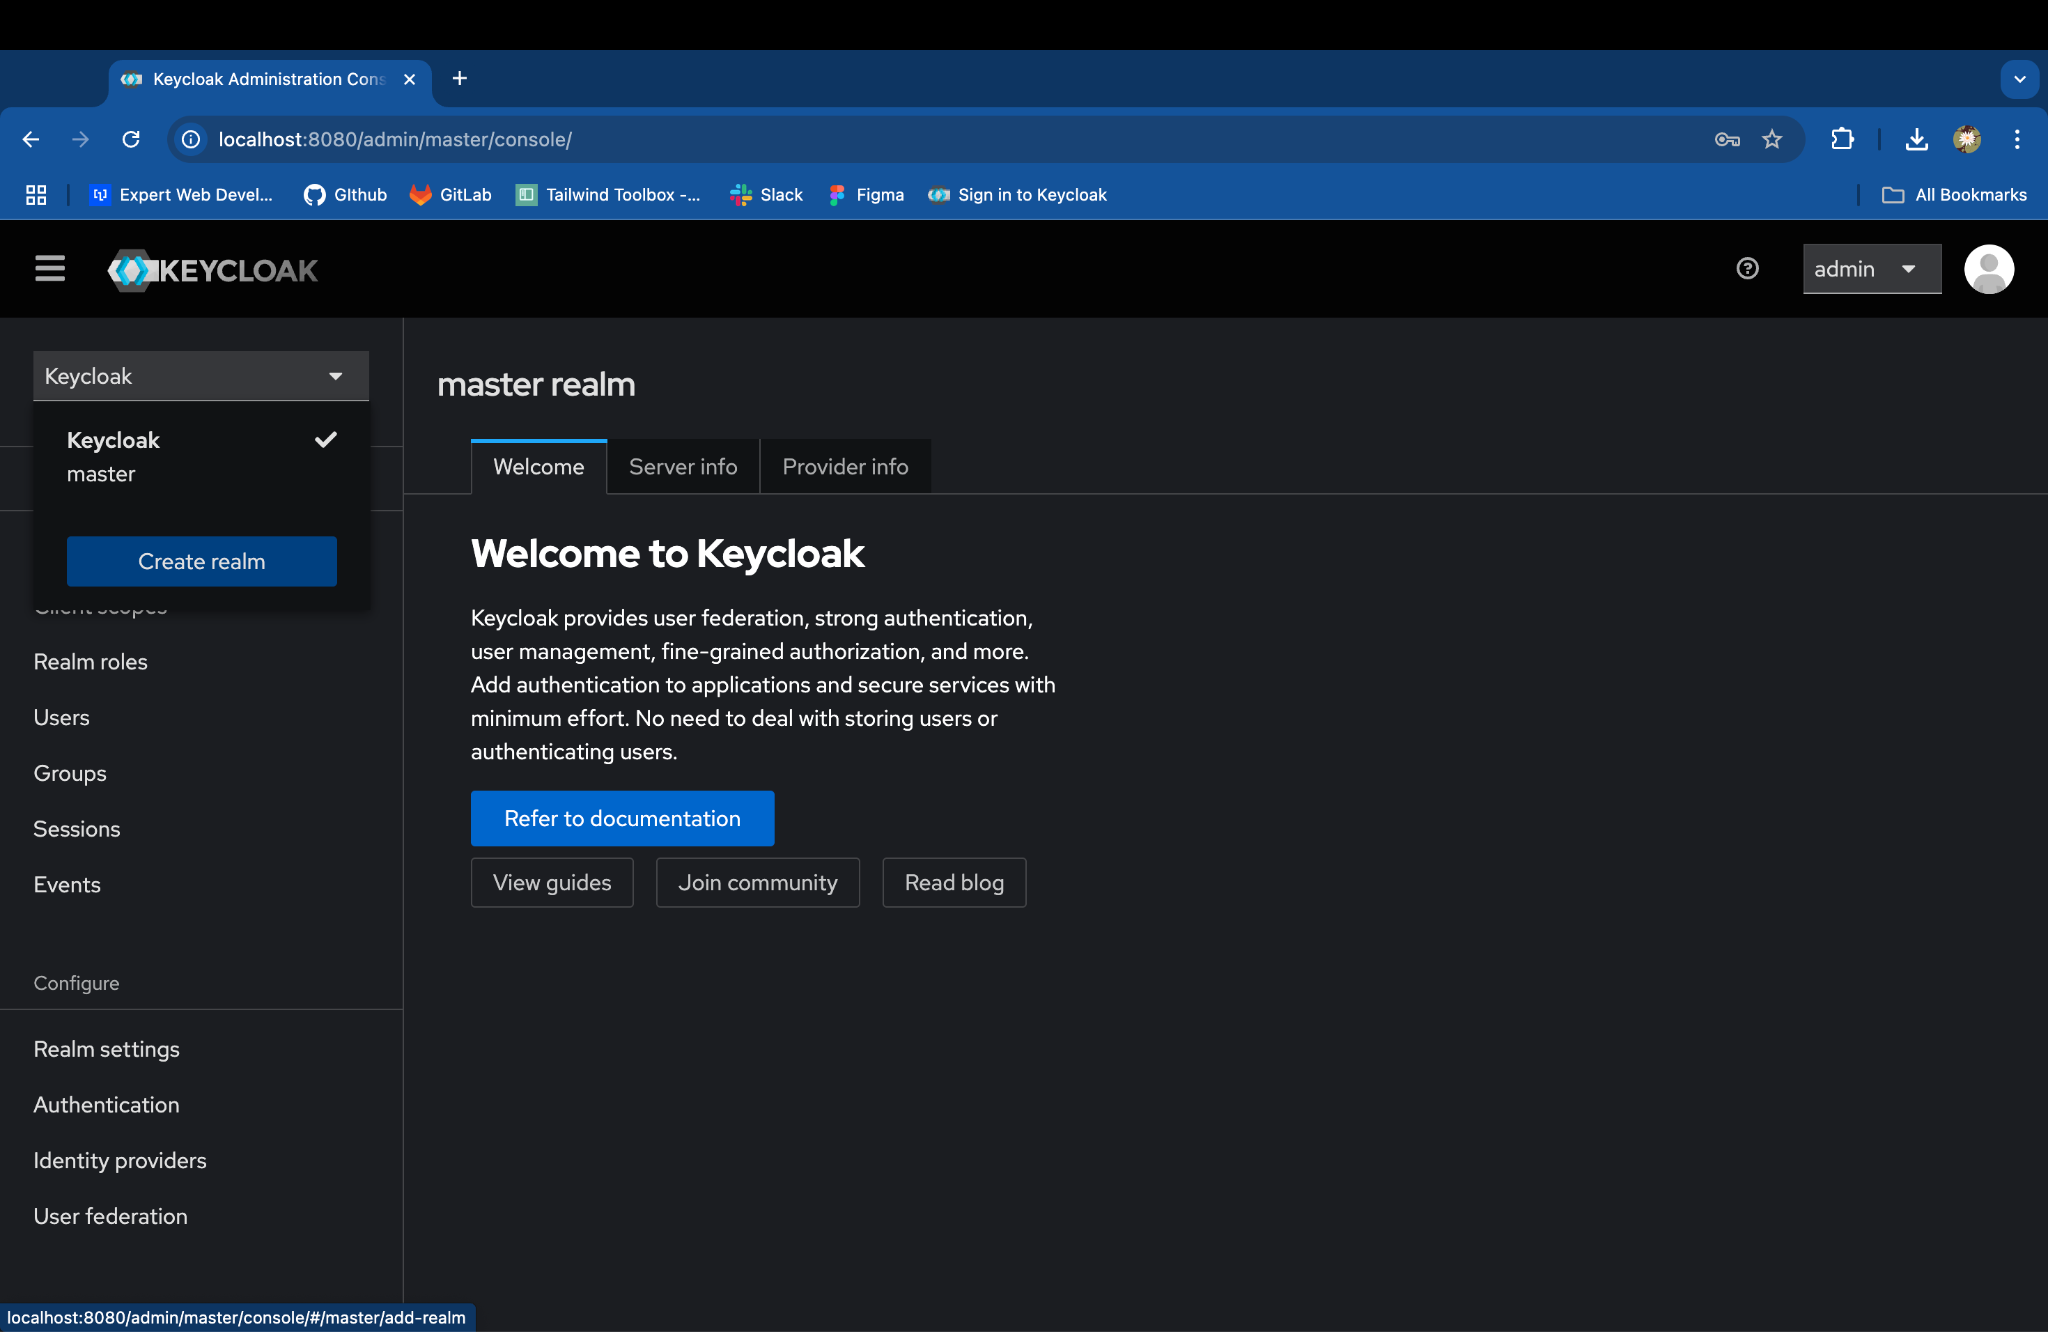
- Enter the Realm name & click on Create: myrealm
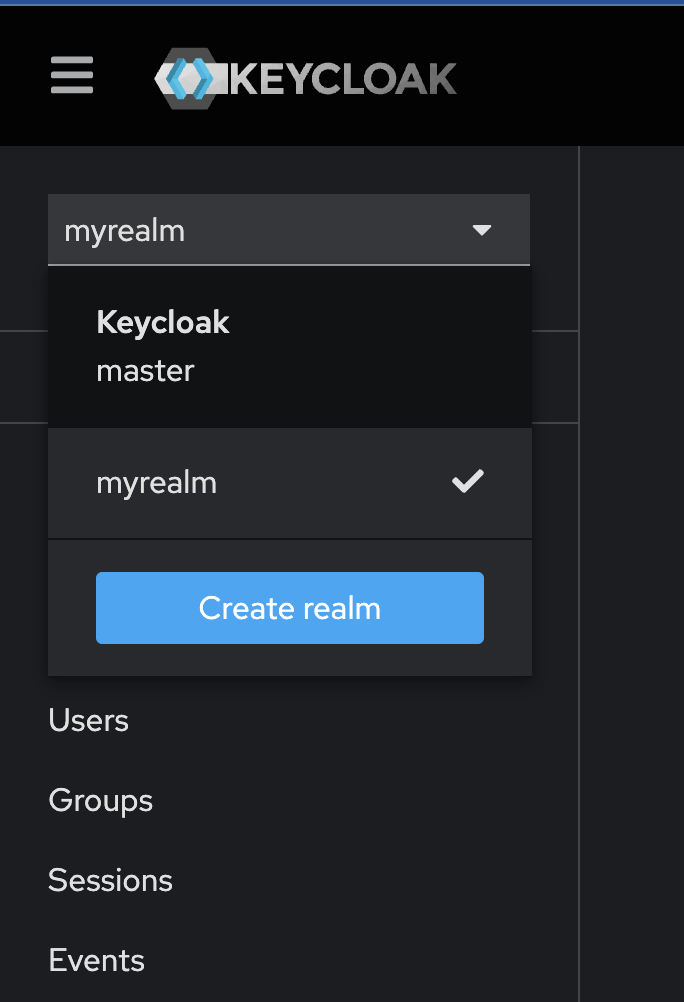
- Now you will be under new realm interface:
Step 3: Create a User in Keycloak
Users:
A user represents an individual identity in the realm.
Key Features:
-
Users can log in and perform actions based on their roles and permissions.
-
Attributes (custom metadata) can be added to users.
-
Users can have:
-
Credentials: Passwords, OTP, etc.
-
Roles: Assign specific permissions.
-
Federation Links: Use external identity providers like LDAP or Google.
-
-
Keycloak provides a user-friendly admin console and REST APIs to manage users.
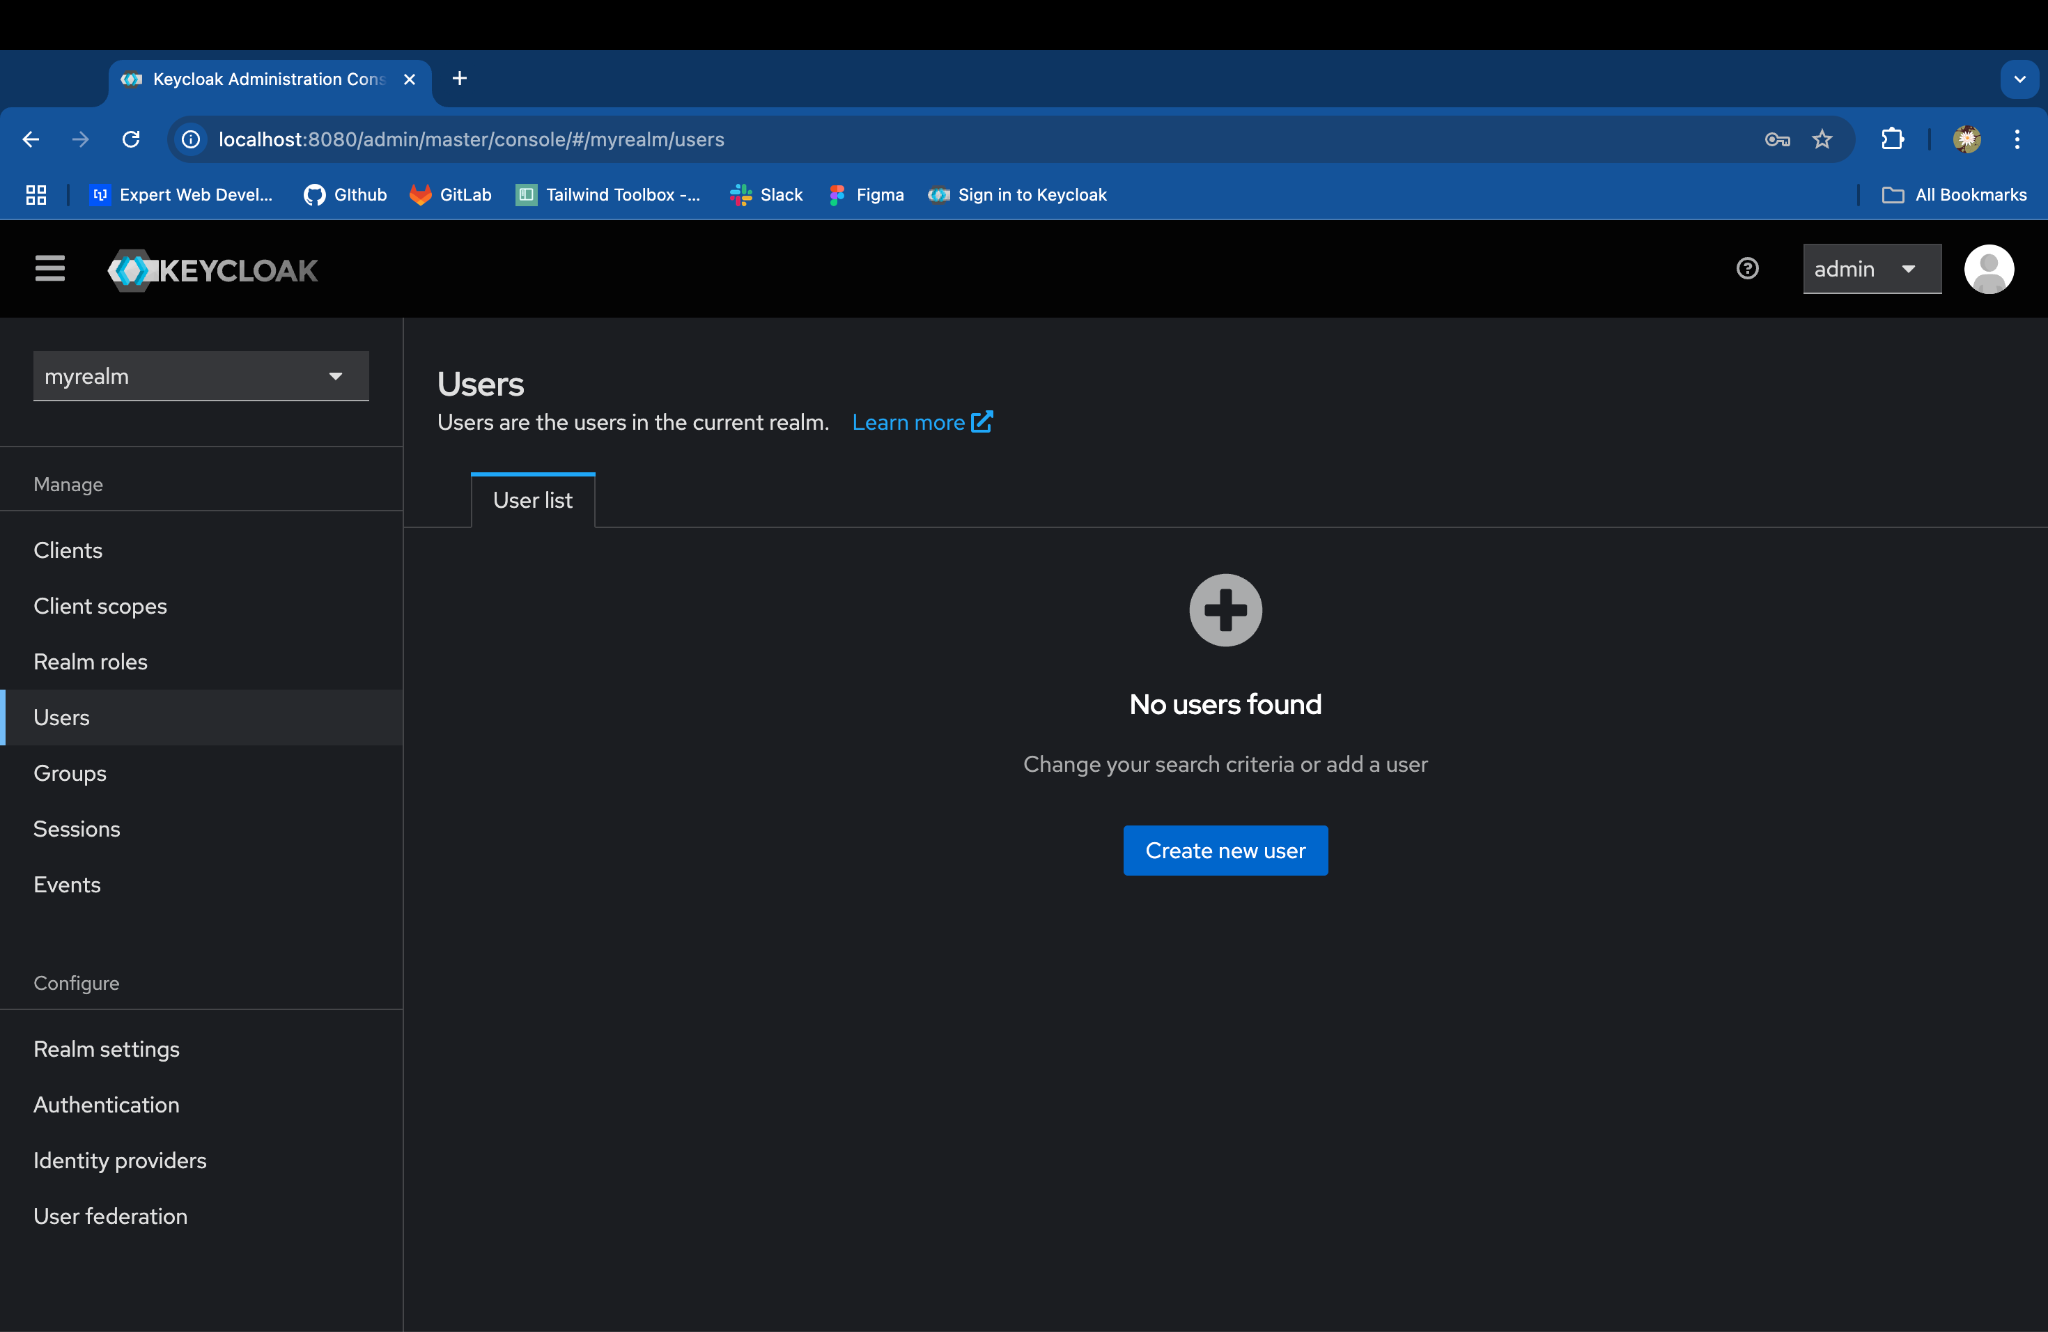
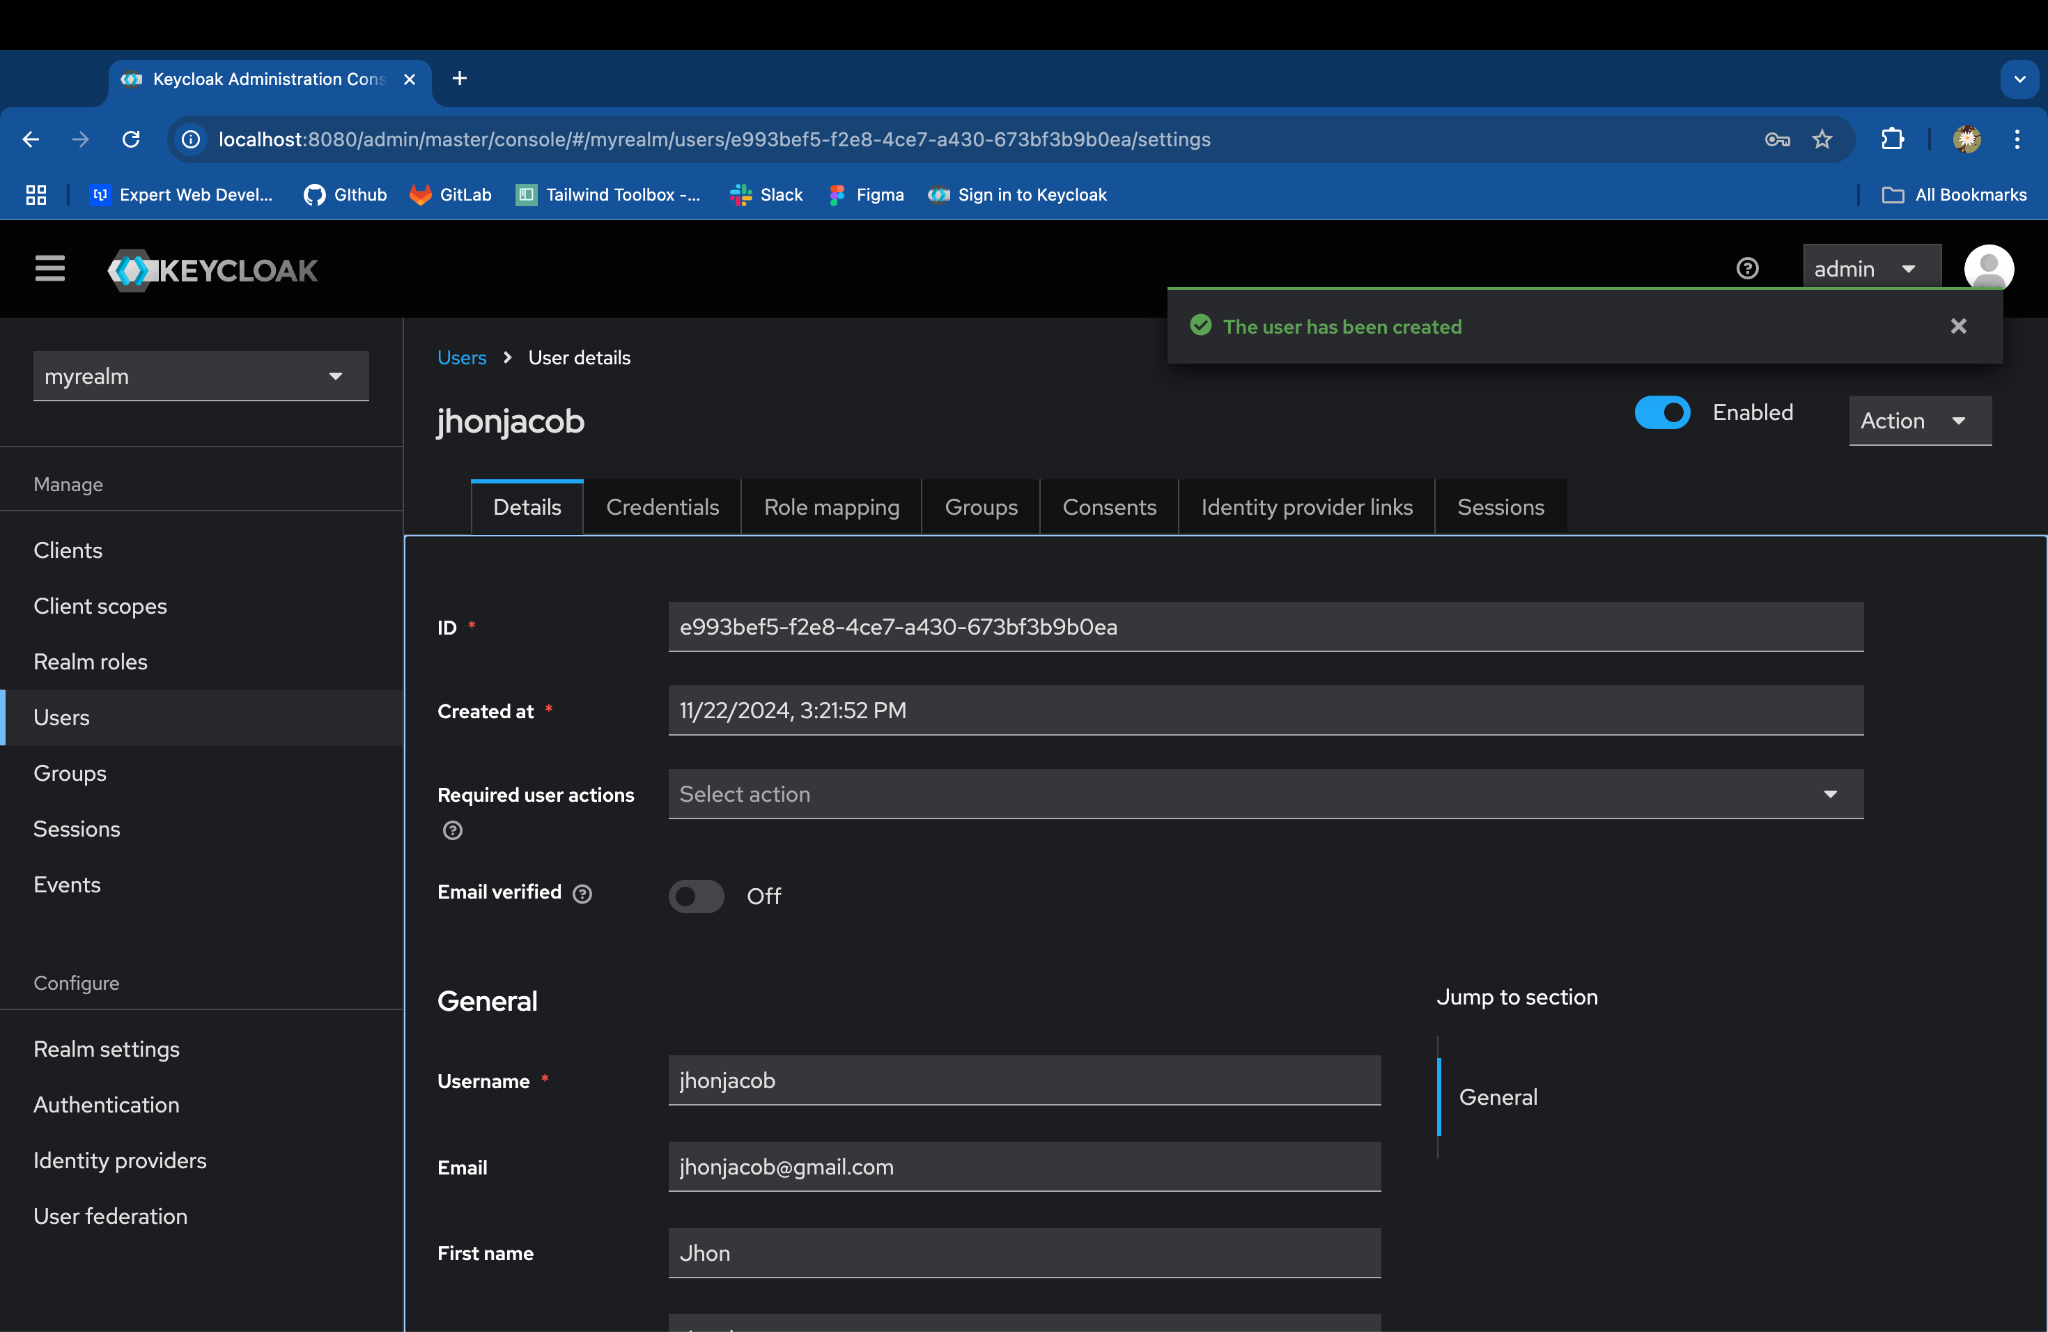
In the left-hand menu, go to Users and click Add user:
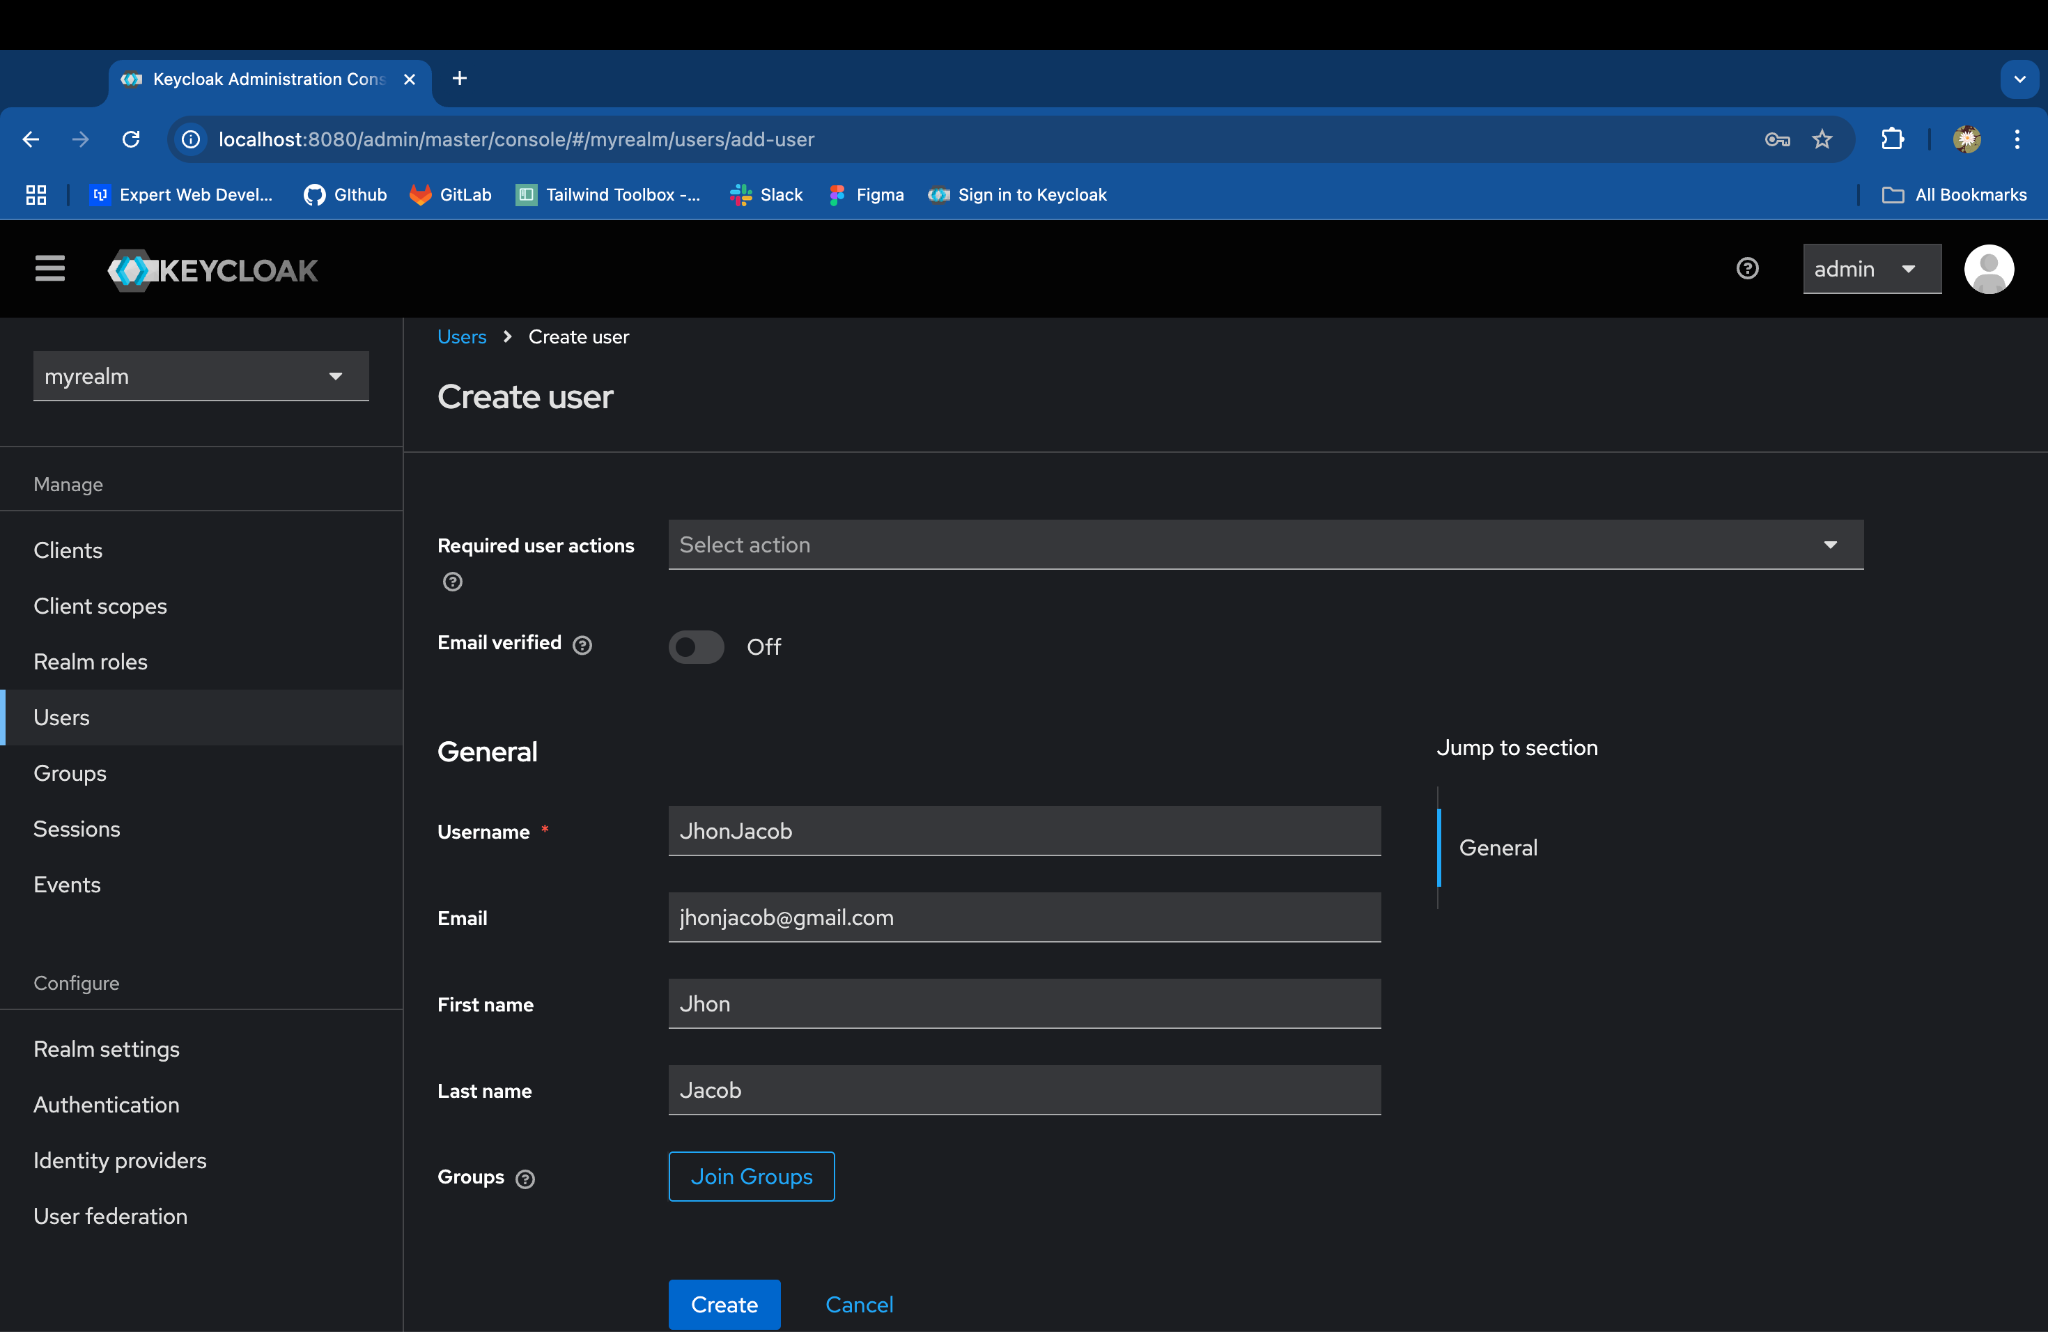
Fill in the required fields & click on Create, such as:
-
Username: (e.g., JhonJacob)
-
Email: (e.g., jhonjacob@gmail.com)
-
First name: (e.g., Jhon)
-
Last name: (e.g., Jacob)
Set the User’s Initial Password:
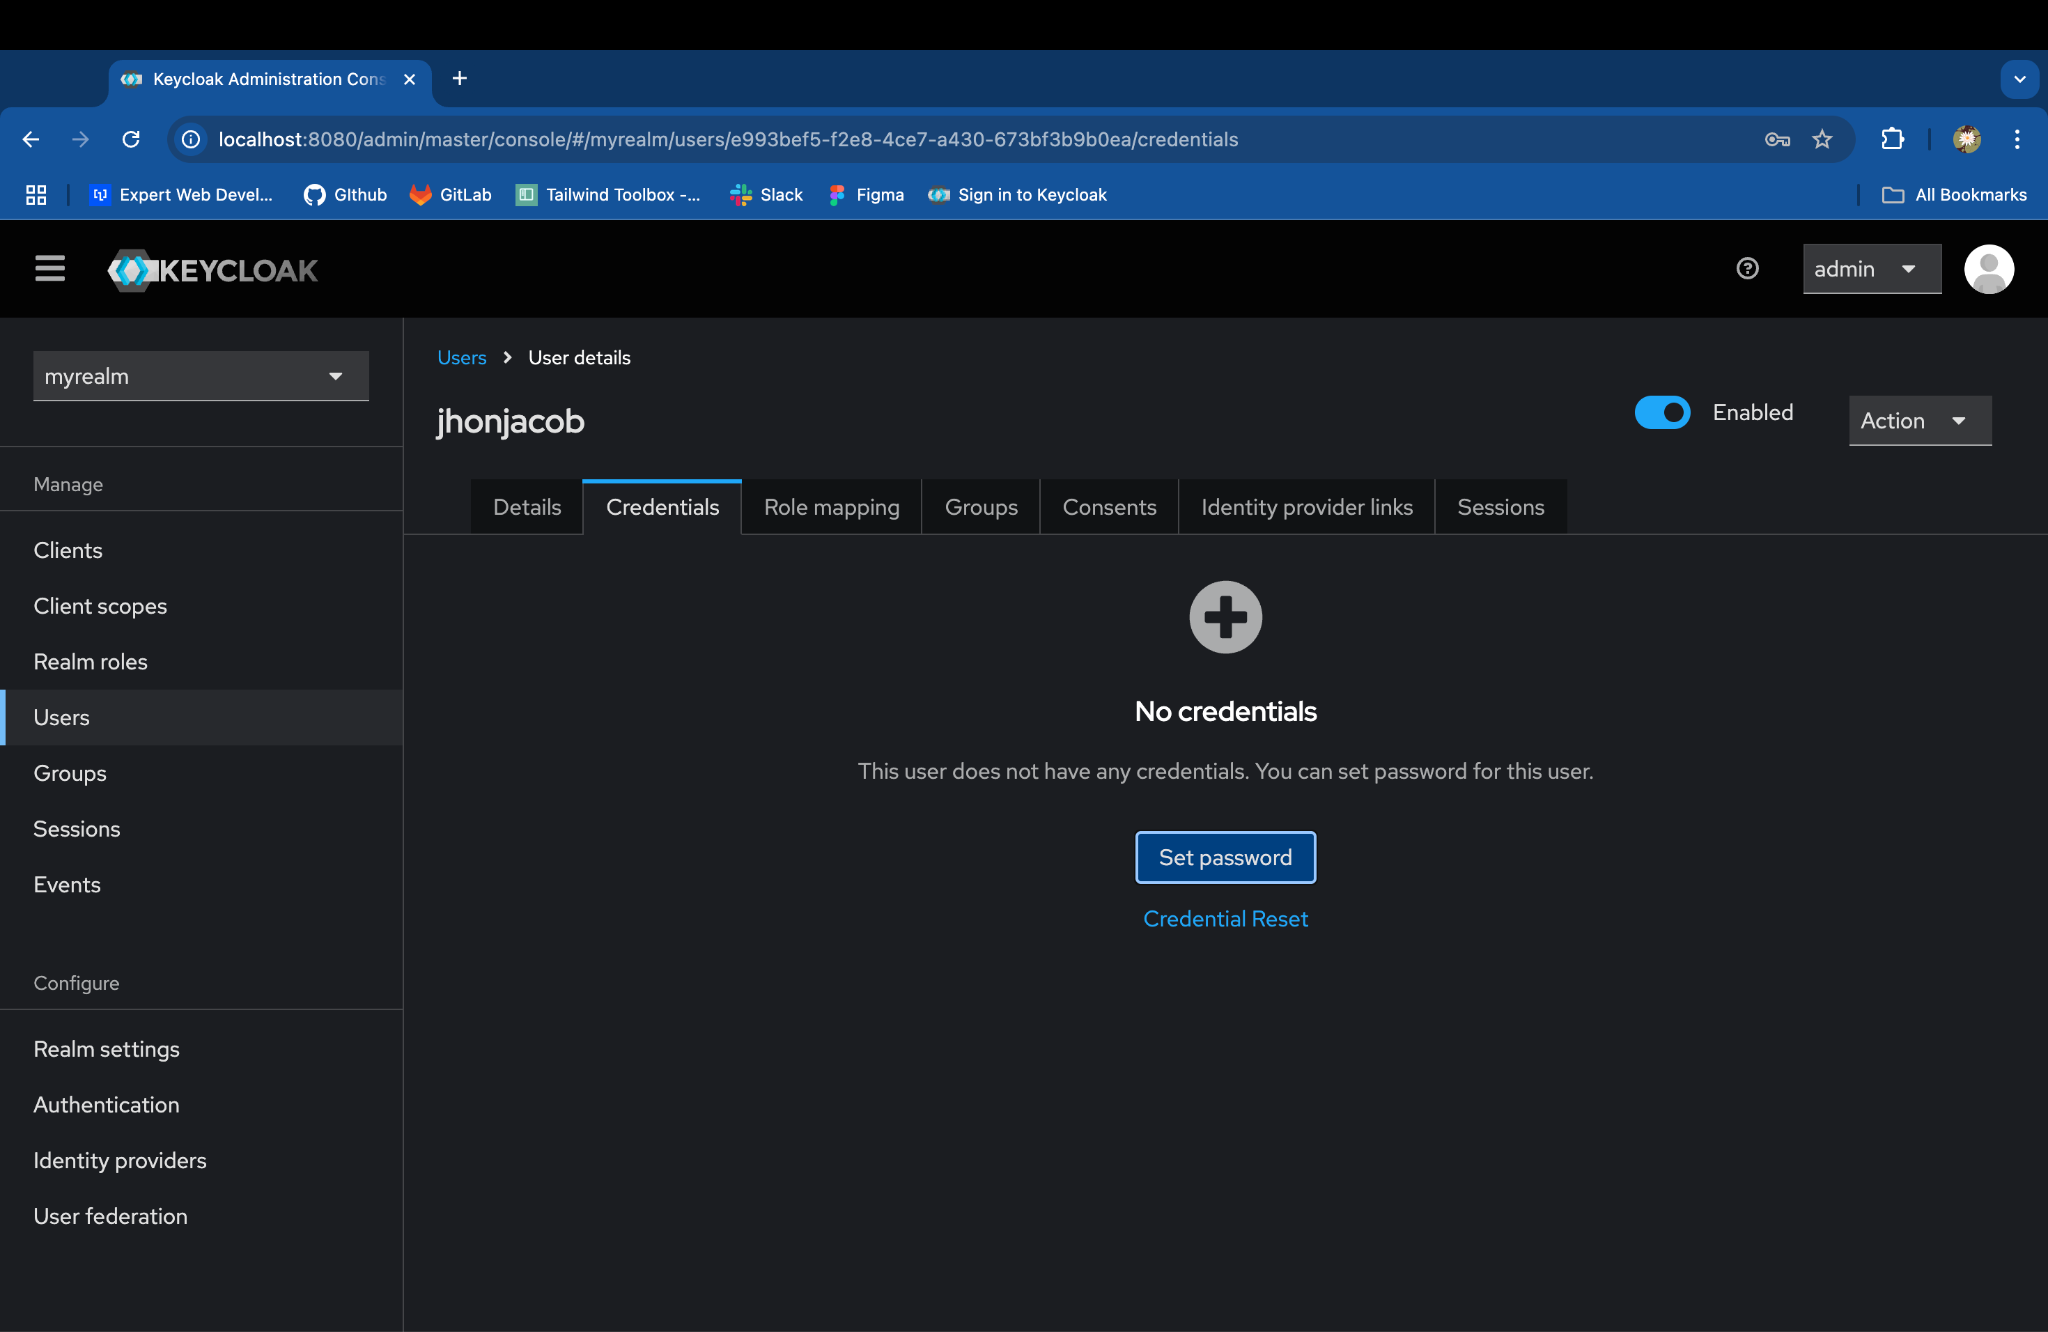
- Select the created user.
- Go to the Credentials tab and click on Set Password
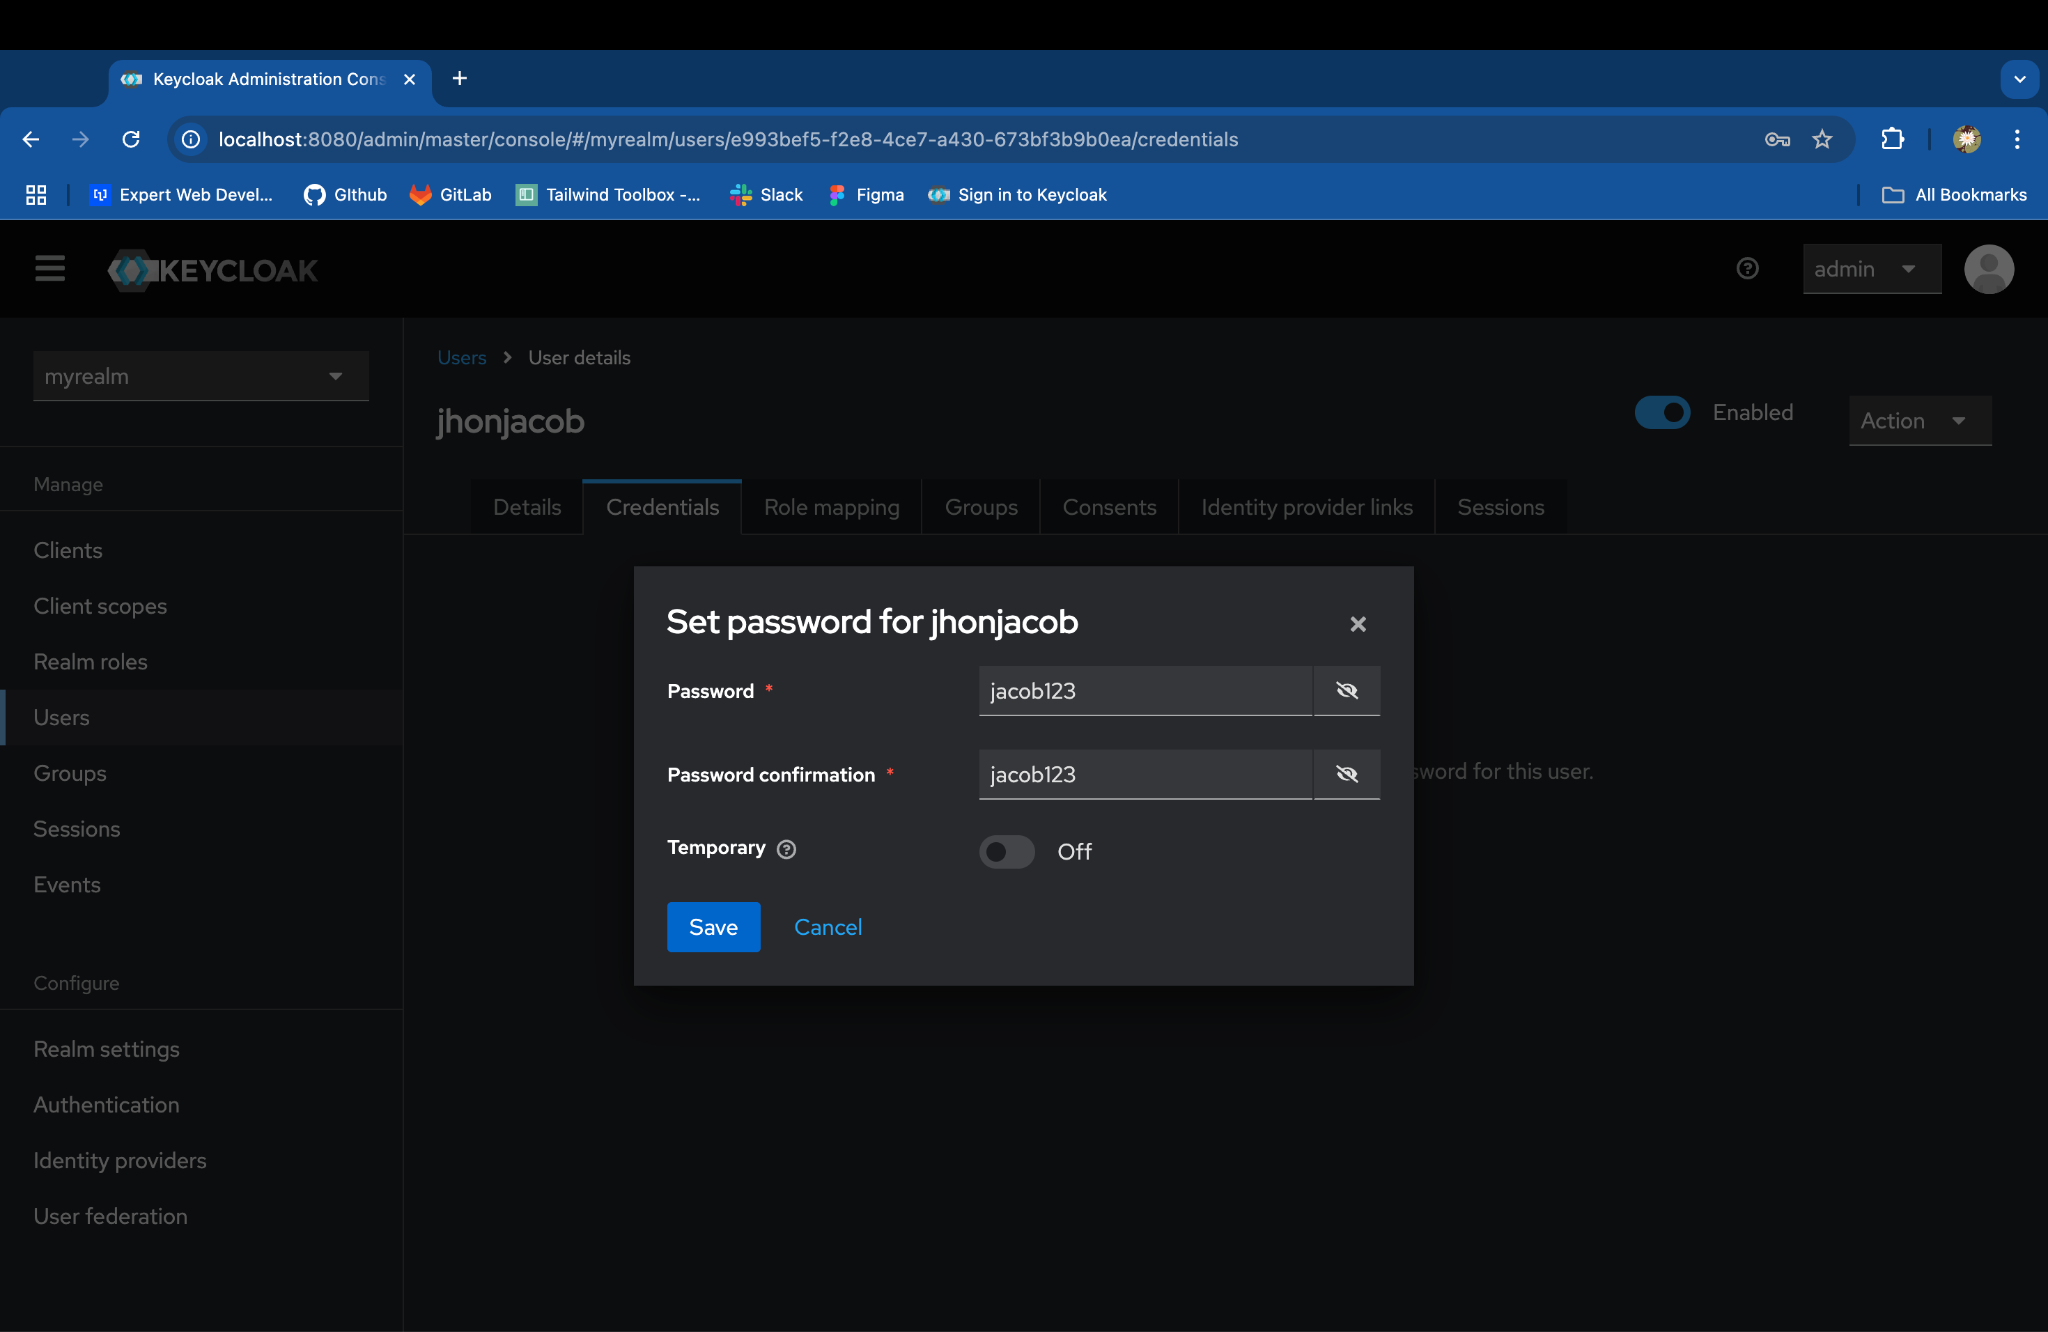
- Enter a password, toggle Temporary to Off to avoid a password update prompt, and click Save.
Step 4: Register the Rails Application as a Client in Keycloak
Clients:
A client represents an application or service that Keycloak protects. It is the entity requesting authentication and authorization.
Key Features:
-
Types:
-
Confidential: For server-side applications (requires a client secret for communication).
-
Public: For client-side applications like SPAs (does not require a client secret).
-
Bearer-only: For backend services that don't initiate logins but verify tokens.
-
-
Client Protocols:
-
OpenID Connect (OIDC): A modern protocol for authentication (built on OAuth 2.0).
-
SAML 2.0: Another protocol for authentication (common in enterprise environments).
-
-
Configuration Options:
-
Redirect URIs
-
Roles and permissions
-
Token settings (lifespan, format, etc.)
-
Consent screens for user permissions
-
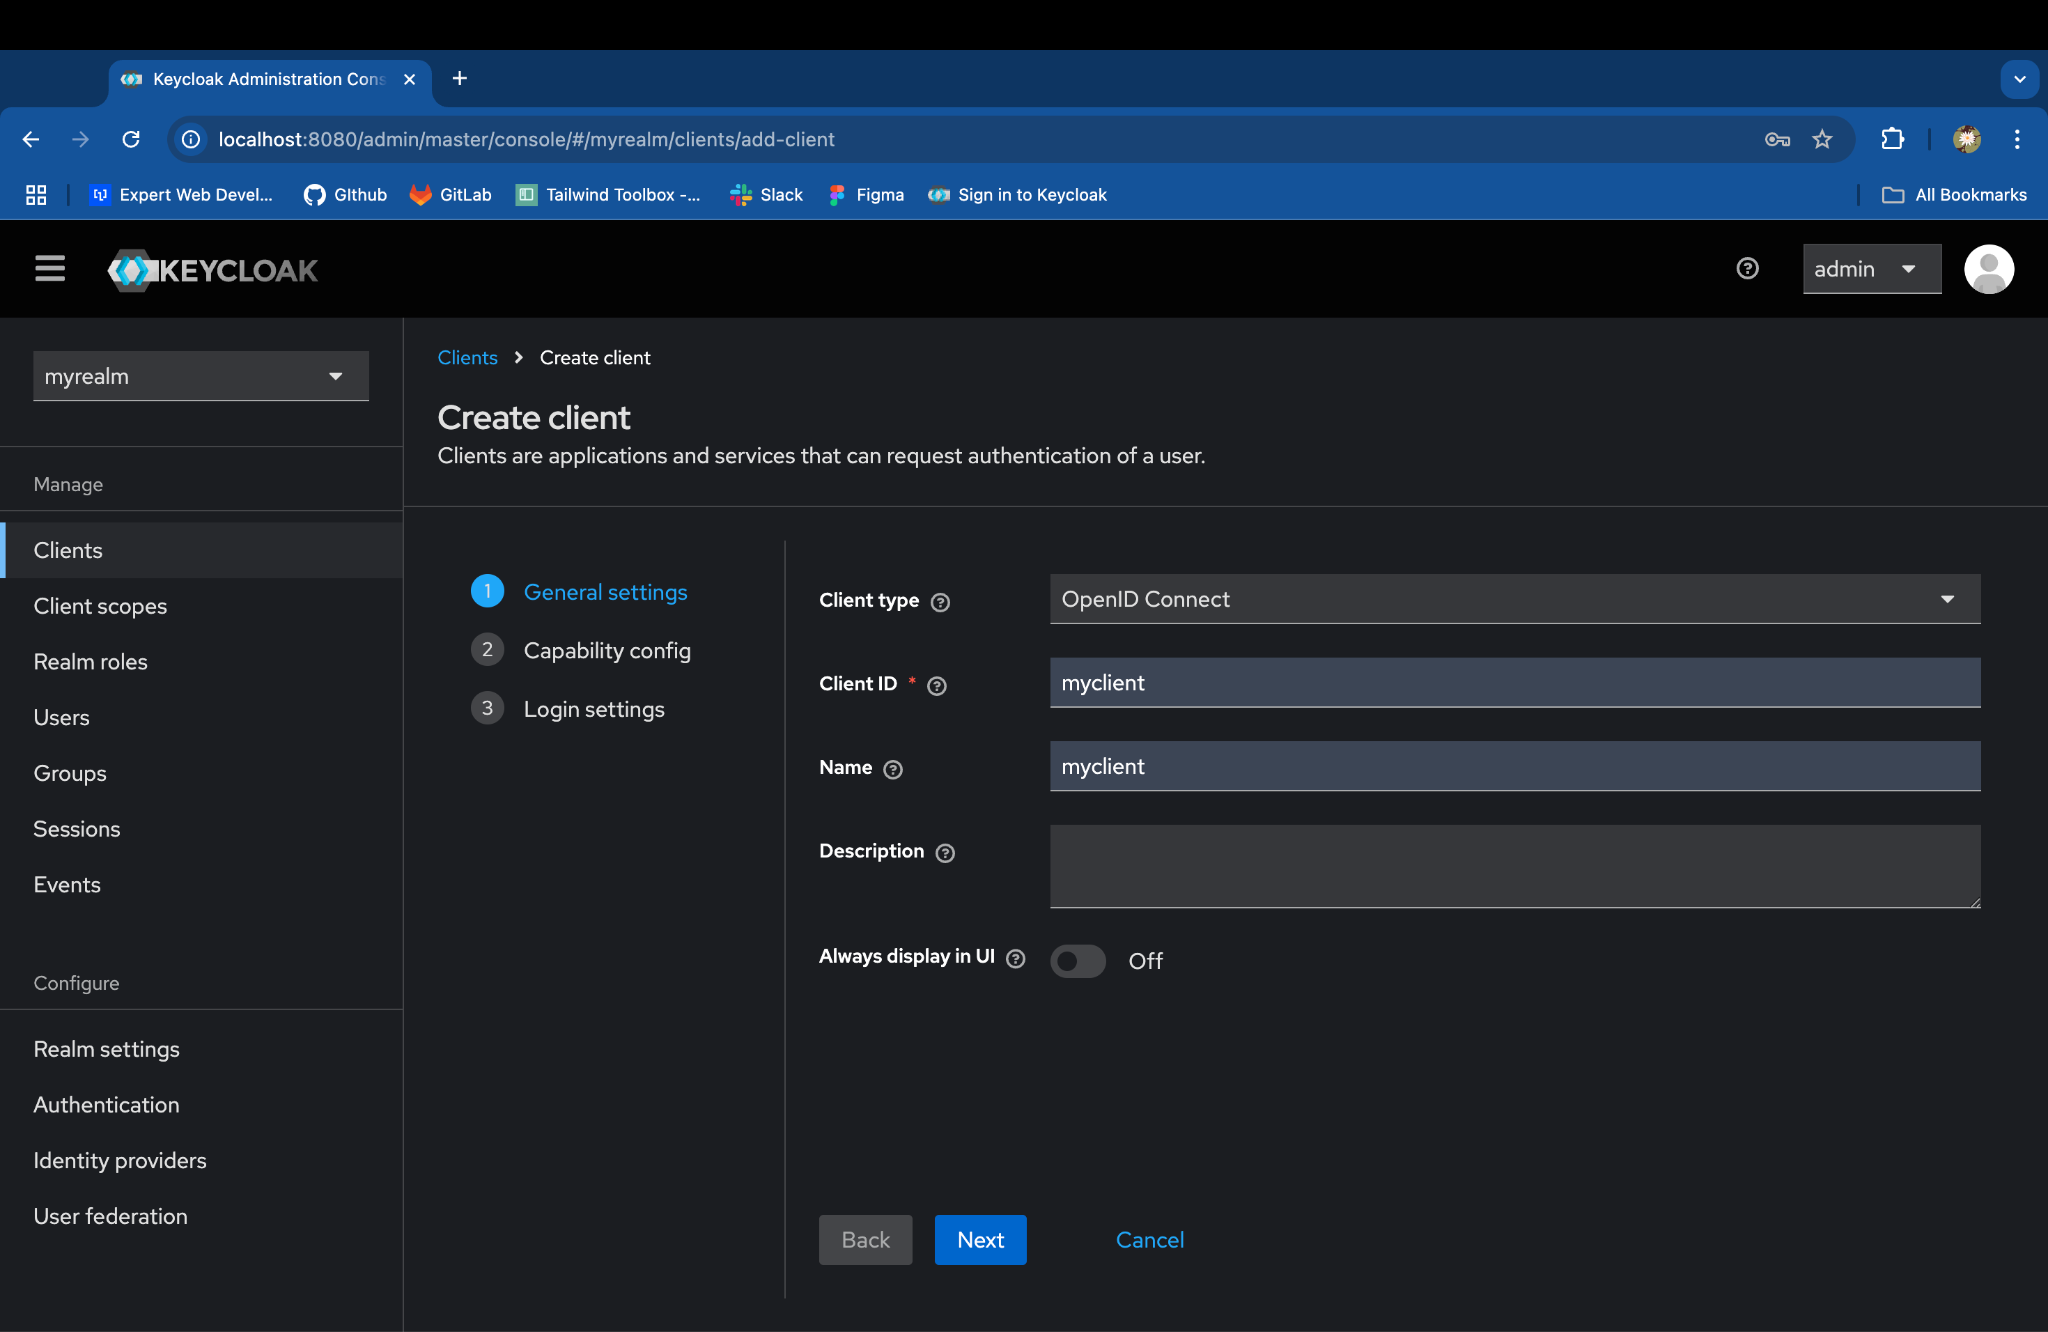
Go to Clients in the left-hand menu.
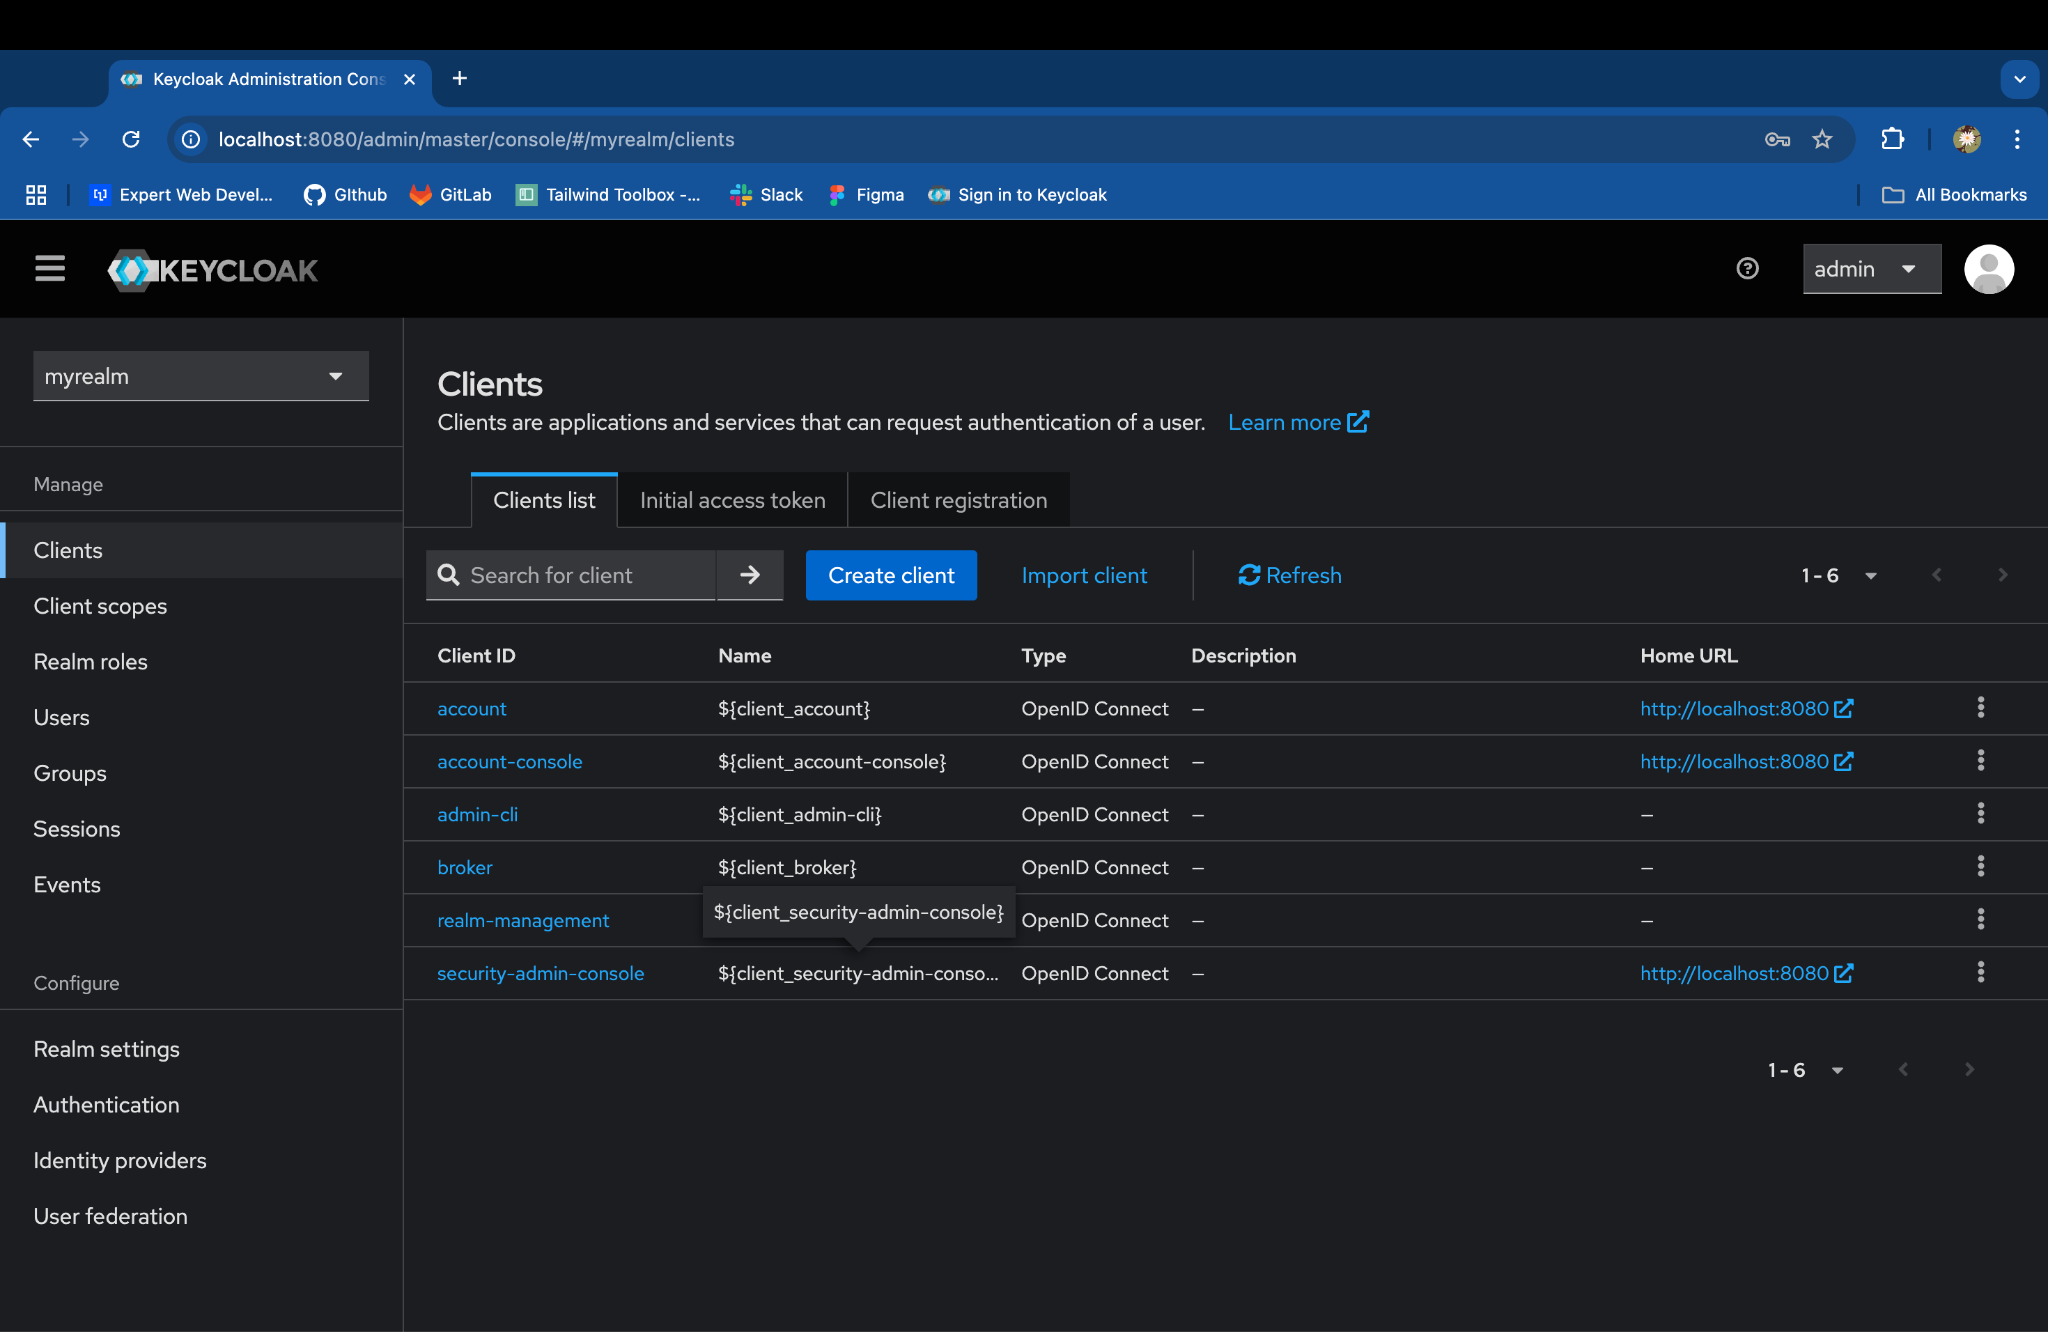
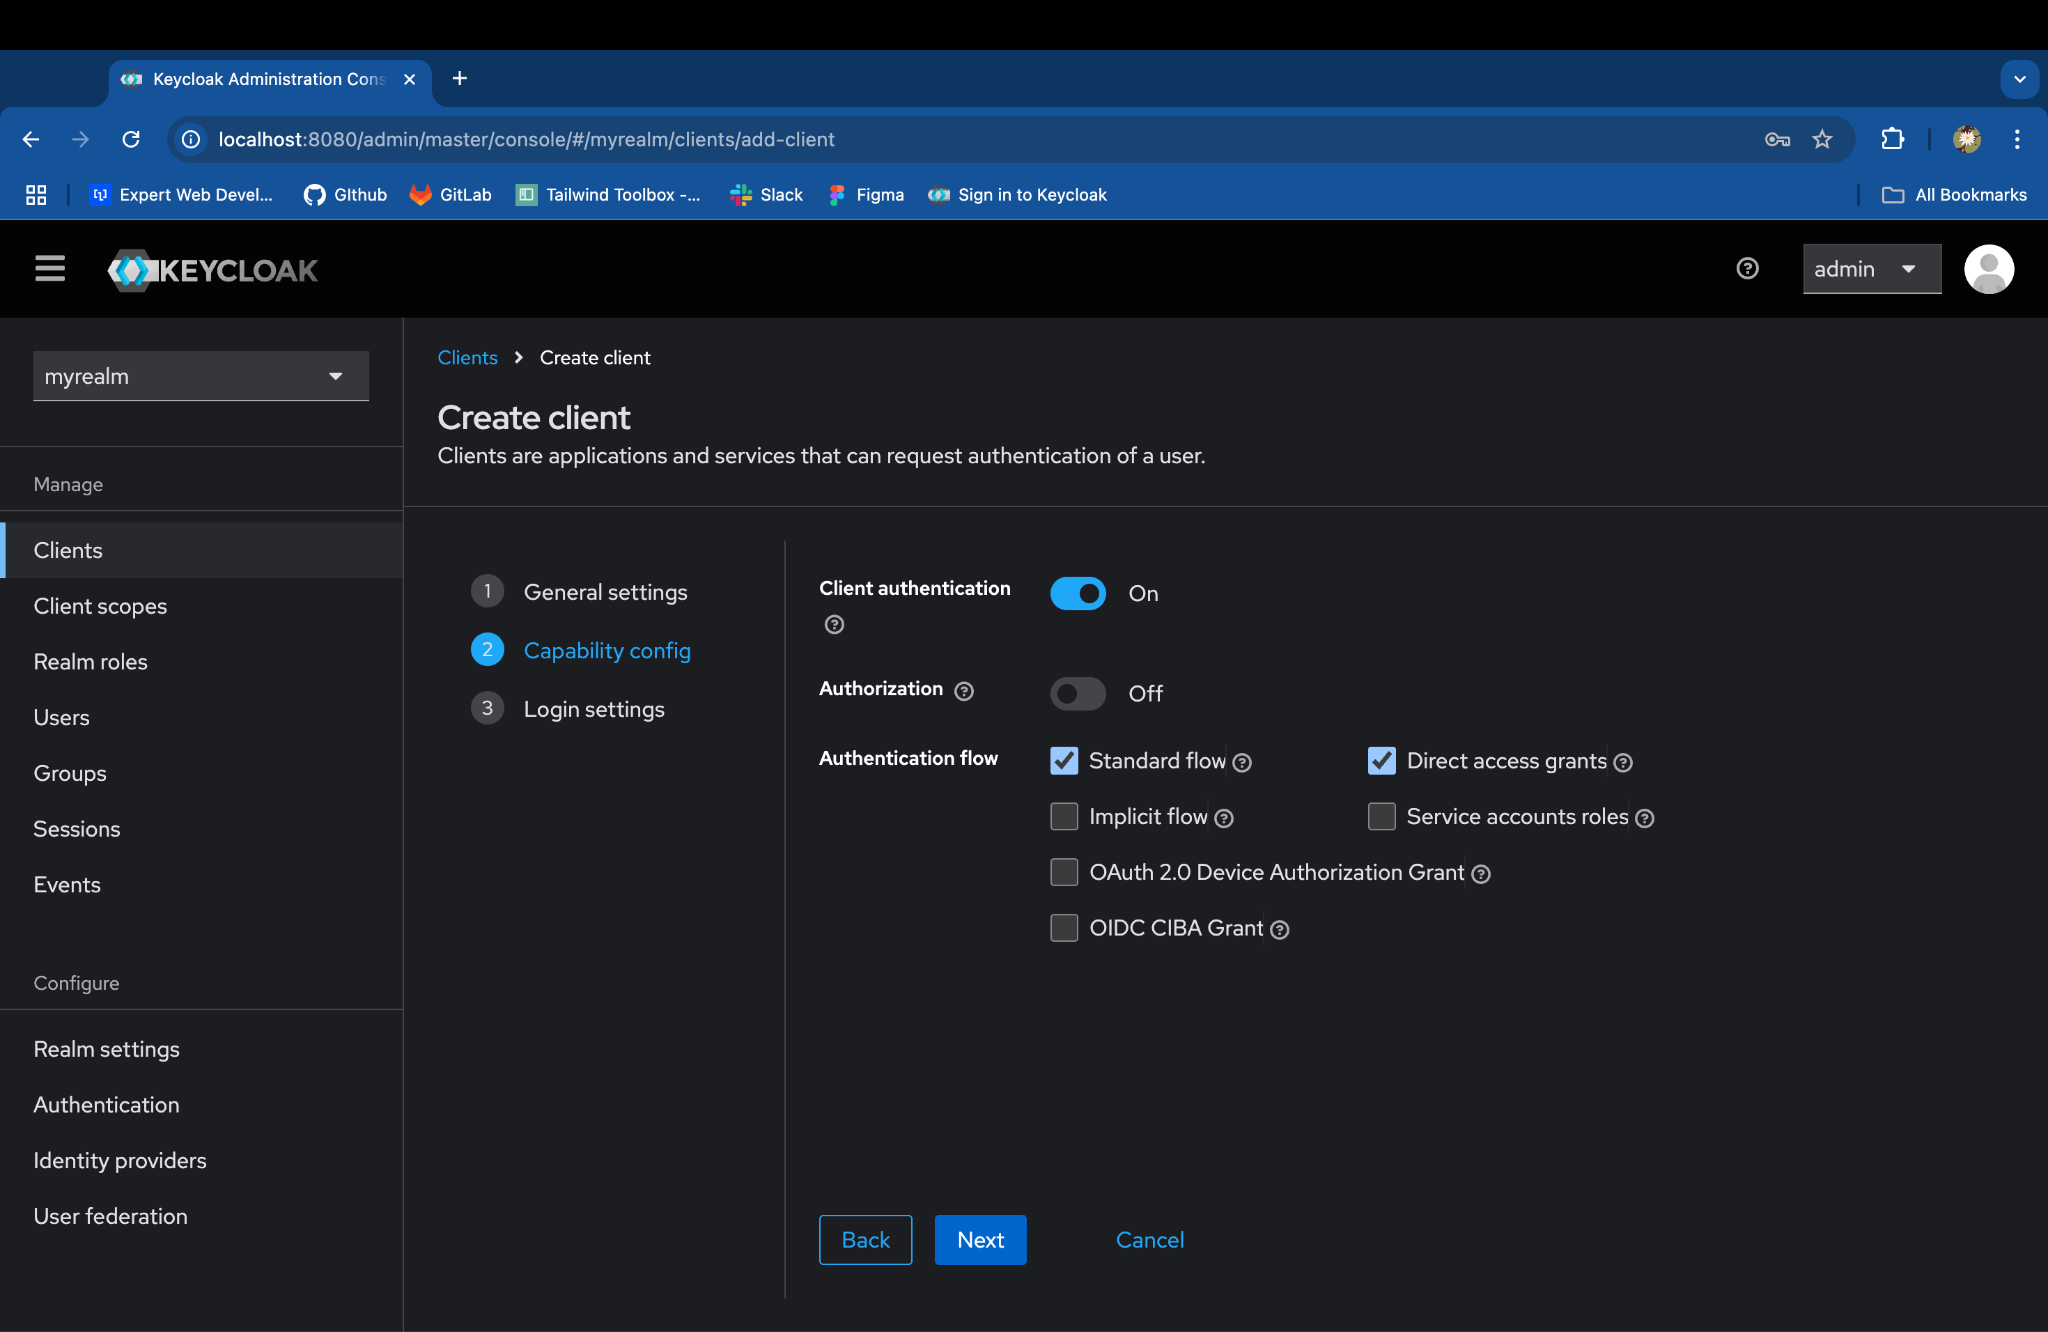
Click on Create client and enter the details:
-
Client type: OpenID Connect
-
Client ID: myclient
-
Turn on the Client authentication.
-
Confirm that Standard flow is enabled.
-
Set the Valid redirect URIs to the Rails app callback URL:- http://localhost:3000/\*
-
Set the Web origins:- http://localhost:3000/\*
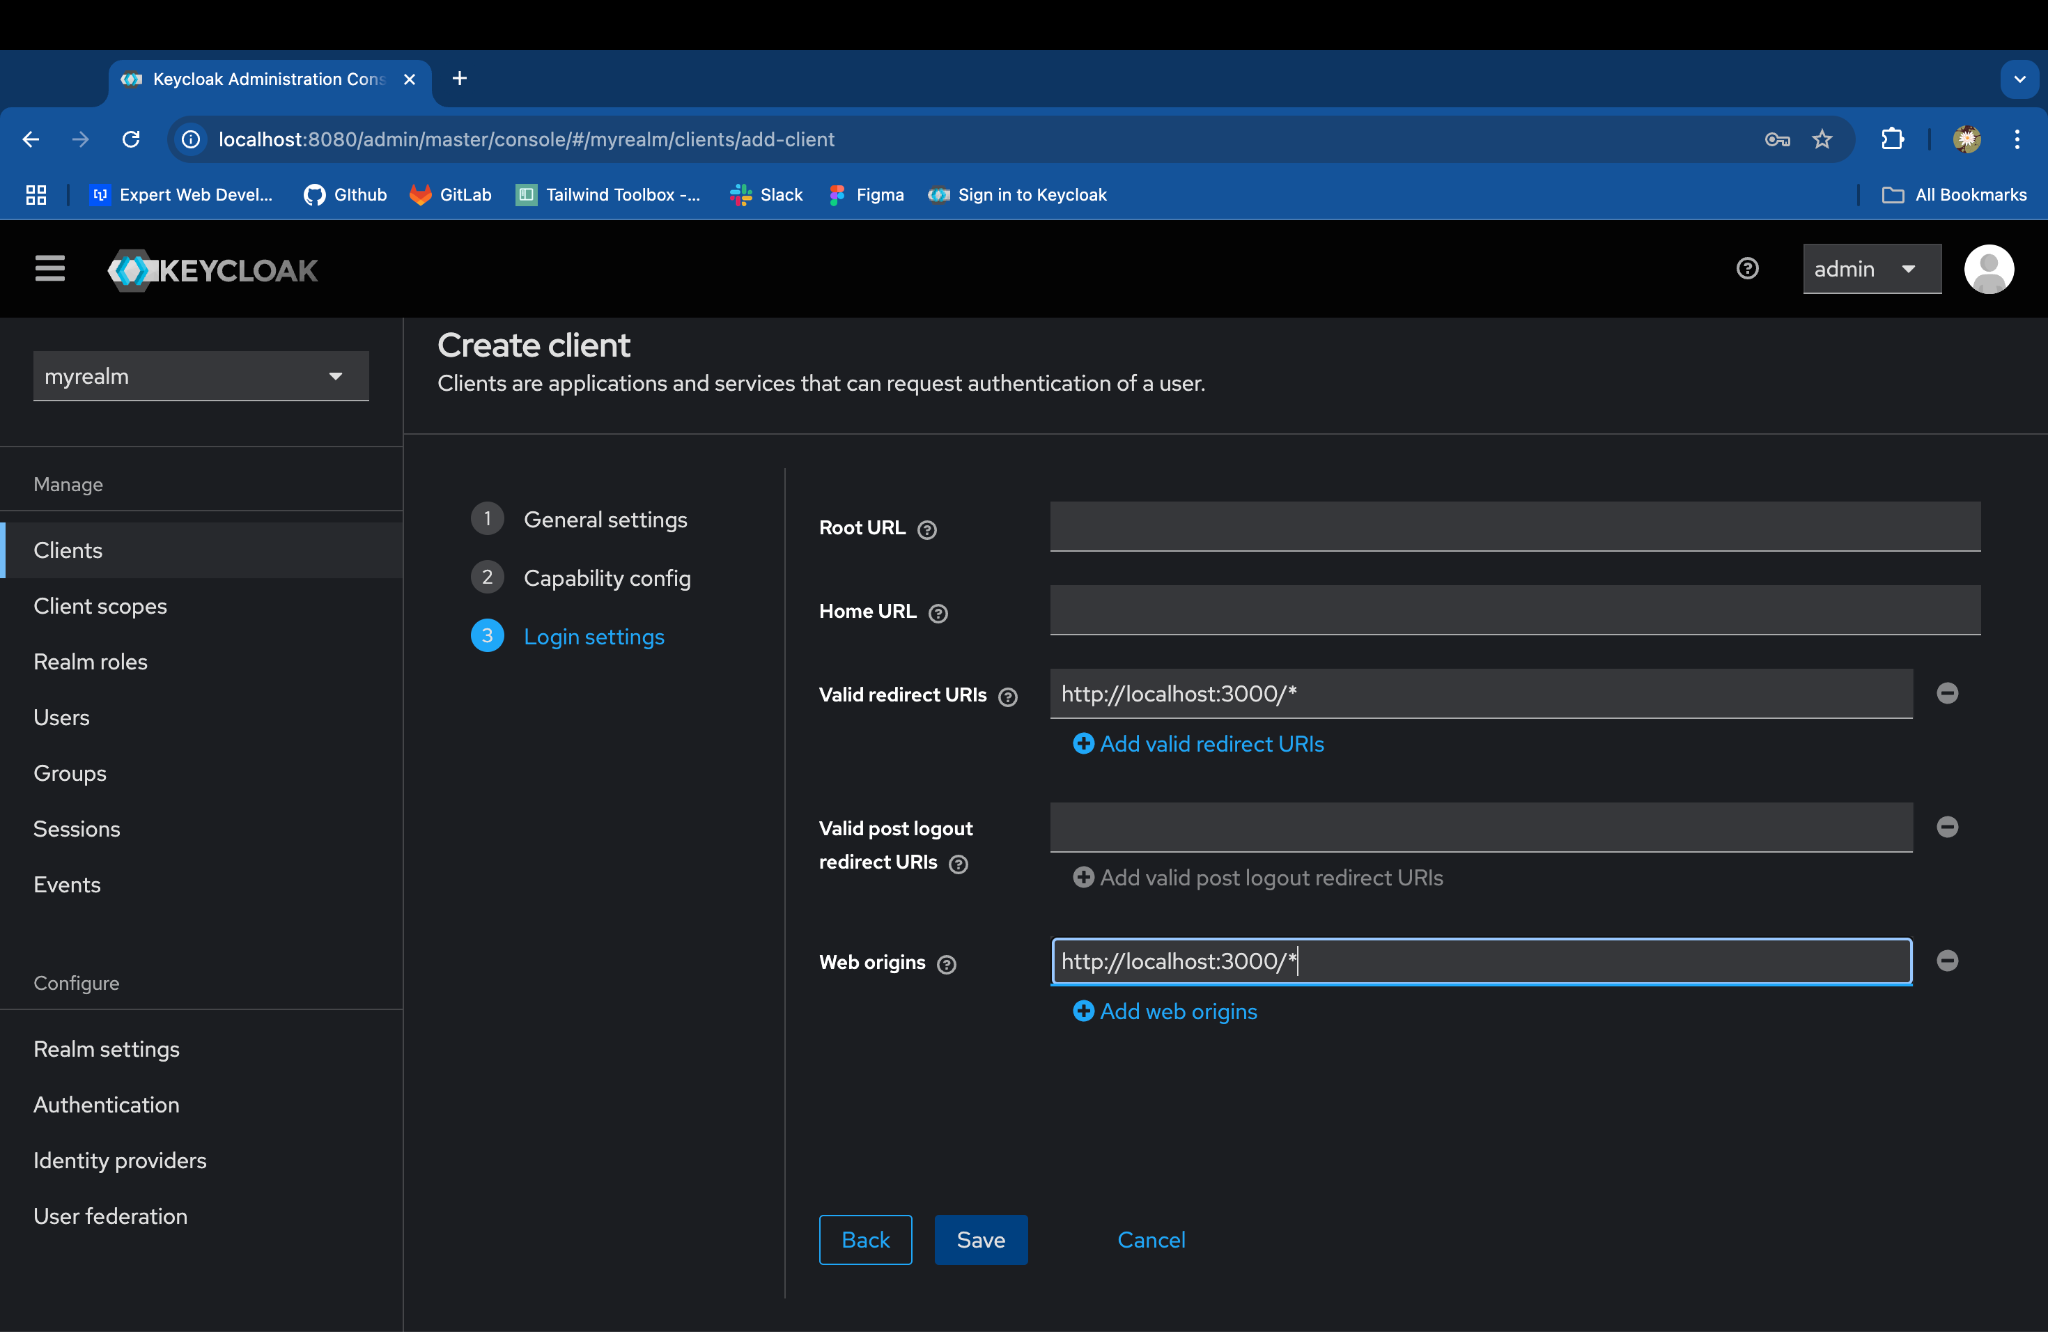
Click on Save
Step 5: Integrate Keycloak with Rails Using omniauth-keycloak
Install and configure the omniauth-keycloak gem in your Rails app.
Add the below gems to your Gemfile:
gem "omniauth"
gem "omniauth-rails_csrf_protection"
gem "omniauth-keycloak"
Run bundle install to install the gem.
Configure OmniAuth:
Initialize the keycloak provider in config/initializers/omniauth.rb:
Rails.application.config.middleware.use OmniAuth::Builder do
  provider :keycloak_openid,
           ENV["KEYCLOAK_CLIENT_ID"],
           ENV["KEYCLOAK_CLIENT_SECRET"],
           client_options: {  site: ENV["KEYCLOAK_URL"],
                              realm: ENV["KEYCLOAK_REALM"],
                              base_url: ""
                            },
           name: "keycloak"
end
Set Keycloak Environment Variables:
Add the following environment variables to your .env file:
KEYCLOAK_CLIENT_ID=<CLIENT_ID> (ex: myclient)
KEYCLOAK_CLIENT_SECRET=<CLIENT_SECRET>
KEYCLOAK_URL=http://localhost:8080
KEYCLOAK_REALM=<REALM_NAME> (ex: myrealm)
Note - Replace CLIENT_SECRET with the client secret from Keycloak under Clients > Your Client > Credentials.
Add a Route and Controller Action for SSO:
- In config/routes.rb, add a route for OmniAuth callback:
get '/auth/:provider/callback', to: 'sessions#create'
get '/auth/failure', to: redirect('/')- In app/controllers/sessions_controller.rb, define the create action to handle the Keycloak callback:
class SessionsController < ApplicationController
  def create
    auth = request.env['omniauth.auth']
    user = User.find_or_create_by(uid: auth['uid'], provider: auth['provider']) do |u|
      u.name = auth['info']['name']
      u.email = auth['info']['email']
      u.access_token = auth['credentials']['token']
      u.refresh_token = auth['credentials']['refresh_token']
    end
    session[:user_id] = user.id
    redirect_to root_path, notice: 'Signed in!'
  end

  def destroy
    session[:user_id] = nil
    redirect_to root_path, notice: 'Signed out!'
  end
end
Add a Login Button:
In your Rails app’s view, add a link to the Keycloak sign-in:
<%= button_to 'Login with Keycloak', '/auth/keycloak', method: :post, data: { turbo: false } %>Step 6: Start the Rails Server
Run bin/dev
Go to http://localhost:3000
Click on Login with Keycloak and enter your Keycloak user credentials
(eg: username - JhonJacob, pass - jacob123).
After successful login, you should be redirected to your Rails app with a session for the authenticated user.
Conclusion
Integrating Keycloak for Single Sign-On (SSO) in a Rails application using the omniauth-keycloak gem is a powerful way to handle user authentication securely and efficiently. With Keycloak, managing users, realms, and roles becomes centralized and scalable, especially for applications that need to support multiple client apps or microservices.
By following this setup, you've created a local Keycloak instance, configured a secure realm, registered your Rails app as a client, and implemented SSO seamlessly. From here, you can further explore Keycloak's features, such as role-based access control (RBAC), event listener spi (SPI), protocol mappers and user federation.
Thank you for following along and happy coding!