Convert Figma design to code
by Nitturu Baba, System Analyst
Introduction
Building user interfaces usually starts with creating static layouts before adding interactivity. But what if you could generate those static pages in just a few seconds? This would save you from repetitive work and let you focus on building interactive features right away. In this blog, we’ll look at the create-component package—a tool that quickly turns Figma designs into static UI pages for frameworks like React, Next, Vue, Angular, and more. The generated code uses Tailwind CSS for styling.
Local Setup
-
Clone the repository:
Get the create-component repository. -
Generate your Figma access token.
-
Update your package.json:
Add create-component to your project’s devDependencies:json
{ "devDependencies": { "create-component": "file:/local_repo_path" } }Replace
/local_repo_pathwith the actual path to the local create-component package. -
Install dependencies:
bash
npm install -
Run the package:
bash
npx create-component --figma-link="figma-url-of-the-component"The first time you run the package, it will ask for your Figma access token. Enter it, and it will be stored securely for future use.
Figma Design Rules
Layout Guidelines
- Use Flexbox layout throughout your UI for accurate alignment and spacing.
Naming Conventions
Images, Logos, and SVGs
- Use the format:
image-image_name - Examples:
image-empty_stateimage-logo_main
For more rules, see the README.md in the repository.
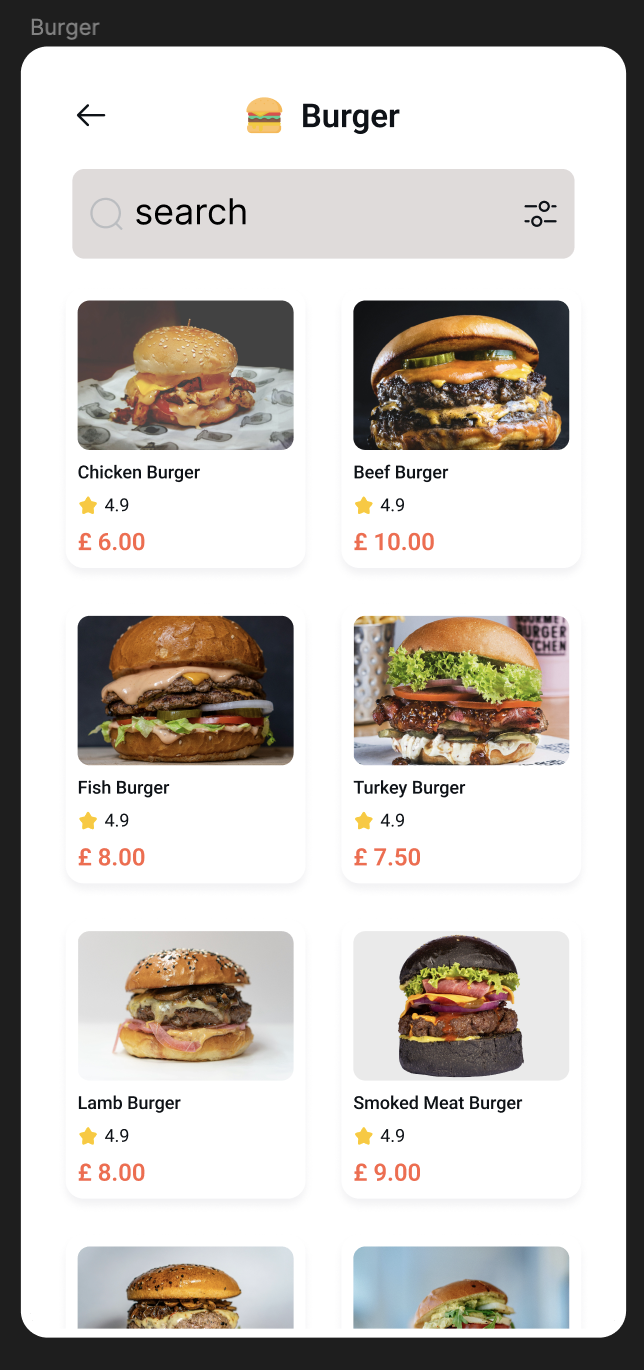
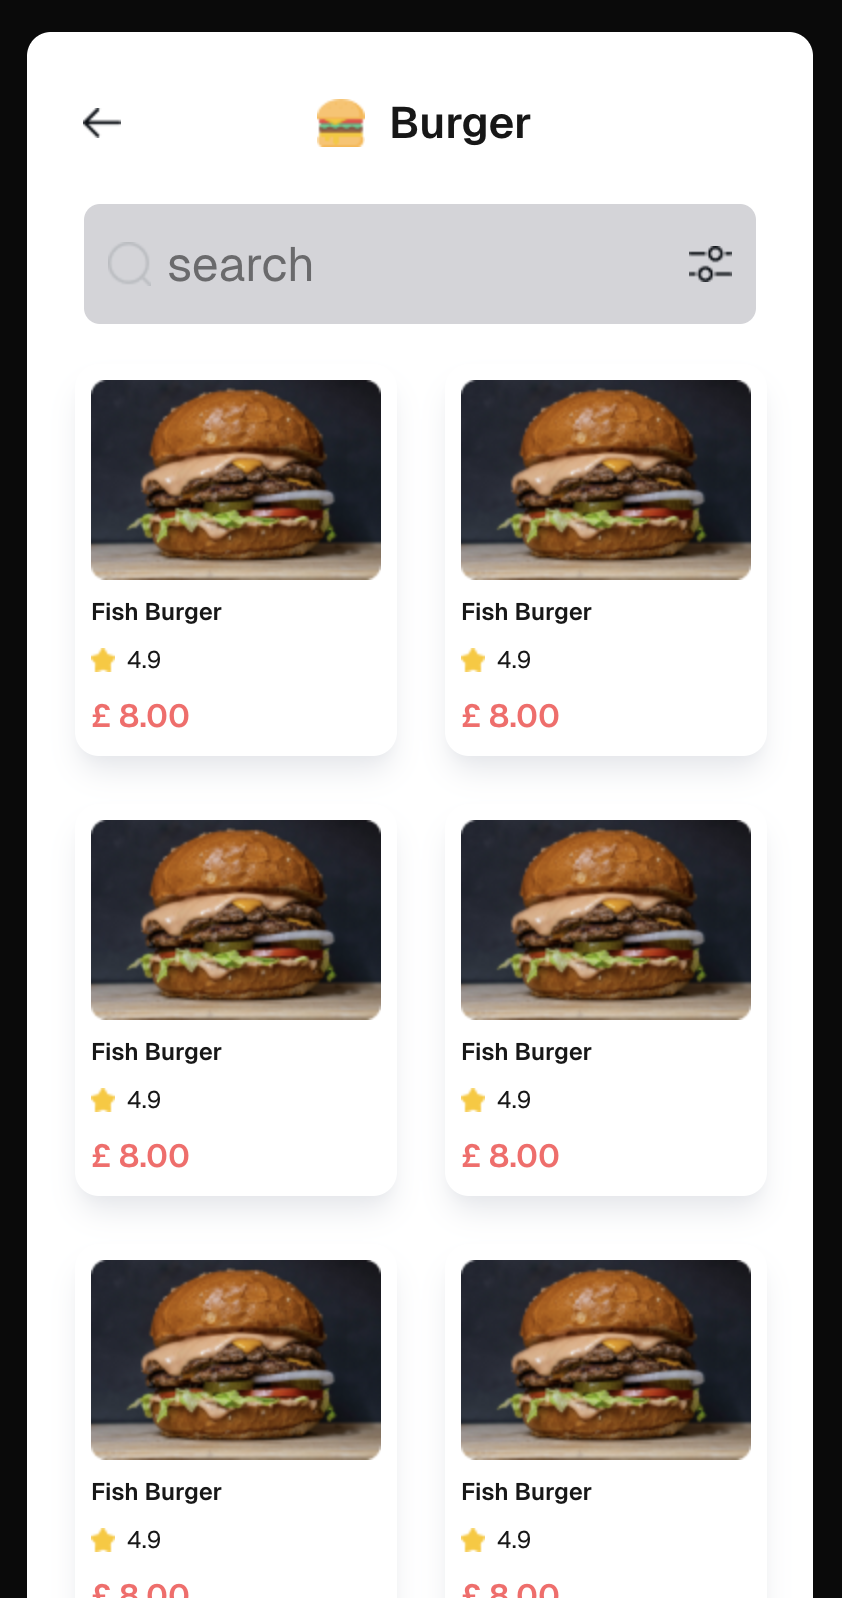
How Figma Designs Become Code
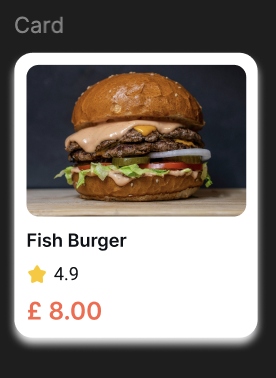
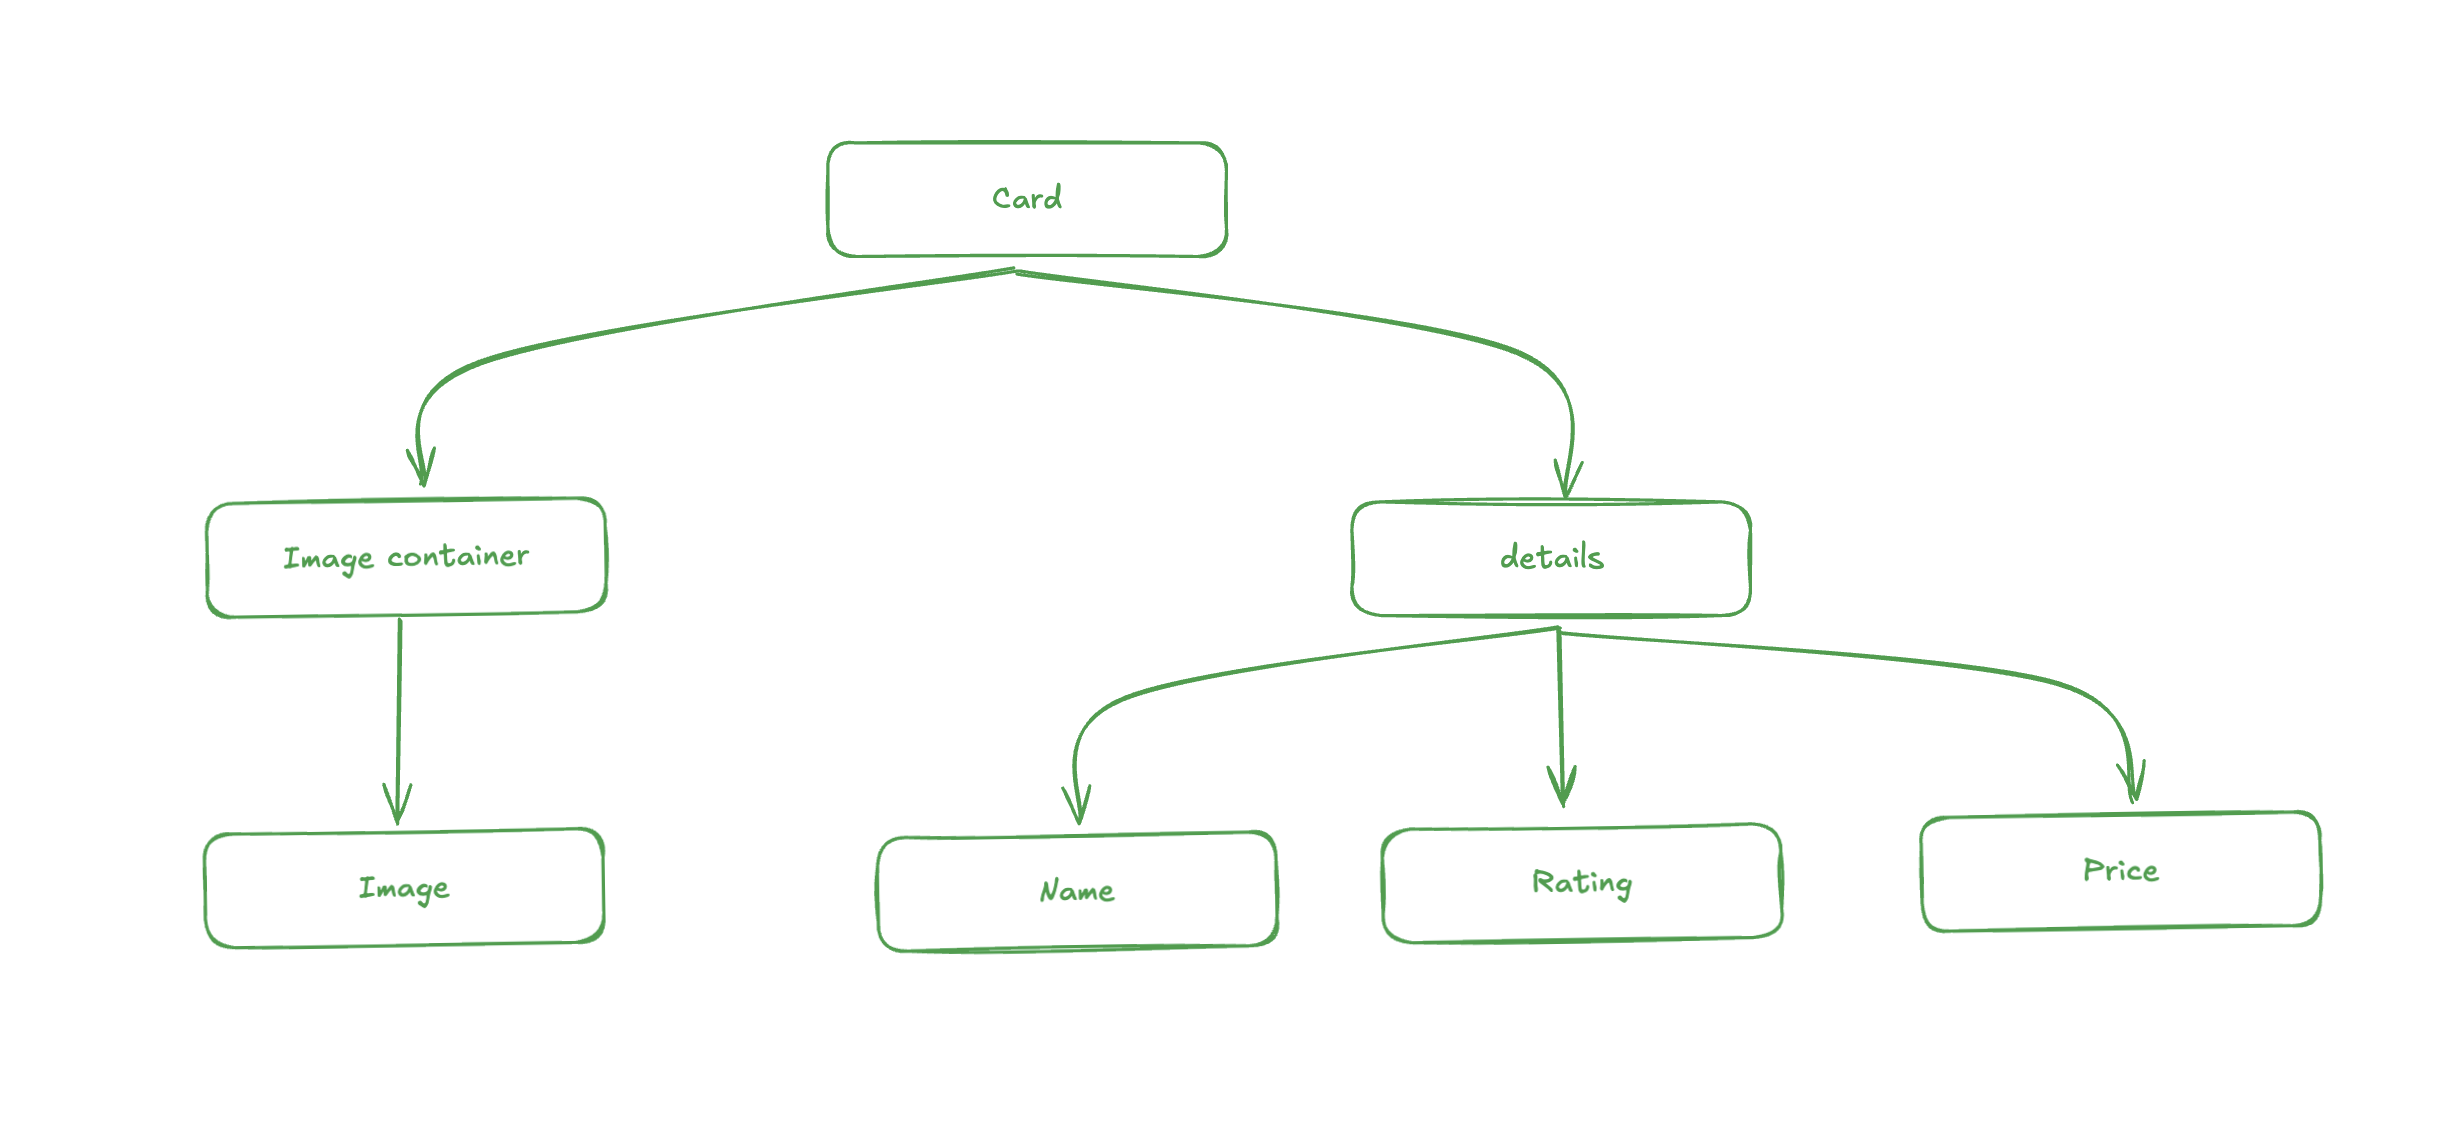
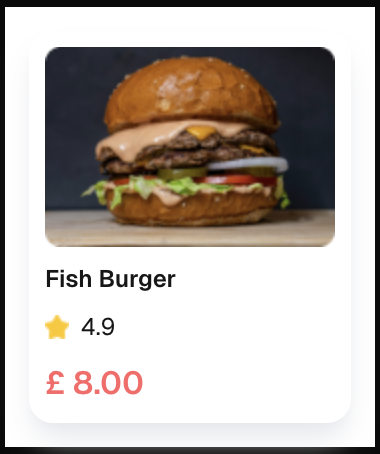
Let’s look at a simple example—a card component and observe the DOM Tree of the design.
Now, lets observe the figma API response of the node
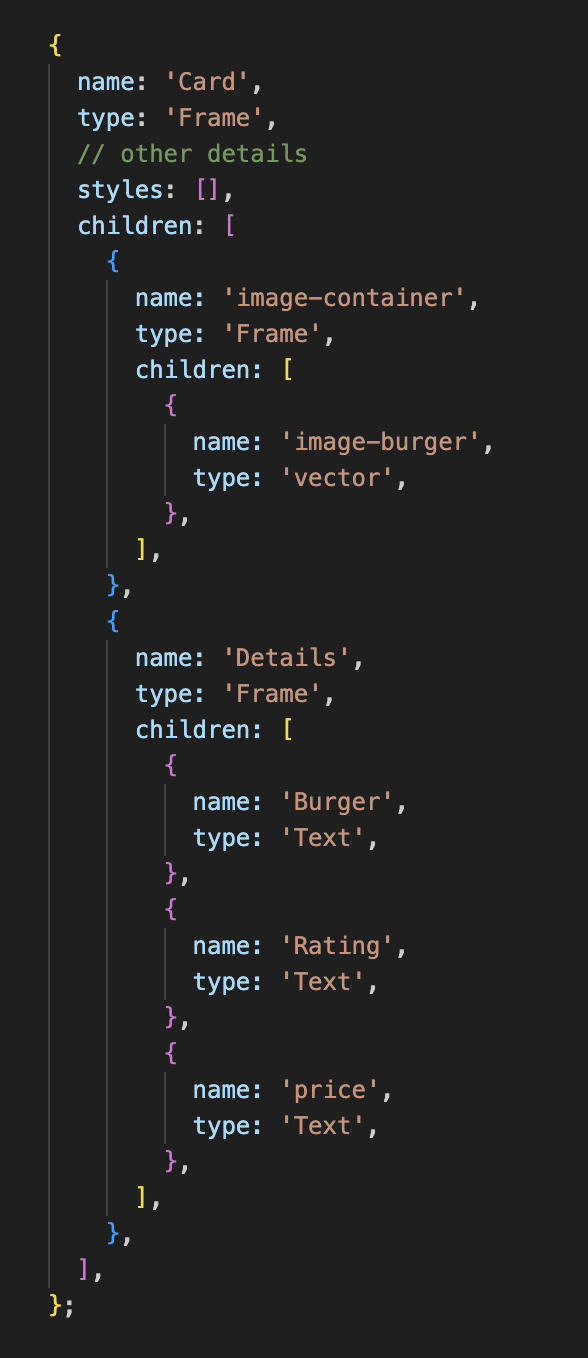
API response visually
If you look at the Figma design and the DOM tree, they both have similar structure. So, if we match each Figma node type to an HTML tag, we can easily turn the Figma design into working code.
- Frame -> div tag
- Vector -> image tag
- Text -> paragraph tag
- Frame (name: input-search) -> input tag etc
Example code to convert Figma design to HTML
JavaScript
async function figmaToCode(node) {
  if (!node) return '';

  const nodeName = node.name || 'Unnamed';
  const nodeType = node.type;
  const children = node.children || [];

  // Handle image elements
  if (nodeType === 'VECTOR') {
    const imageUrl = getFigmaImageFromNodeId(node.id);
    return `<img src="${imageUrl}" alt="${nodeName}" />`;
  }

  // Handle text elements
  if (nodeType === 'TEXT') {
    const textContent = node.characters?.trim() || '';
    return `<p>${textContent}</p>`;
  }

  // Handle input fields
  if (nodeName.split('-')[0].toLowerCase() === 'input') {
    return `<input type="text" placeholder="${nodeName}" />`;
  }

  // Handle generic containers
  if (nodeType === 'FRAME') {
    const childHtml = await Promise.all(
      children.map((child) => this.figmaToCode(child))
    );
    return `<div>${childHtml.join('')}</div>`;
  }

  return '';
}
The node argument is the Figma API response for a node. For the full code and framework-specific conversion, check the repository.
Building Components
After following the design rules, you can generate a component from any Figma design with a single command. Just copy the Figma URL of the node and run:
bash
npx create-component --figma-link="figma_URL"
By default, the generated component file will be named after the corresponding node in Figma. If you want to specify a different name, use the --name="ComponentName" argument.
You can repeat this process to build all the small components needed for a page, or even a large component that uses smaller ones.
Once you have all your small components, you can generate a large component in the same way. Copy the Figma URL for the large component and run:
bash
npx create-component --figma-link="figma_URL_of_large_component"
When generating a large component, the tool checks the src/components folder to see if any required small components already exist by matching the file names with the node names in the Figma design. If a matching file is found, it reuses that component; otherwise, it includes the code for the small component directly within the large component.
Best Practice: For better code reuse and maintainability, it’s recommended to build and generate all small components first. Once your small components are ready, you can then generate larger components.
Conclusion
Converting Figma designs directly into code makes it easy to build fast, static user interfaces. By automating the creation of UI components, you can quickly set up your project and keep your design consistent. This workflow empowers you to iterate quickly—making updates and improvements with little effort. Once your static layout is ready, you can easily add interactivity and new features as your project grows. This approach speeds up development, reduces repetitive work, and lets you focus on delivering a great user experience.