Auth0 actions
by Mohammad hussain, System Analyst
Introduction:
Auth0 is a flexible, drop-in solution to add authentication and authorization services to your applications.
What Are Auth0 Actions?
Actions are customizable, secure, and versioned functions that run at specific points within a platform, allowing users to extend and tailor the platform's functionality. These functions are typically written in Node.js and can be used to implement custom logic based on specific events or processes.
Types of Auth0 Actions
There are several types of Auth0 Actions, including:
-
Pre-User Registration: Actions that execute before a user is created.
-
Post-User Registration: Actions that run after a user has successfully registered.
-
Post-Login: Actions triggered after the user logs in, which is our focus in this guide.
Setting Up a Action to Restrict Domain Access for social login:
Auth0 provides the ability to customize the authentication flow by adding logic that enforces specific conditions for access. In this section, we’ll walk you through configuring a Post-Login Action that restricts access to your application, allowing only users with email addresses from a specific domain to gain entry after logging in via a social provider like Google.
This approach is particularly useful when you need to limit access to users from certain organizations, ensuring that only those with an approved email domain are granted access.
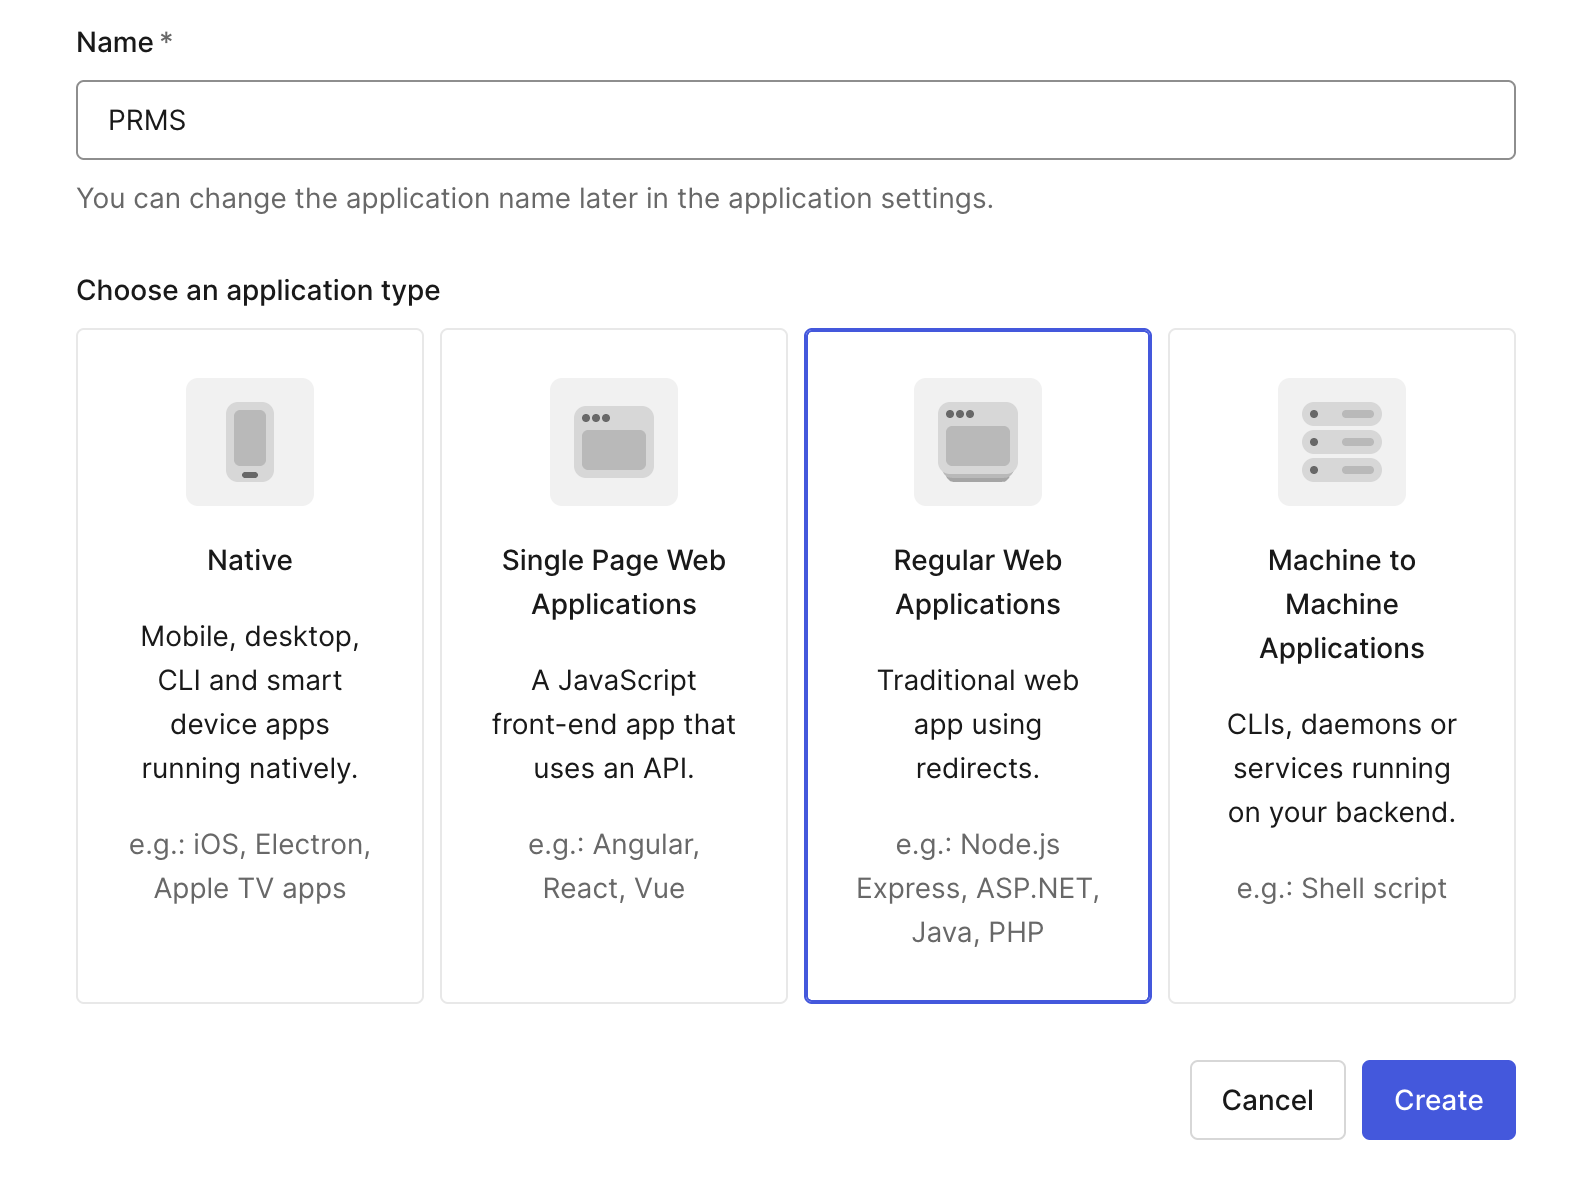
Step1: create an app
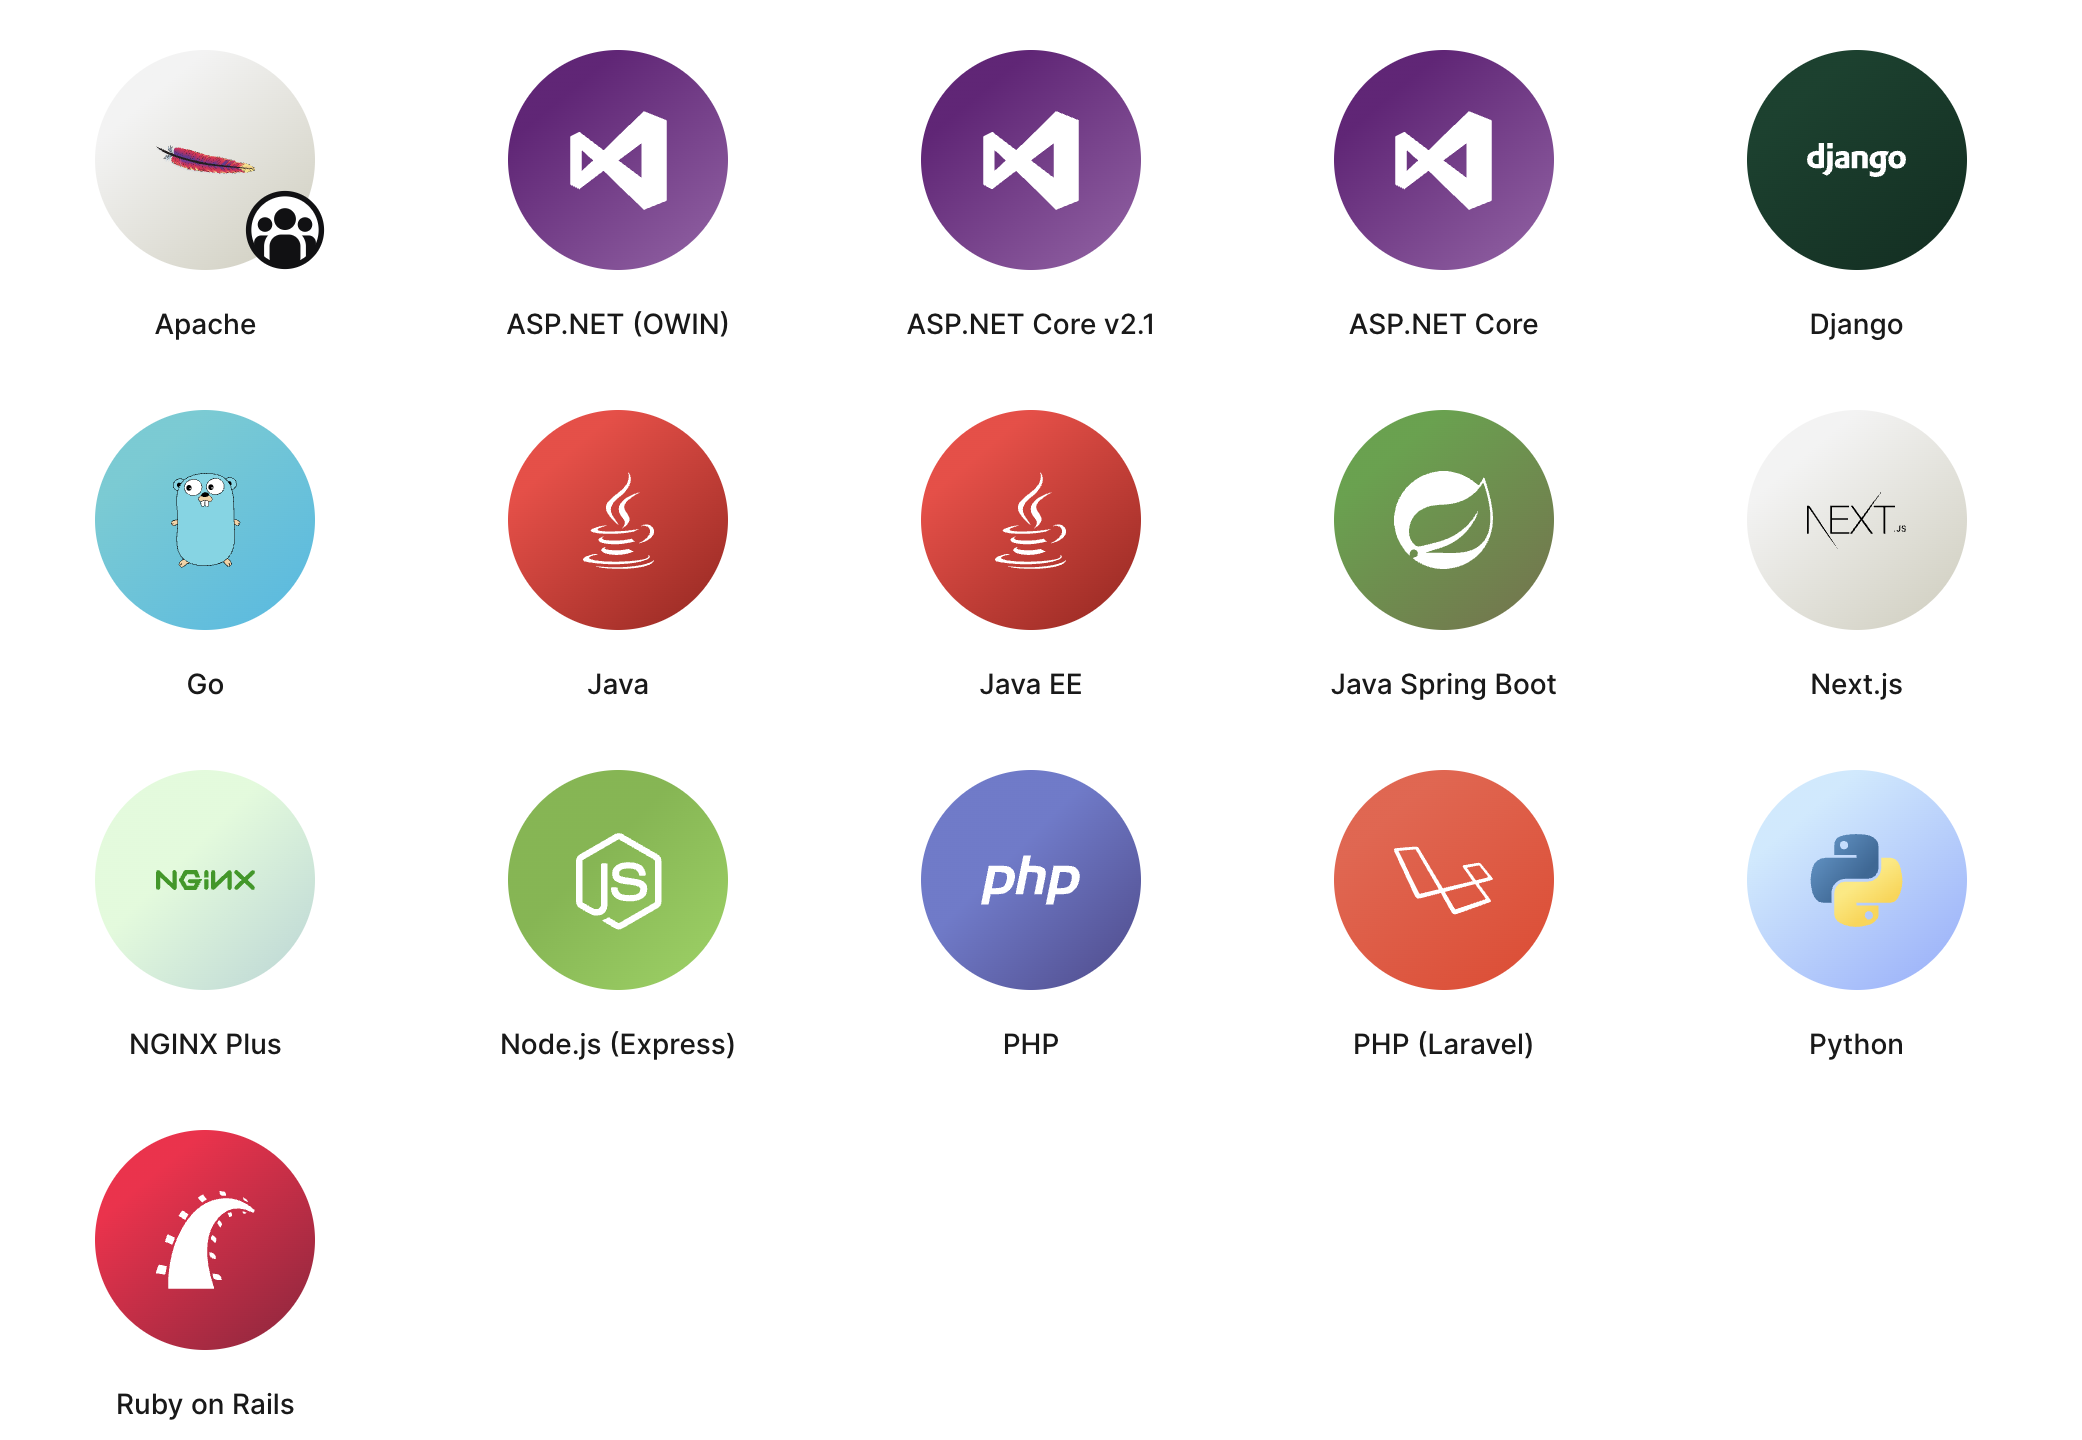
The first step is to create an application in Auth0. To do so, navigate to the "Applications" section from the left sidebar in the Auth0 dashboard. Click the "Create Application" button and give your application a meaningful name. Depending on your needs, select the "Regular Web App" option and choose the appropriate technology stack. In this example, we’re selecting Ruby on Rails as the platform for the app.
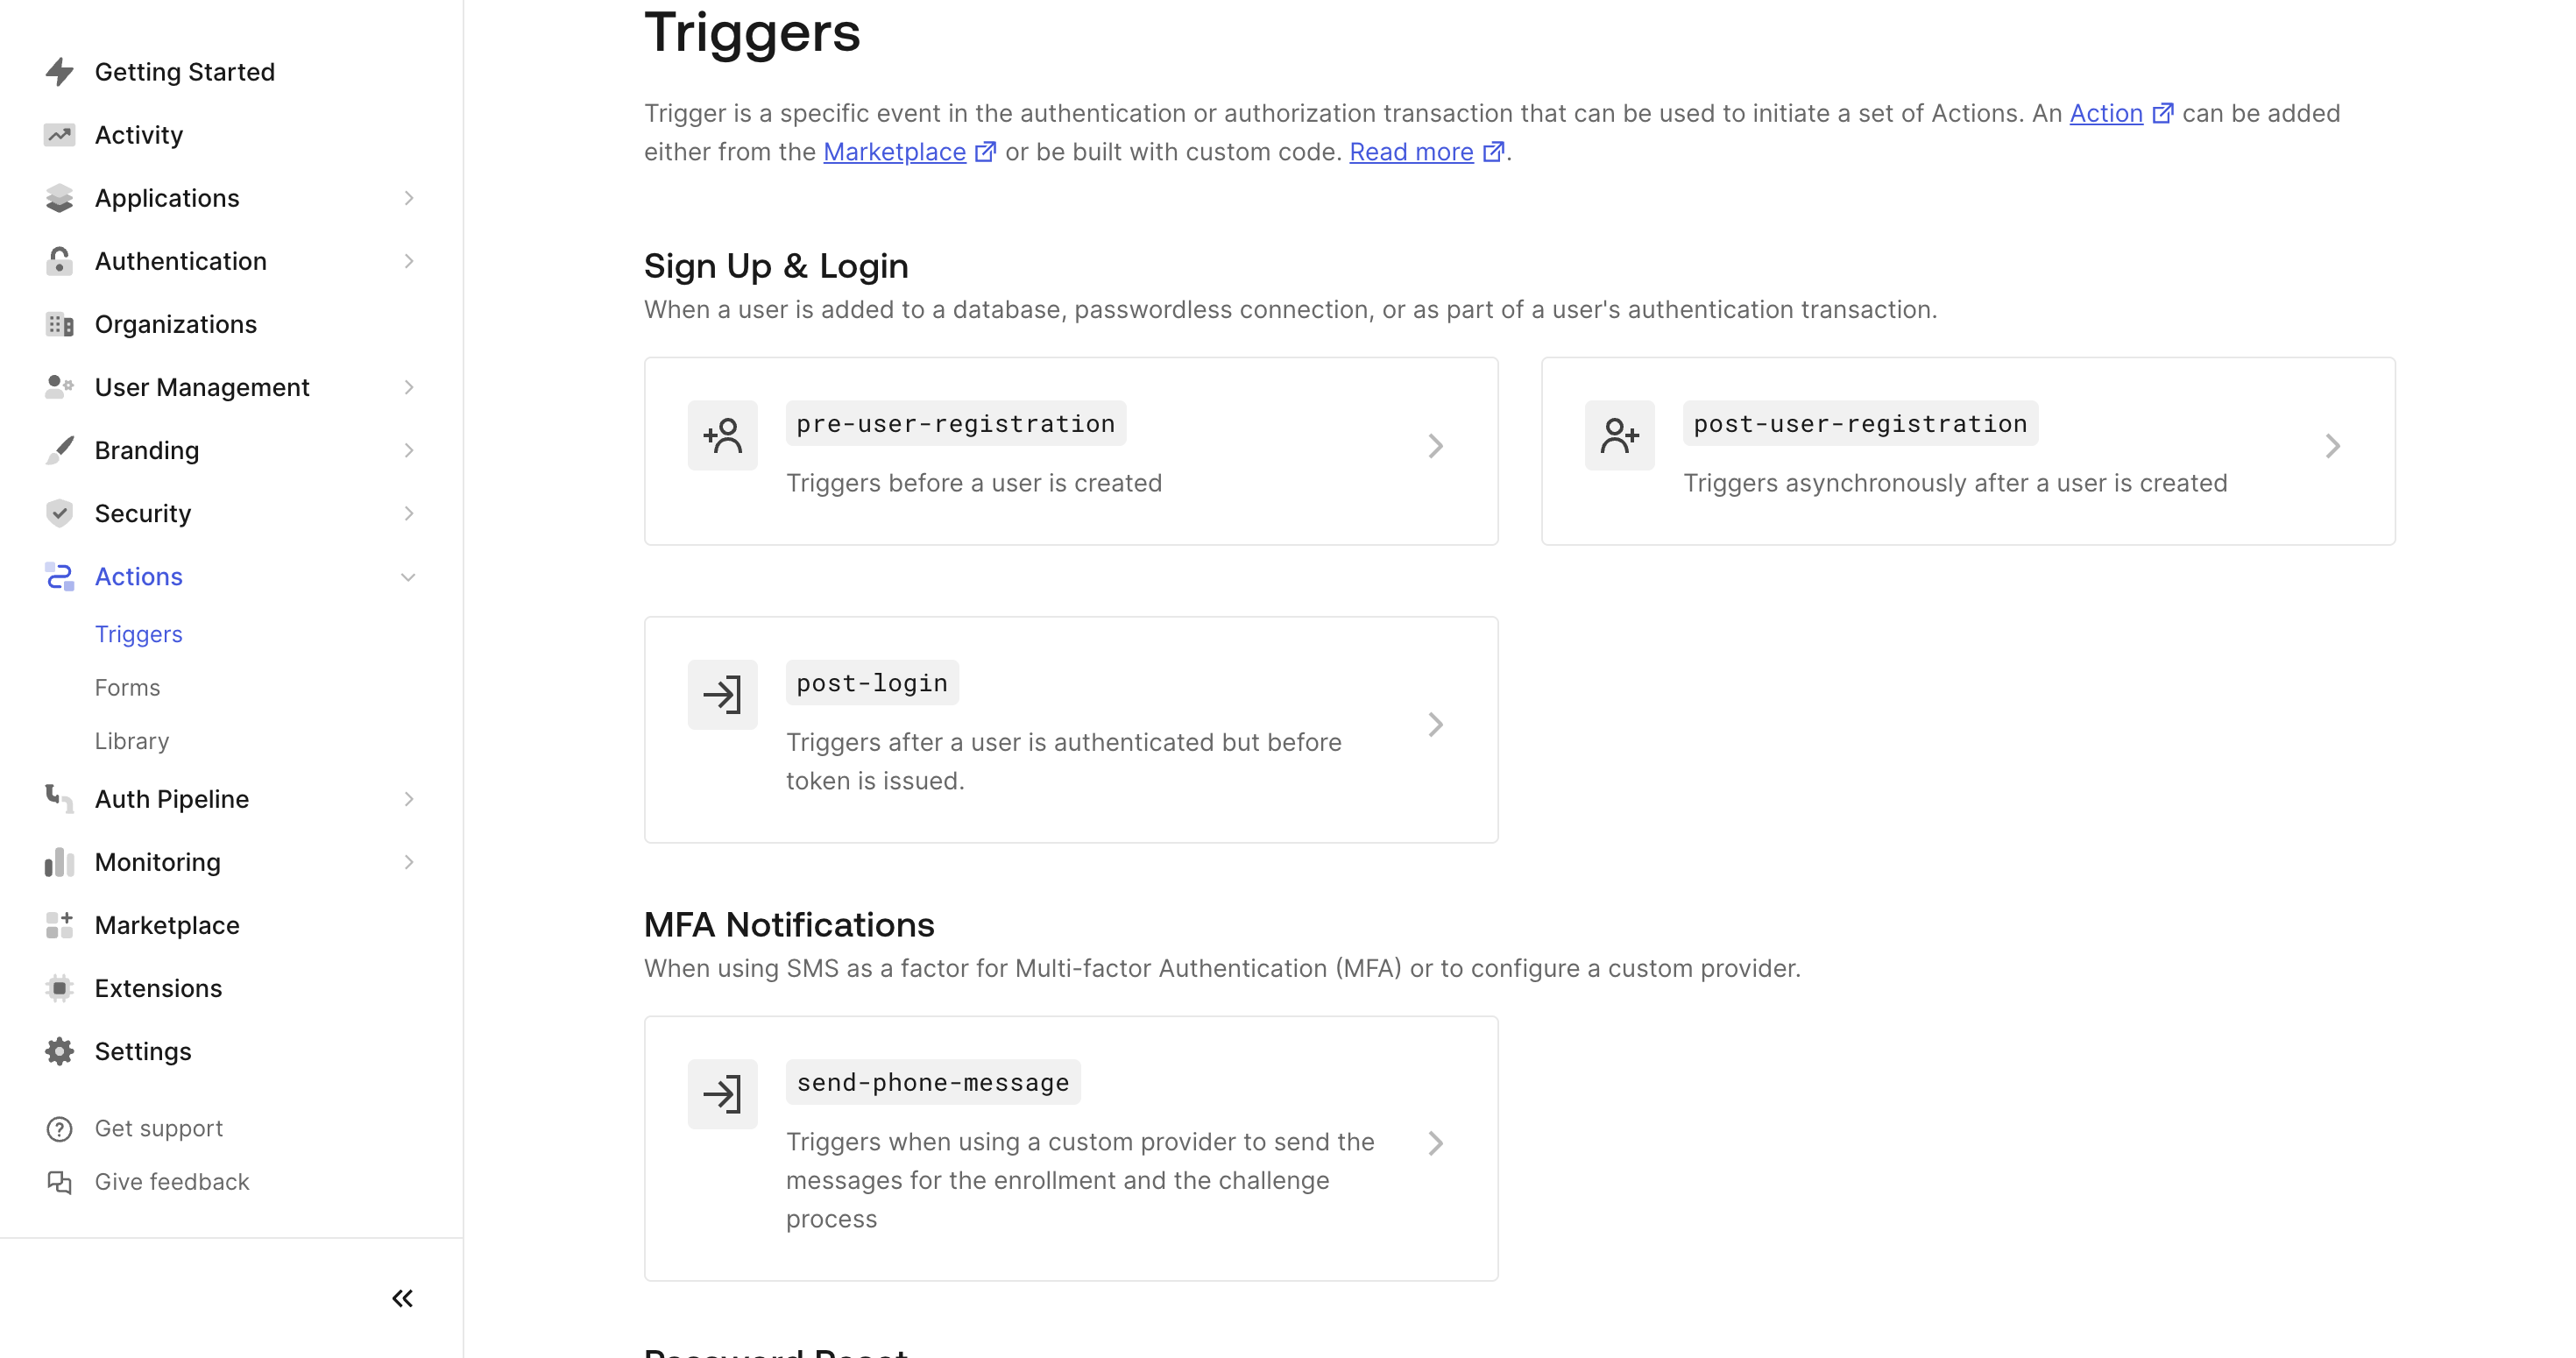
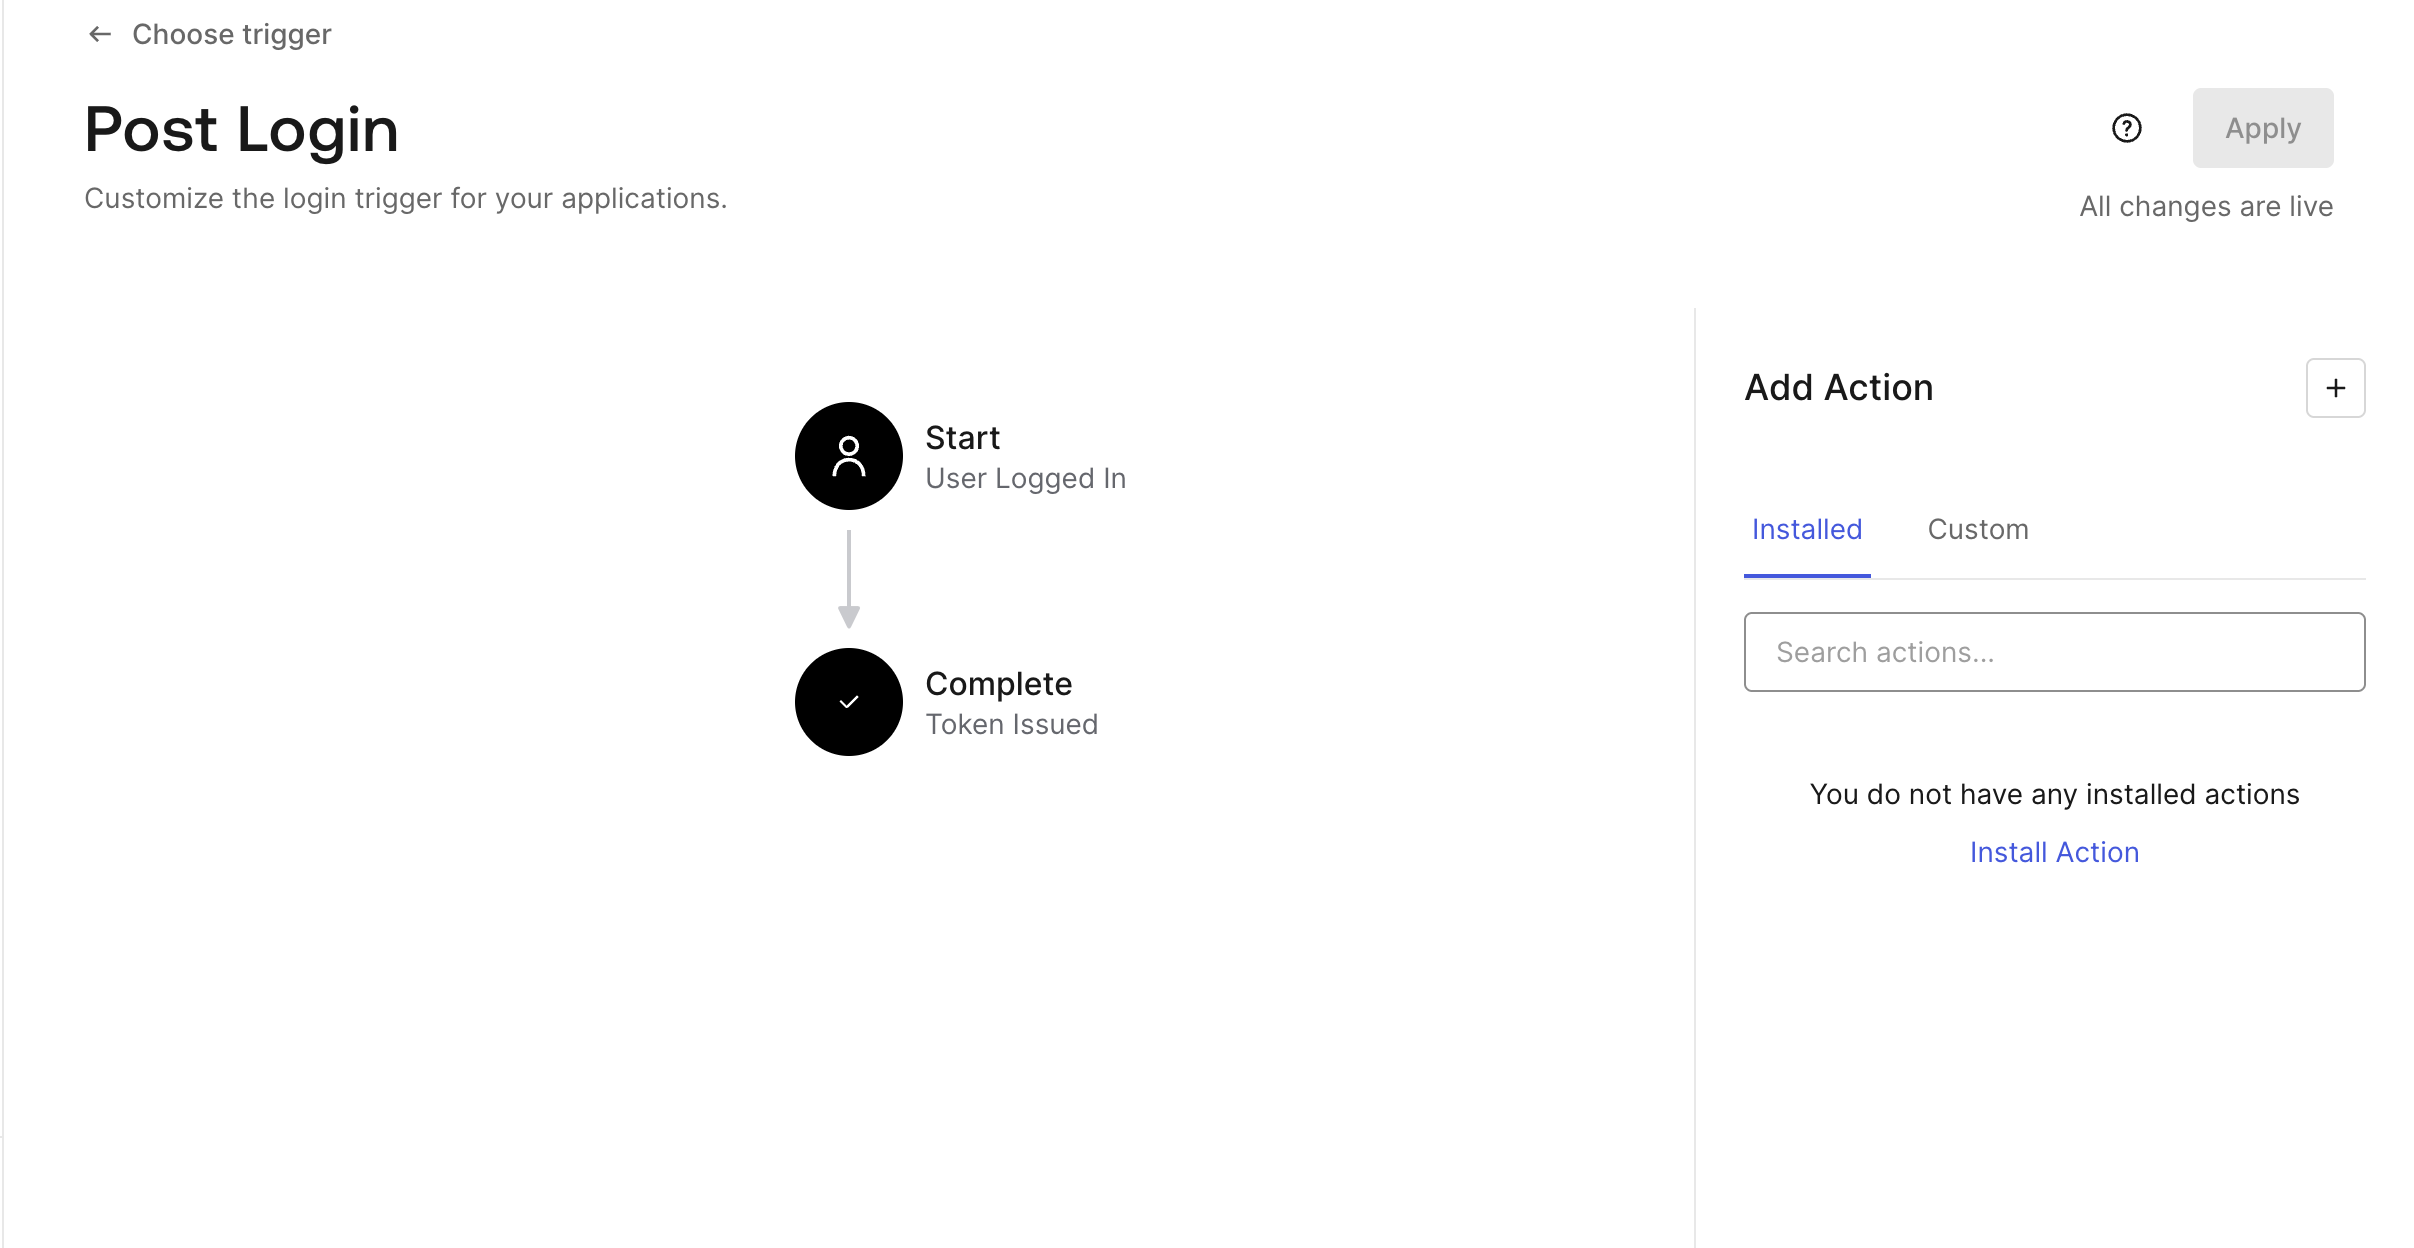
Step 2: Create a Post-Login Action
Once the application is set up, navigate to the "Actions" tab in the left sidebar. Here, you will manage all your custom actions.
If your application relies on social logins (such as logging in with Google or Facebook) and does not have a traditional username/password authentication method, you can create a post-login action to control what happens after a user successfully logs in. In this case, we’ll configure the action to allow access only to users who log in with an email address from a specific domain (for example, the domain "codemancers.com"). Any other users will be denied access.
To add a new action, click the "+" button. Select the "Custom" option, which allows you to define your own logic for how users should be authenticated.
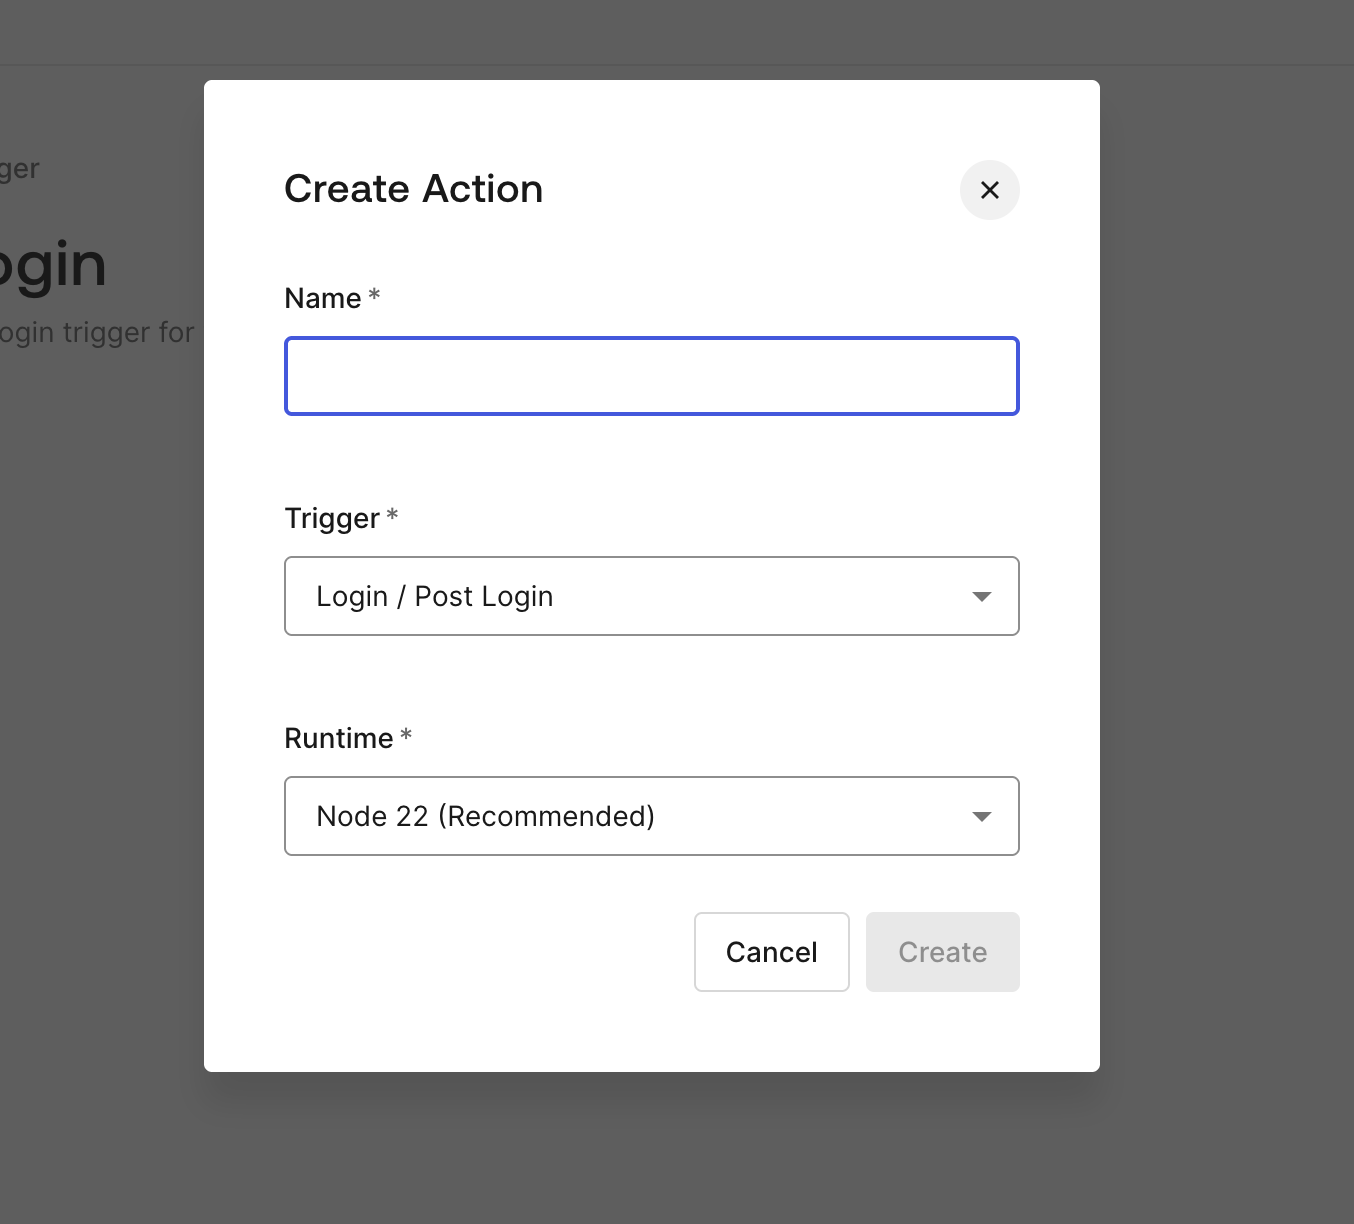
After selecting the "Custom" option, you can now specify the logic for the action. Give your action a descriptive name so you can easily identify it later. The action will run whenever a user logs in and allows you to implement custom domain restrictions based on the user's email address.
Step 3: Customize the Post-Login Action
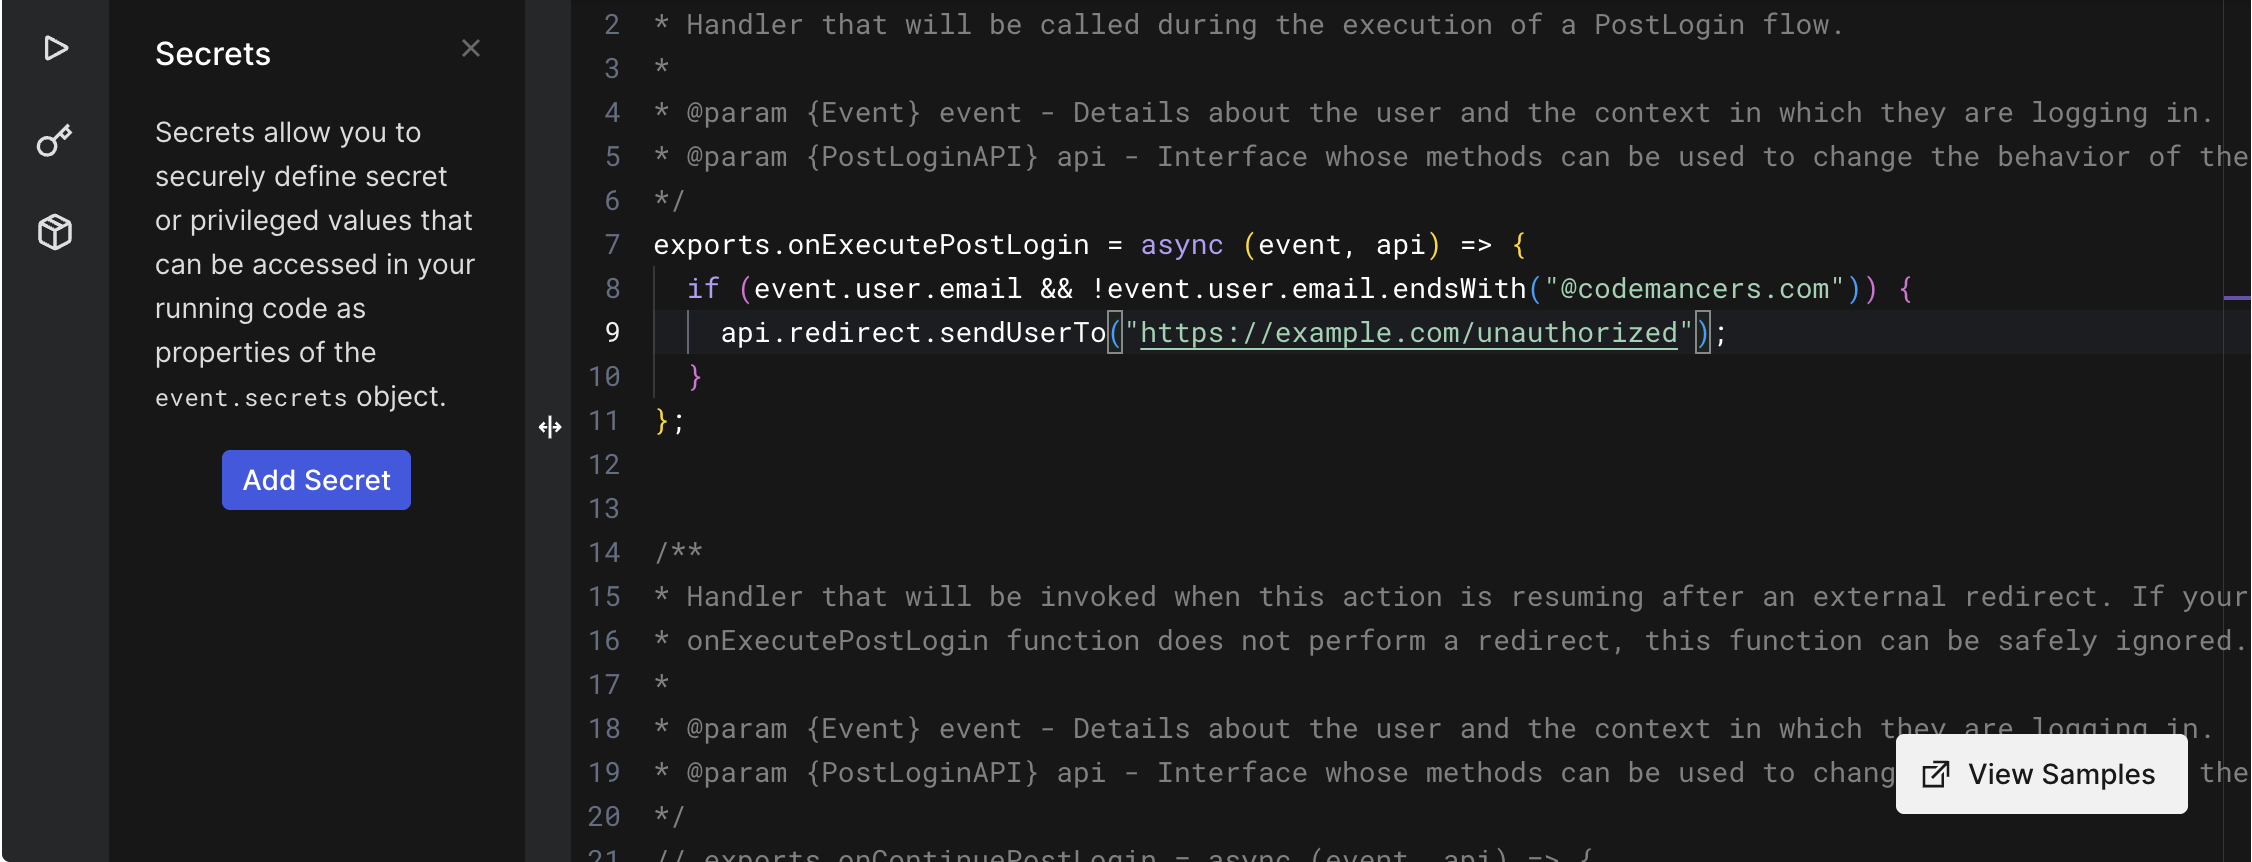
Once you’ve created the post-login action, the next step is to implement the logic to restrict access based on the user's email domain. You can use Node.js to write this logic. For instance, you can check if the user's email domain matches the allowed domain (e.g., "codemancers.com"). If it doesn’t, the action will deny the login attempt and redirect the user to an unauthorized access page.
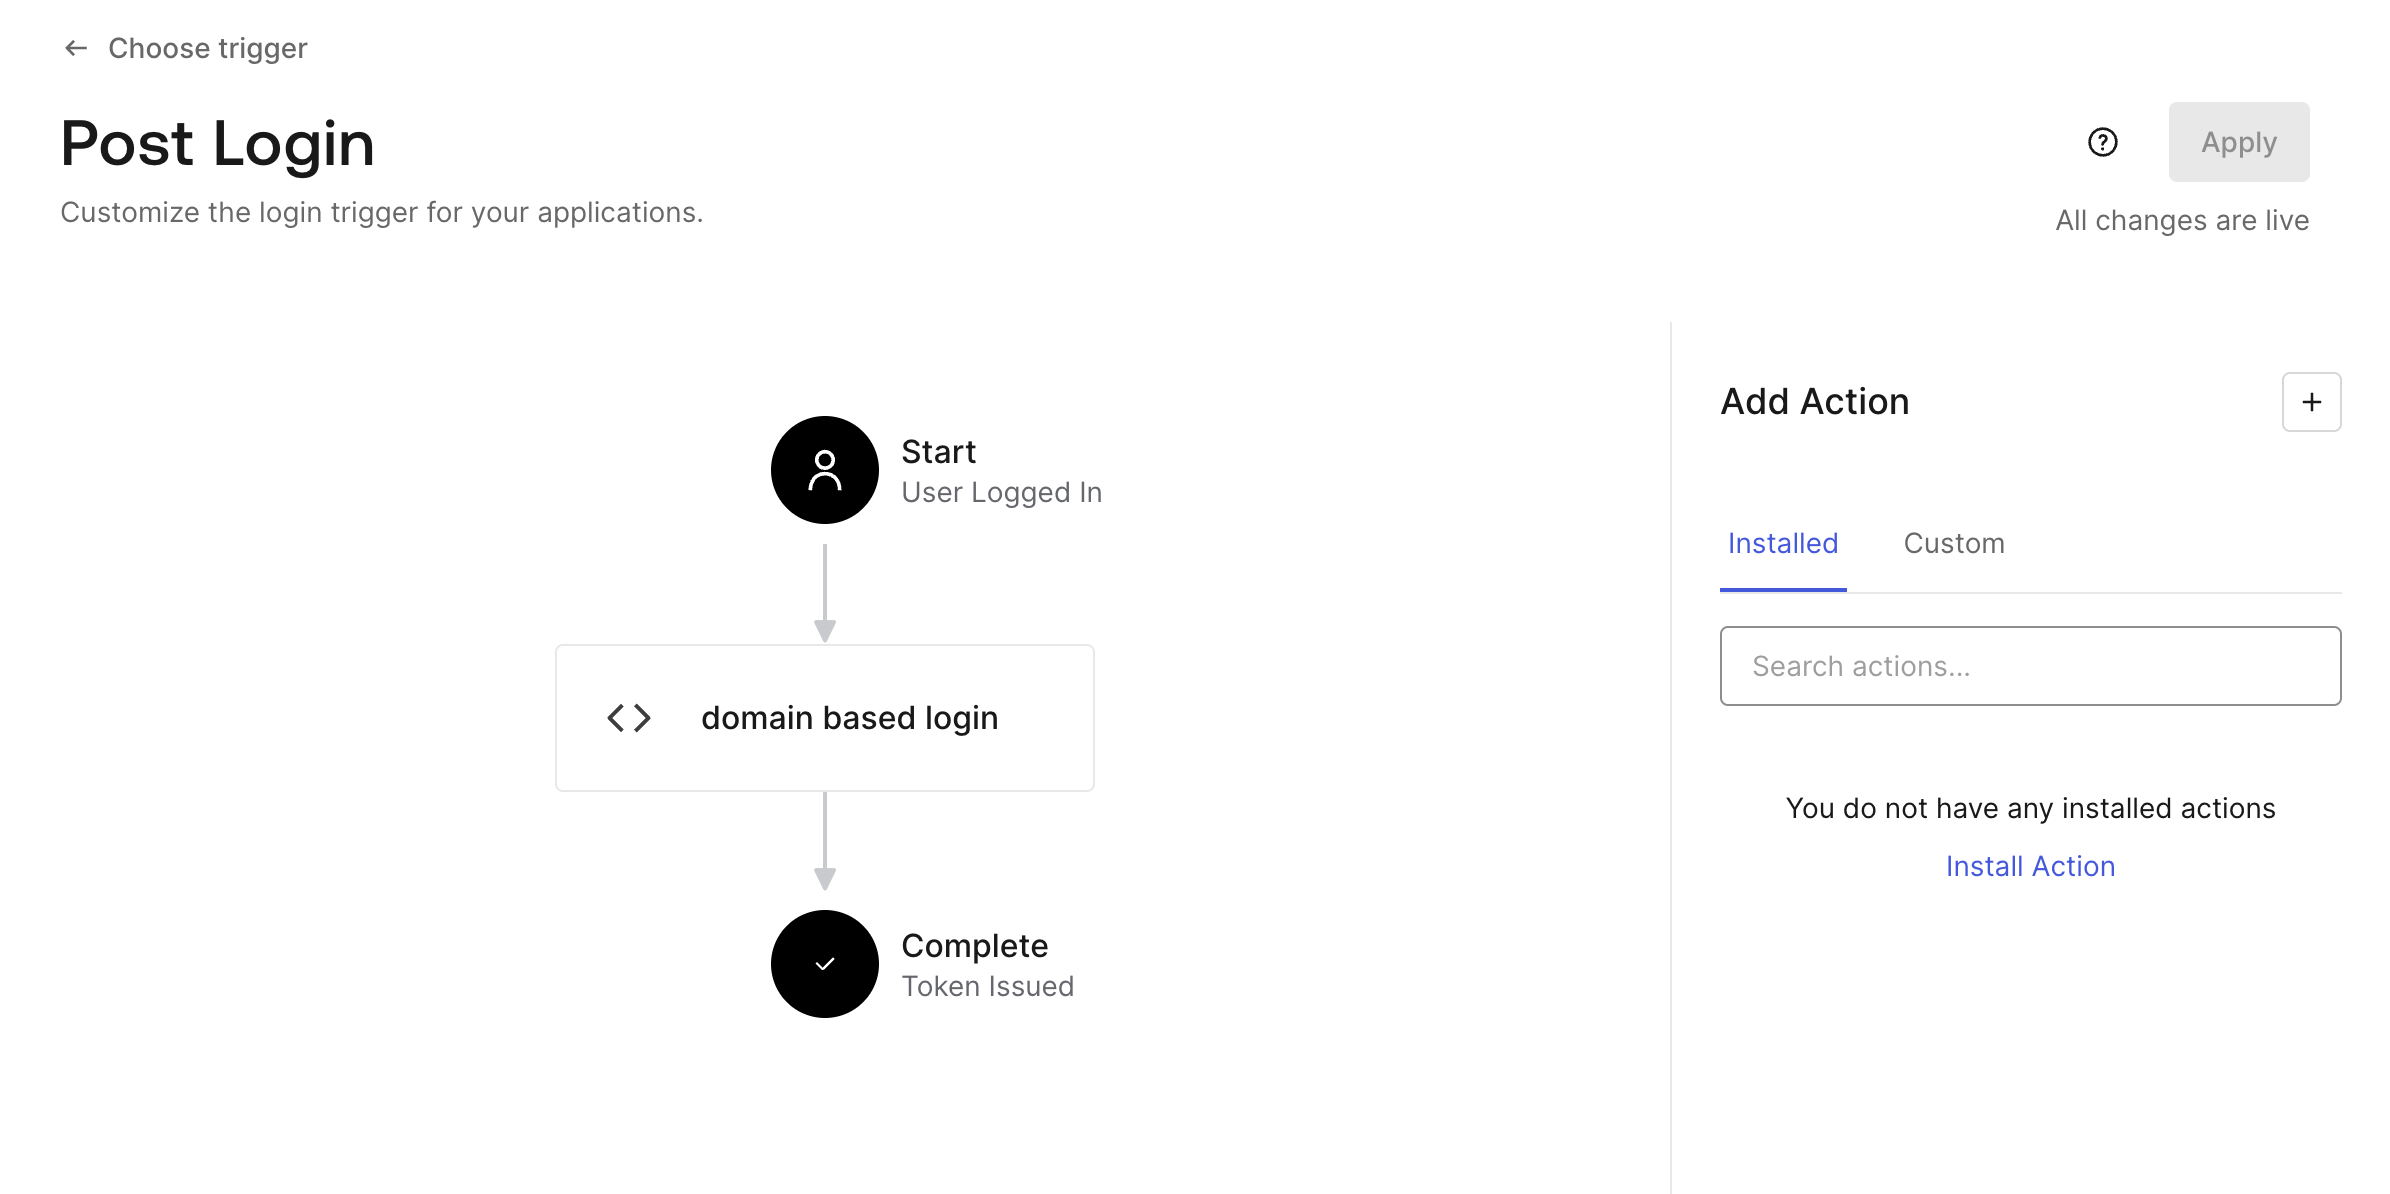
To integrate this action, simply drag and drop the action.
Once the action is triggered, the system will automatically evaluate the user’s email domain and either grant or deny access based on the domain match.
And that's it! When a user logs in with an email from the specified domain, they’ll be granted access. If the domain doesn’t match, the login attempt will be rejected.
Step 4: Test and Verify
After the action has been configured, it’s important to test it to ensure that everything is working as expected. Log in with a social login that uses an email address from an allowed domain (e.g., "john@codemancers.com") and verify that the user gains access. Then, test with an email from a different domain (e.g., "john@gmail.com") and ensure the system denies access and redirects the user to an unauthorized page.